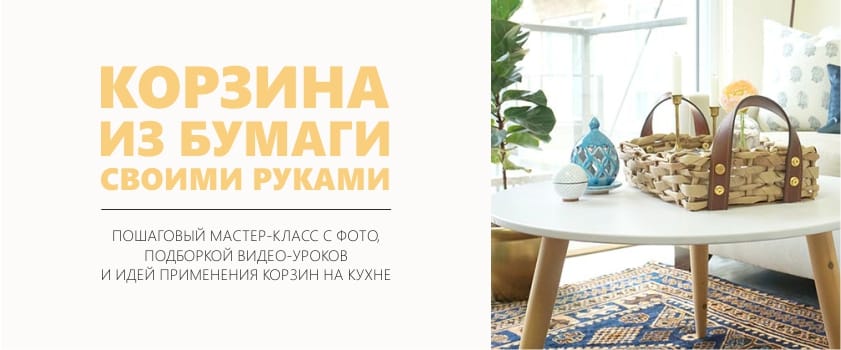
Baskets and baskets help to maintain order in the house and decorate the interior, so there is never a lot of them. Beautiful braids can be bought in the store, but it is much more profitable to learn how to weave them with your own hands.
- If you have a couple of free evenings and a pile of any paper, then you can weave the basket not only without financial losses, but in the right size, color and shape. And still weaving baskets with your own hands is a very pleasant and peaceful process that you can do, for example, while watching your favorite movie.
And don't be confused by the fact that baskets are not made of wicker or rattan, because if everything is done correctly, then seemingly homemade baskets made from old papers will not differ from real braids. Of course, they will not be so durable and moisture-proof, but, nevertheless, they are ideal for storing most things.
For beginner craftswomen, we have prepared a step-by-step workshop on weaving such a rectangular basket of Kraft paper with leather handles. And at the end of the article you can see several ideas for the use of baskets of different shapes and sizes.
Master class on weaving baskets for beginners
In this workshop, we will talk about how to learn how to weave a basket of rectangular, square or round paper.
For the work we need:
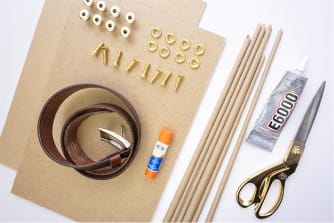
- Kraft paper - you can take bakery paper, several paper bags, wrapping postage paper, pages of newspapers, magazines, etc .;
- 2 identical bases of thick cardboard or fiberboard, cut in square or rectangular shape - you can choose cardboard, if you want to weave just a basket for storage only, and if you like the idea of a tray basket as in this master class, then use fiberboard size 24 × 38 cm, 2.5 mm thick.
Important: if you want to weave a basket with higher walls than in our lesson, then you will need some auxiliary pattern, for example, a shoebox. The pattern will help you to weave a basket of the correct rectangular shape. The basis of cardboard in this case must match the size of the box.
- A wooden skewer for kebabs or a thin knitting needle;
- Scissors;
- Any glue for paper and glue is stronger, for example, “Moment”, as well as double-sided tape;
- Transparent matt acrylic water-based lacquer in a spray or can;
- Long narrow leather belt (preferably XL size);
- 8 brass cap nuts, 8 brass cogs with a flat head and a cross slot, 8 brass washers (sold in hardware stores, the entire set of fasteners will cost you about 70 rubles);
- Electric drill or awl to make holes in the leather belt;
- Marker.
Instruction
Step 1. Making tubules
To do this, you first need to cut the paper into equal formats, for example, A4 or A5. Suppose you have chosen for the manufacture of baskets of old newspapers that already have the size we need. Next, we need to cut the newspaper pages into strips - future tubes.Here's how to do it quickly:
- Fully open the newspaper, then fold it in half lengthwise and smooth the fold.
- Now take a kitchen or stationery knife and cut the newspaper at the fold. It is desirable that the cut-off points are smooth and unworn.
- From the resulting stack of paper, separate the half, bend it along and cut it again. You will have strips about 10 cm wide. Now, perform the same procedure with the remaining stack of paper.
- Next, sort those strips that have bright corners without text and pictures - it is from these strips that you get white tubes. For work, they are more convenient, because they are easier to paint under the rattan or vine. But this does not mean that it is impossible to use colored stripes, it is advisable to pre-coat the tubes simply rolled with light paint, or paint them more closely (let's talk about the nuances of painting a little lower).
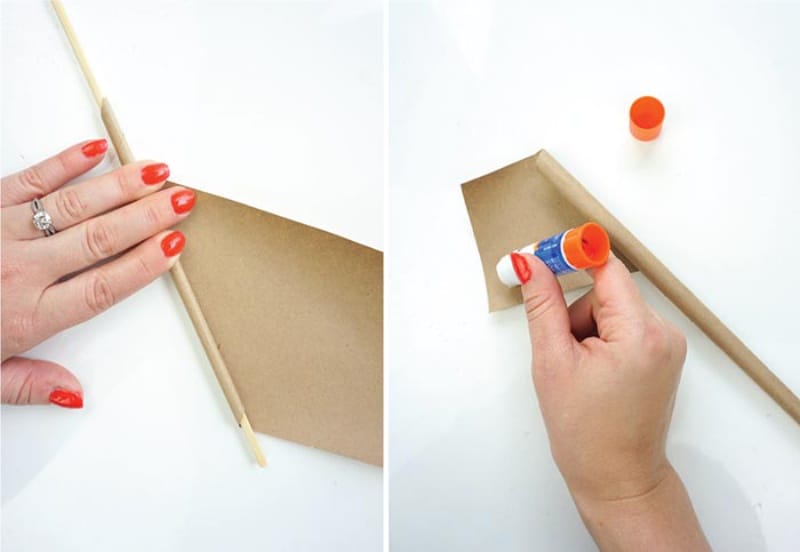
- So, we start to twist the straws. Put on the very edge of the strip (but not on the white!) Wooden skewer at the minimum (!) Angle and try to put paper on it tightly and tightly (photos 1 and 2). At first it can be done on the table, twisting the skewer and holding the paper, and reaching the middle of the tube, you can lift it up and continue to twist.
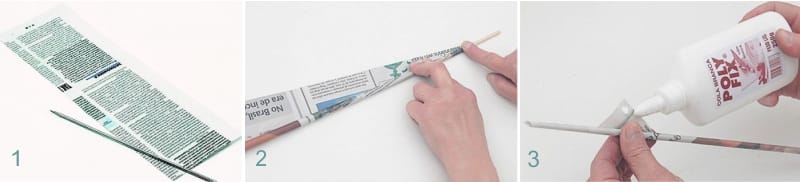
When you have only a tip, you need to slightly grease it with glue and only then screw it all the way in (photo 3). Woo-ala, the first tube is ready! It remains only ... to wind another 100-500 of these tubes (the exact amount depends on the size of the basket). Do not worry, it is not so difficult and long, but patience does not hurt here.
Who wants to learn all the subtleties of the art of making tubes, we suggest watching the video lesson from Elena Tishchenko.
So, we learned the basic way how to make tubes of newspapers. However, let's go back to the instructions.
- In this master class, the decorator screwed first only 24 tubes of kraft paper (7x45 cm), and then about 120 more tubes (of 7x90 cm strips). Why did he do it? We read further.
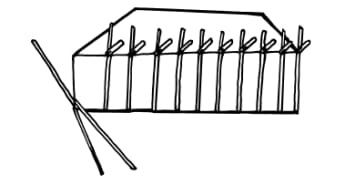
Step 2. Making the frame
Next we need to make a skeleton basket. To do this, we take a base of cardboard or hardboard and with the help of double-sided tape or glue we attach the tubes to it, keeping the same interval between them (2-5 cm). You should have about the same design as in the photo below, but the exact number of tubes depends on the size of your base and the selected interval.
- These tubes are called vertical uprights, as they will later “stand” and serve as a frame for the future basket.
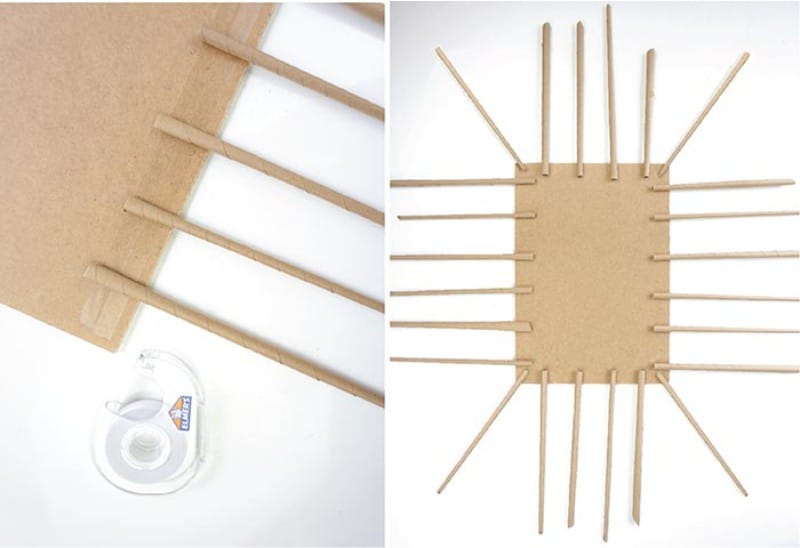
- According to the decorator's idea, the main basket weaving should be deliberately coarse, therefore thicker tubules were used for the walls. However, these 24 tube racks are made thin in order to make it easier to braid them later. You can repeat reception of the designer, and you can weave a basket from identical tubules.
- If desired, the basis of cardboard or fiberboard can be pre-upholstered with a cloth, such as linen.
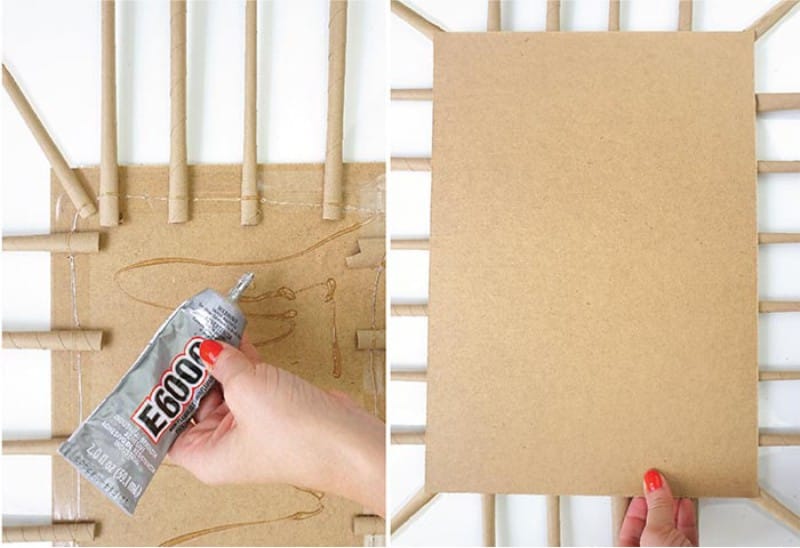
Next on the resulting structure simply glue the second piece of cardboard or fiberboard and press. It is best to leave our billet for 1 day to dry.
Step 3. Start weaving
The base is ready, which means it's time to start weaving! There are many ways of weaving, we offer to master the most elementary - “rope”.
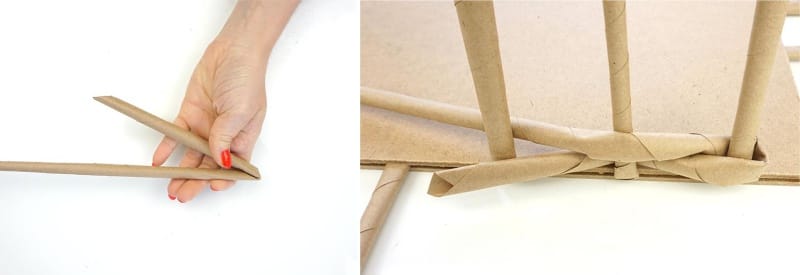
- Bend the tube in half and wrap any vertical tube tube with it (you can start from any place);
- Then cross the ends of the tube as shown in the photo below. You will have the first loop.
- Then wrap the second stand and cross the ends again. You will have the first eight.
- Continue weaving until the horizontal tubes run out. As soon as this happens, put some PVA glue inside each piece and insert new tubes to a depth of 2-3 cm (their tips can be bent a little).
- Thus, you need to weave 7 rows, if you want to make a low basket like in our master class.
How to fix the rack in a vertical position with clothespins
- If you want to weave a basket with higher walls, then after the first two or three rows you need to use a box-template and weave it already around it. At the same time, weaving should be periodically corrected - level the stands, compact woven rows, etc. For convenience, the stands can be fixed in a vertical position with the help of clothespins, as shown in the picture to the right. By the way, if you want to weave a round basket, then a pan, a round casket, a cache-pot, etc., will fit as a pattern.
Step 4. We finish weaving
Finally, we finished the last row, all trimmed and corrected, and took out the template box. Now we need to finish the job beautifully. To do this, the horizontal tubes with which we weave the walls are simply cut off, leaving only 5-10 cm from their length, and we hide the ends inside the weave (left photo below).
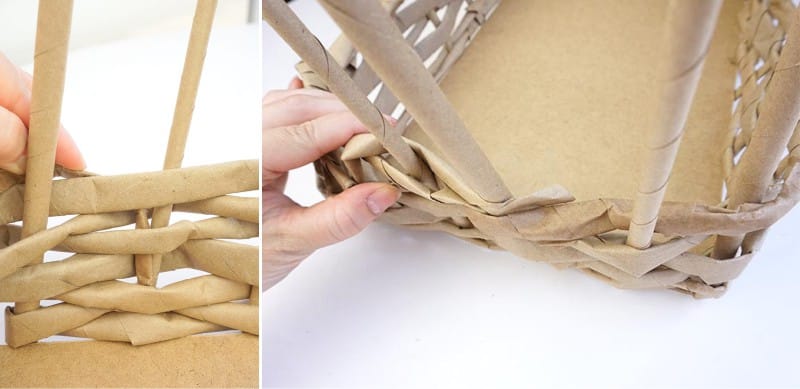
Okay, now take up the rack. They can be simply cut off, slightly smearing the edges with glue or making a simple but beautiful edging:
- Bend the first vertical rack 90 degrees and braid it for the adjacent rack to the right, then output on the outside of the third rack. Finally, hide it and glue it. Repeat with the next upright stand and all others.
Step 5. Lubricate
Hooray! The basket is almost ready, it remains only to varnish it. In this workshop, acrylic lacquer is used in the spray, but you can walk along your wicker brush.
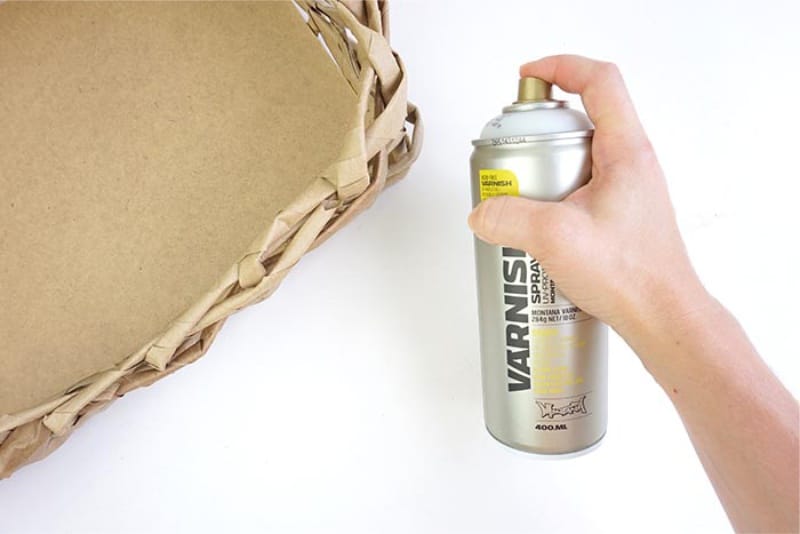
- If desired / necessary, before applying the varnish the basket can be painted, but it is best to paint the tubes even before weaving begins - so the coating will be of better quality. Acrylic paints on a water basis are ideal for painting, and they will give the paper a density and dry quickly. For more information on staining newspaper tubes, see the following video lesson from Elena Tishchenko.
Step 6. Fasten the handles
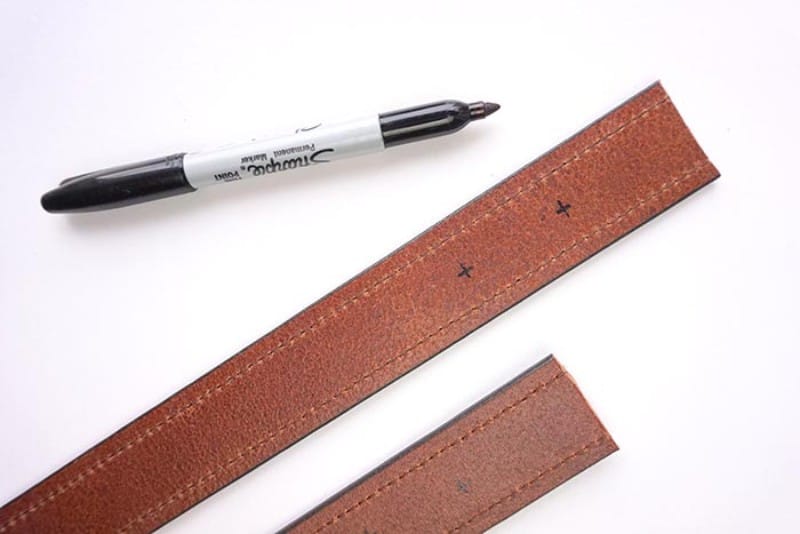
- Cut off the belt buckle and the end with the holes. Then cut the middle part of the belt into two equal parts. That's what you should do.
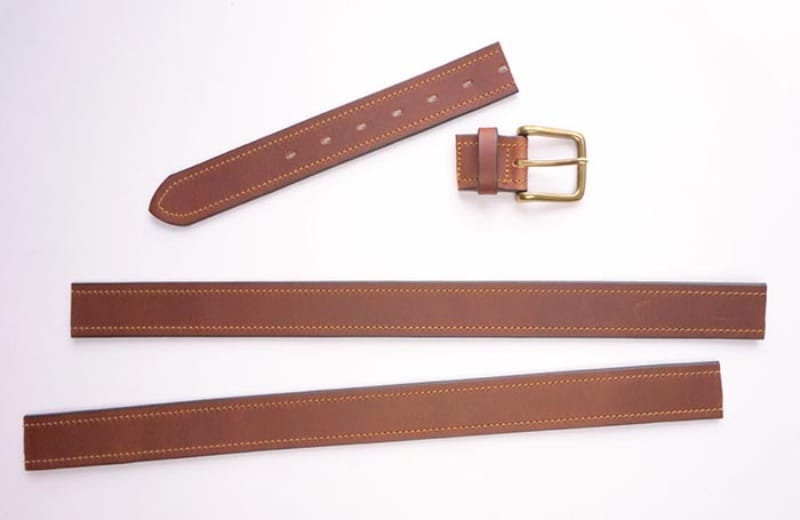
- On the wrong side of the tapes with a marker, mark the location of the 2 screws on each end of the two strips.
- Use an electric drill, an awl or just a nail to make holes in the ribbons at each mark (8 holes in total).
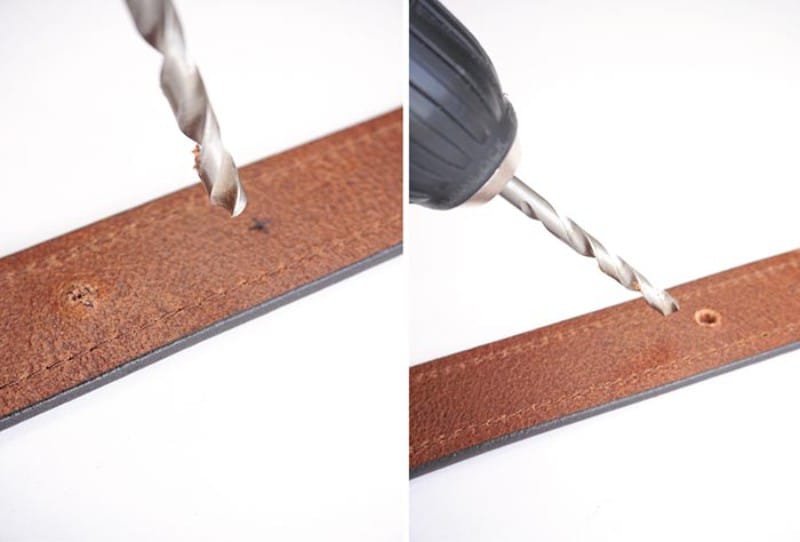
- On the front side of the tape, place the washer on the hole made, screw the screws into them with a screwdriver.

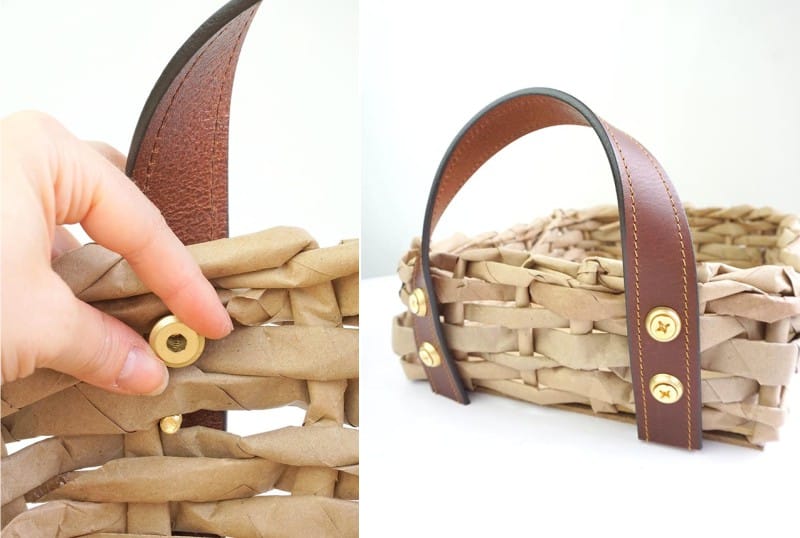
- Next, attach the handles to the outside of the basket. In this case, each fixing screw should enter between two rows of weaving as shown in the next right photo. Then, from the inside of the basket, screw the end caps onto each of the 8 screws.
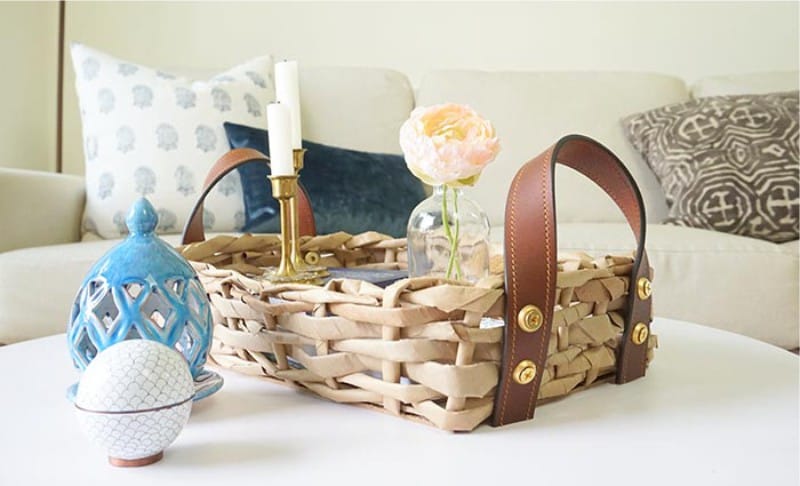
Woo-ala, a basket of paper is ready!
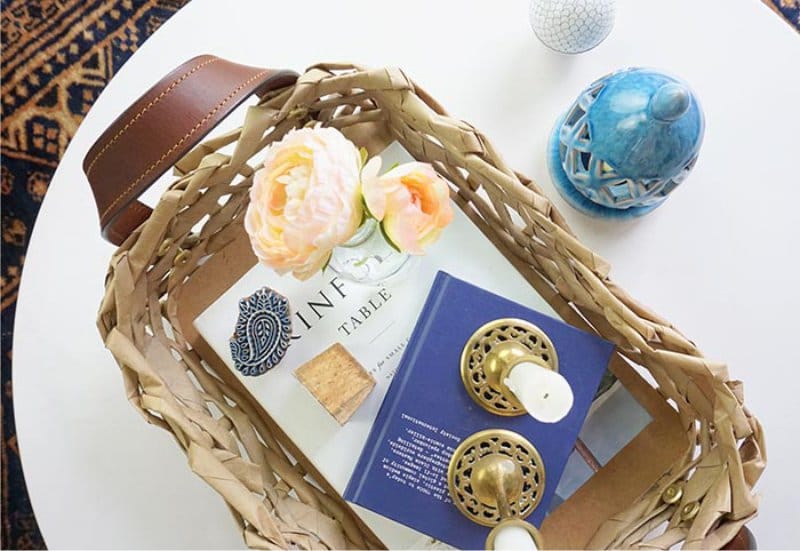
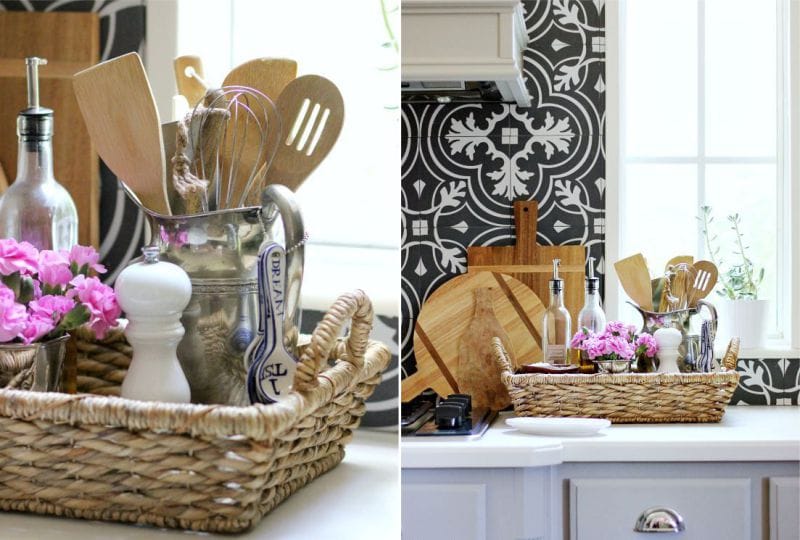
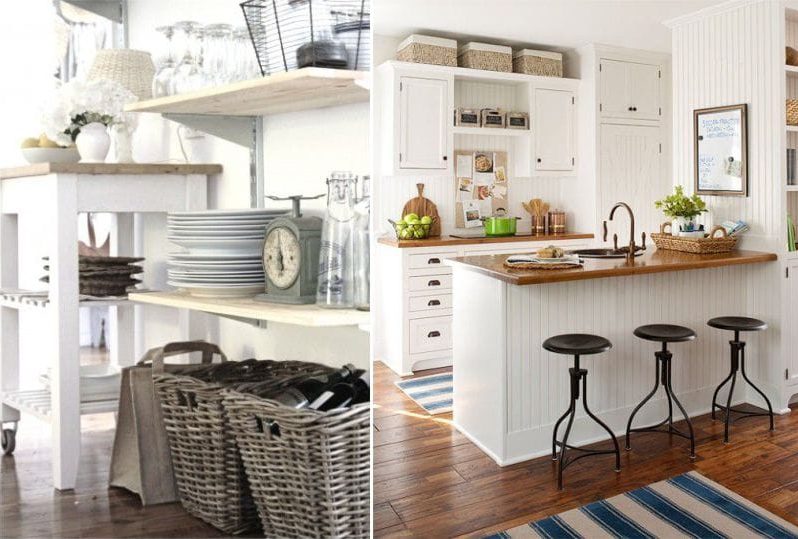
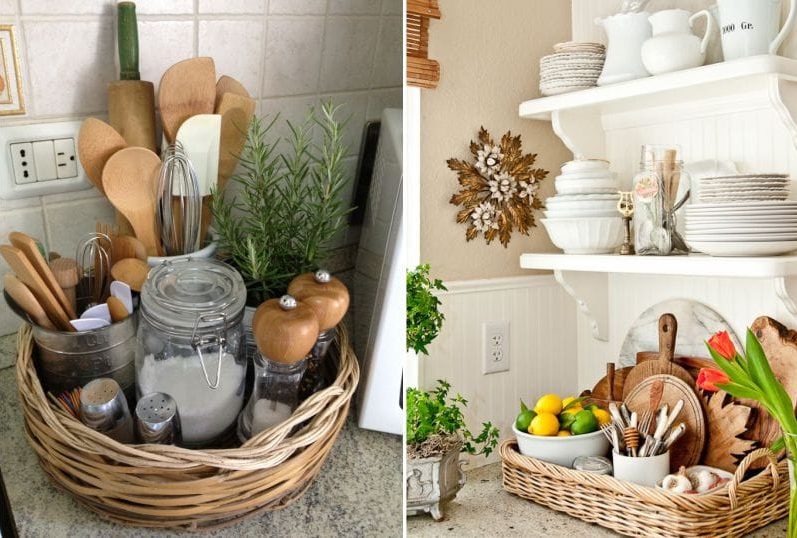
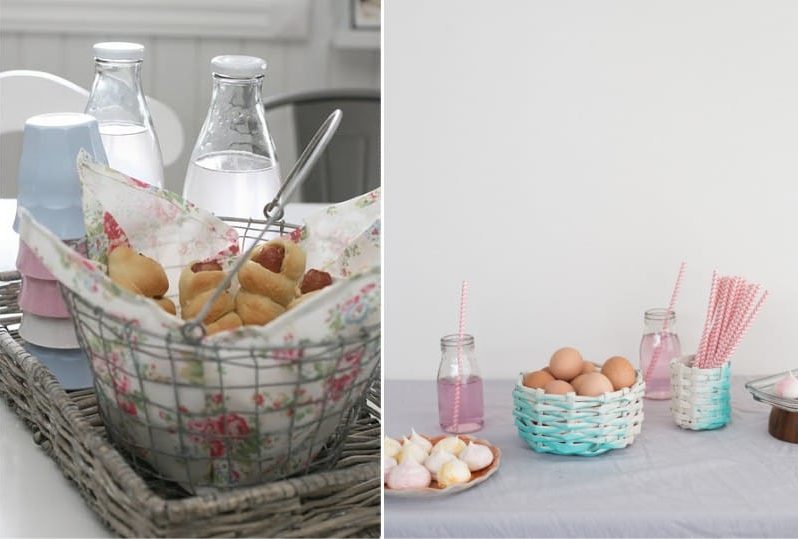
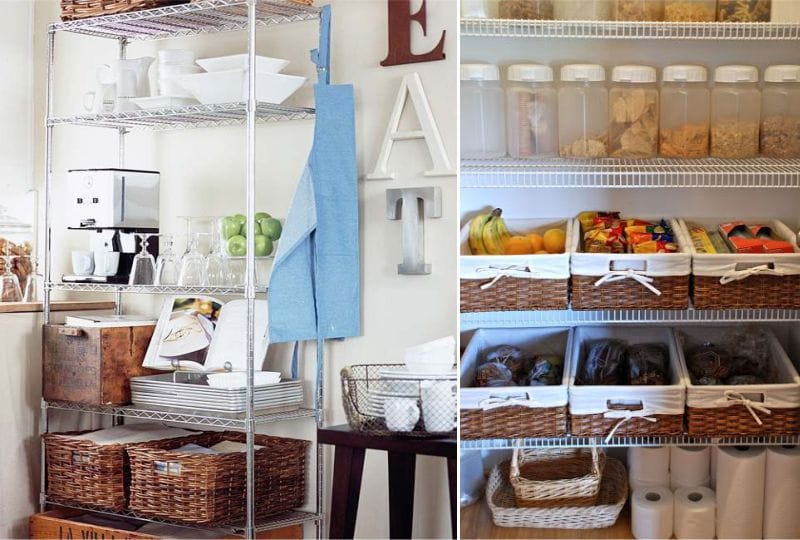
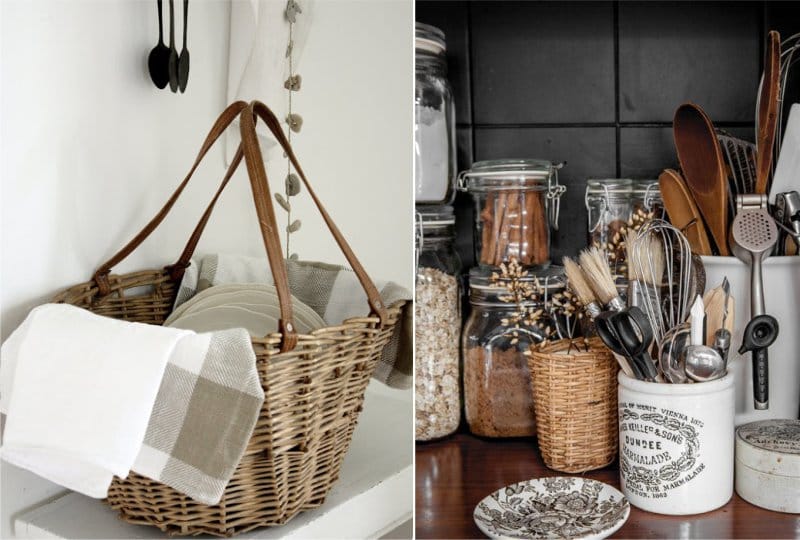
Ideas for storing and using baskets in the kitchen
And now we offer to be inspired by creativity and take a look at the ideas of "basket weaving" and the use of wickers in the kitchen (scroll through the photo).


 (Rate the material! Already voted:39 average rating: 4,54 from 5)
- Storage in the kitchen - 17 super-efficient solutions and life hacking
- 12 super ideas for home and kitchen
- Hand painted vases: 3 workshops and 45 ideas of decor
- Ideas and workshops on sewing tacks with your own hands
- Remaking tin and glass jars: workshops and ideas
- Vases from glass bottles: decor, painting and trimming