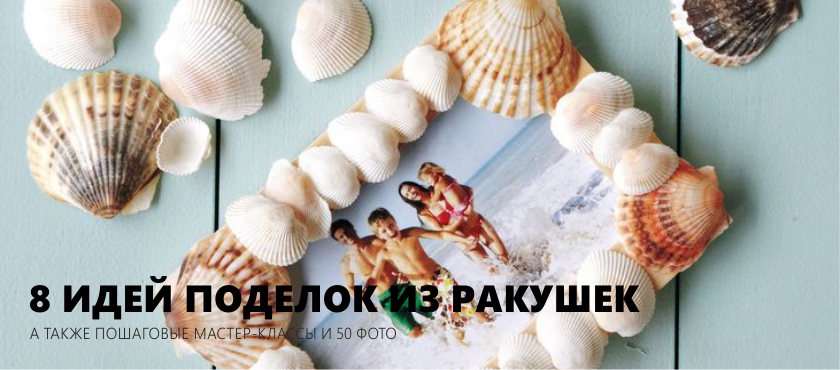
Save shells as a reminder of carefree days on the beach is best in the form of interior items, jewelry and souvenirs. After all, they are such a beautiful, completely free, natural and durable material. In this material you will find 50 inspirational photos, 8 ideas and the same step-by-step master-classes on making crafts from shells with your own hands for beginners.
Basic instructions for the preparation of shells
Cleansing
Before you start making crafts from seashells, they need to properly prepare.
- If the shells are “dead” and the remains of mollusks are not left in them, then they just need to be soaked in a solution of water and any chlorine-containing agent (eg, with bleach, “Duckling”, etc.) in a 1: 1 ratio for 30 minutes. If the shells are very dirty, or you want to remove the dark outer layer of periostracum, soak them longer. After soaking, clean the shells with a brush and rinse in clean water.
- If the shells are “alive”, that is, they have the remains of mollusks (even if they have long died) and have an unpleasant smell, then they must be thoroughly cleaned. To do this, lower the shells in boiling water for 5 minutes, and then remove the remains of the mollusks using forceps, nail scissors, etc. There is a second way: heat the shells in the microwave for 30 seconds, then try to remove the remains with forceps. In case of failure, continue heating the shells in the microwave oven, checking the result every 10 seconds. When all remains are removed, treat the shells with chlorine-containing agent according to the first instruction.
After processing, inspect the shells for chipping and, if any, sand them with a sanding block, disc or emery cloth. If you wish, you can add shine to them with a clear nail polish or furniture, as well as with the help of oil or fat cream. However, in this case, before processing the shells with glue, gluing places will have to be additionally degreased with alcohol.
Drilling holes
To make some kinds of seashell crafts (eg, wind music, garland, beads, bracelet and other jewelry), they need to drill a hole. This task is quite simple, the difficulty consists only in the fact that the shells can crack or stratify at the drilling site.
- Therefore, keep in mind the main rule: the thinner the sink, the smaller the hole should be in it and, accordingly, the thread / accessories of the decoration.
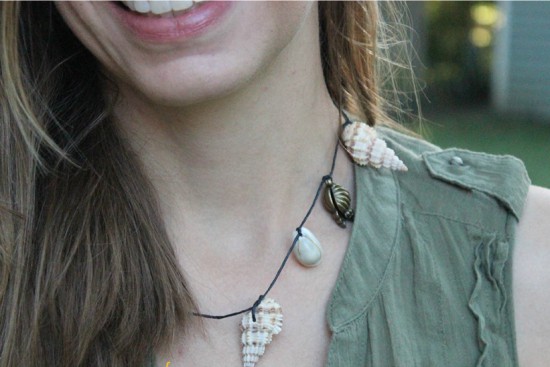
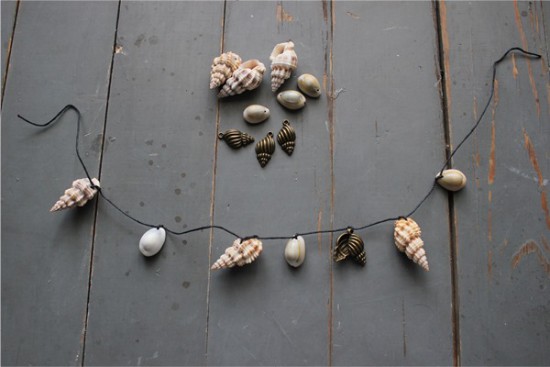 To make such beads, you need to drill holes in the shells and string them on a silk cord, fixing the location of the knots. Further, the ends of the laces will only hold in the crimp kontsevikah and attach fasteners to them
There are two ways to make holes in the shells - manual and automated.
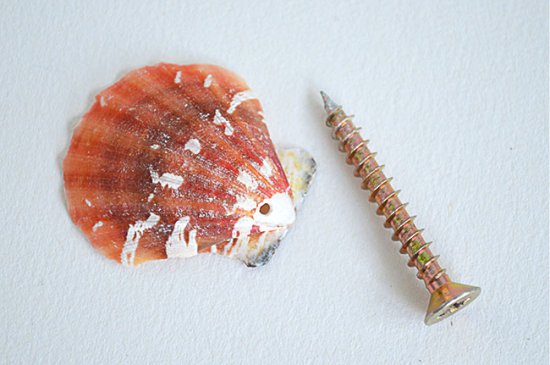
Method 1. Select a drill bit for a drill, screwdriver or straight grinder with a diameter of 0.8 - 2 mm. Put the shell on a wooden or plastic board and glue it with masking tape. Drill a hole right on the tape - it will not allow the shell to split or peel.
Method 2 If you do not have a screwdriver or a drill, then you can make a hole in the sink with a stud and a hammer. To do this, first paste the seashell with masking tape, put a label on the inside of the shell, then place the carnation and gently tap it with a hammer several times to make the initial hole. Then expand the hole, moving the same nail back and forth inside it until you reach the desired diameter.
If there was neither a nail nor a hammer, then use an ordinary needle, nail scissors or a knife and “drill” the hole manually. The result will appear in about 10 minutes.
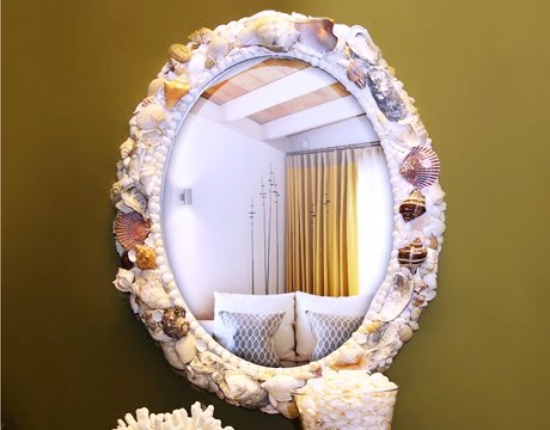
Idea 1. Encrusted frames, frames and frames
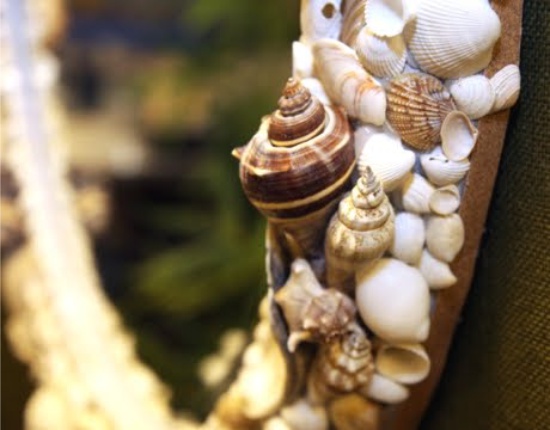
Seashells can be decorated frame mirrors, paintings or photo frames. Examples of such crafts are presented in the following collection (scroll through the photo to the right).
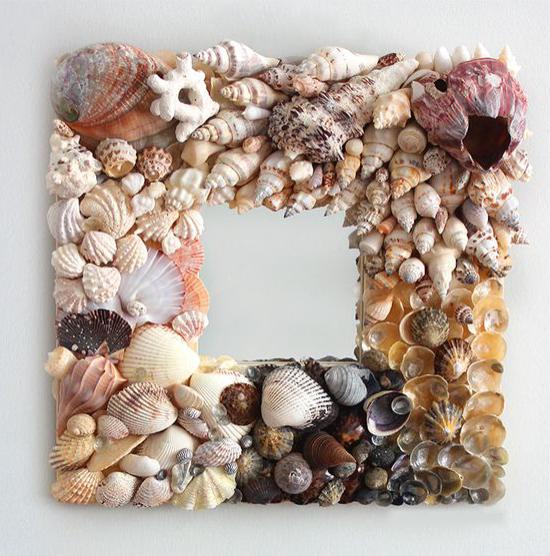
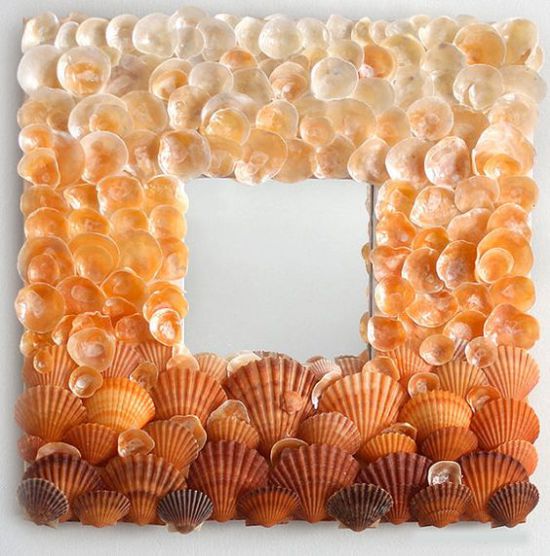
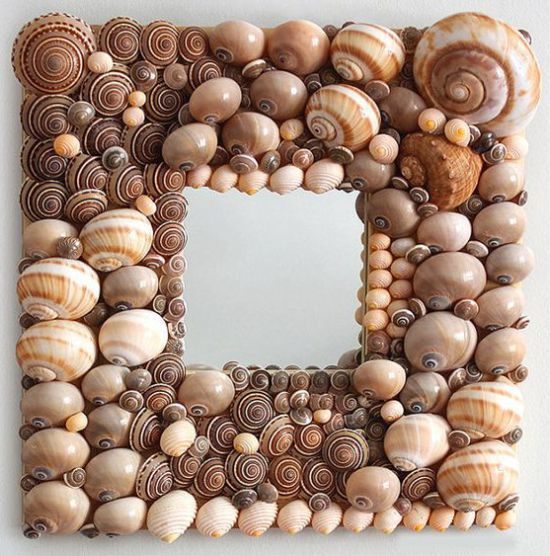

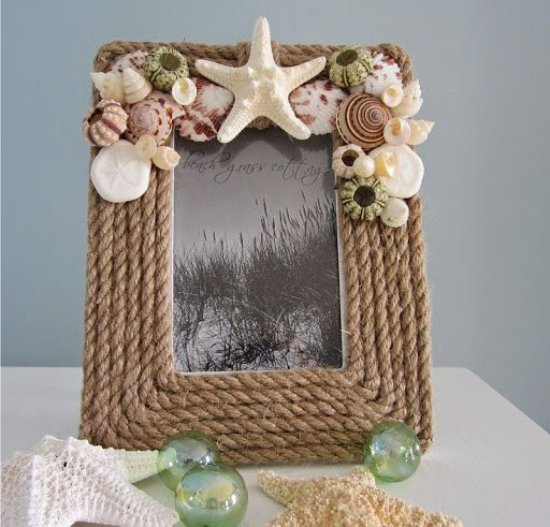
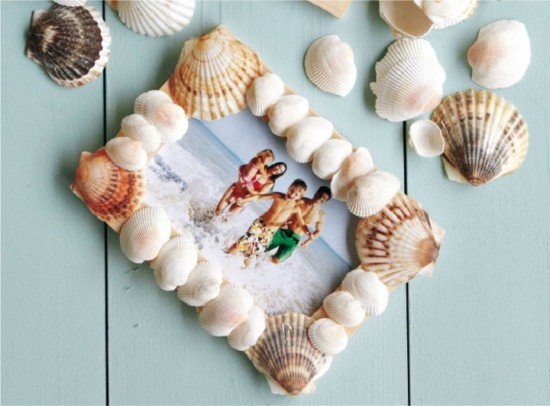
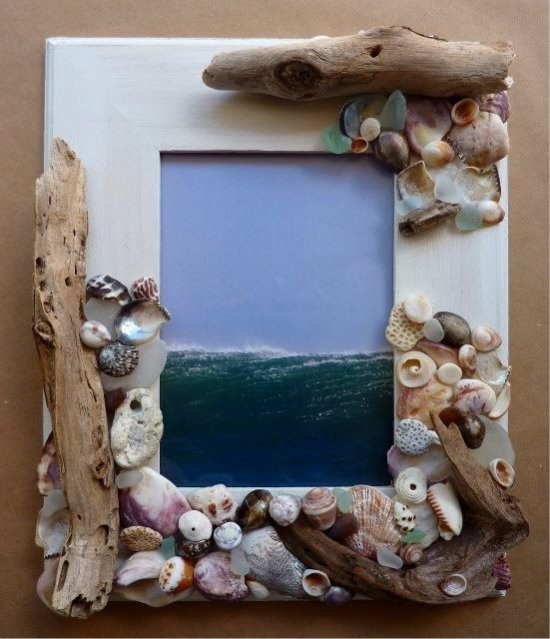
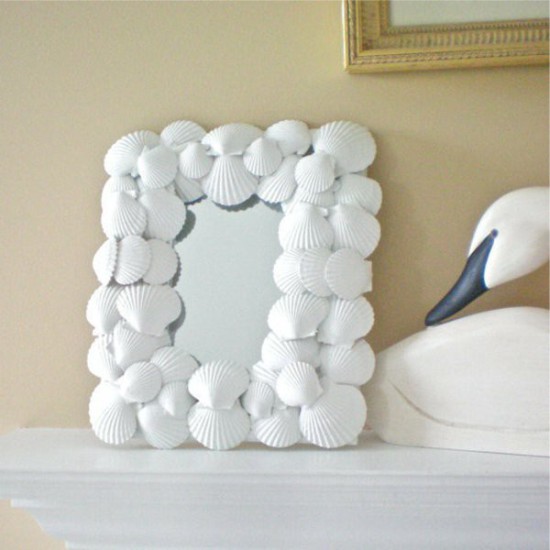
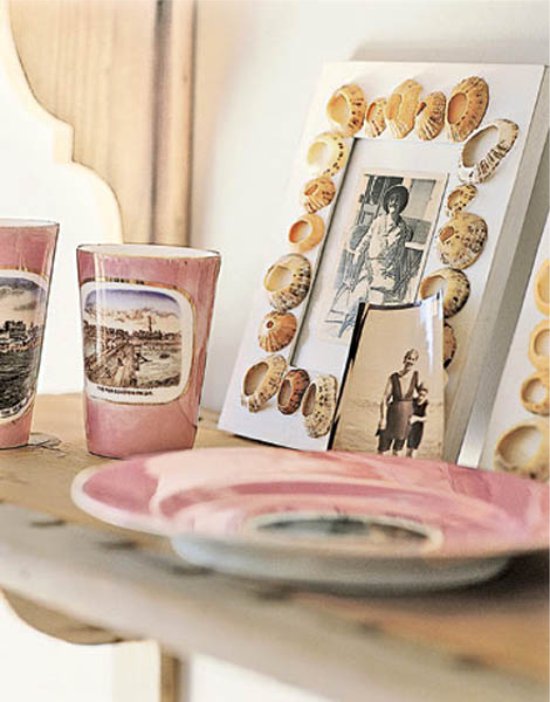
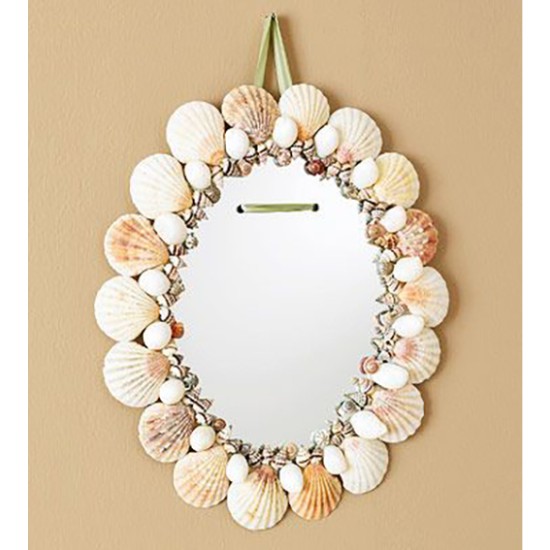
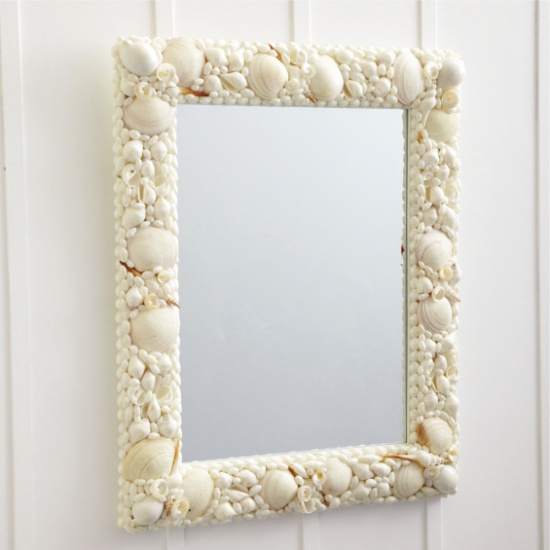
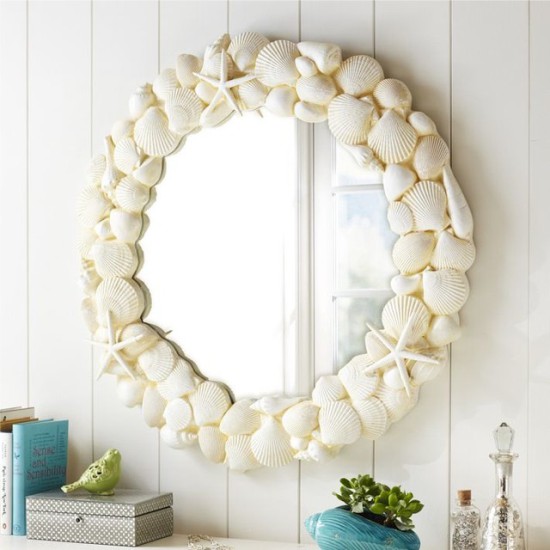
Today we offer you to decorate a mirror frame with seashells, but according to the same principle you can decorate any photo frame or frame of the picture.
Materials:
- Shells of small, medium and large size and, if desired, additional decorations (eg, starfish, pearls, figures of skates, etc.).
- Glue gun and a few sticks of glue or transparent epoxy glue.
- Newspaper or any unwanted paper to protect the mirror from glue.
- Paint tape or regular tape.
Instruction:
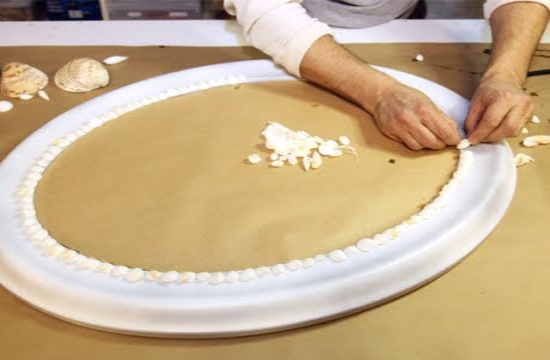
Step 1. Protect the mirror with paper, securing it with masking tape. At this stage, the frame can be painted if its initial appearance does not suit you.
Step 2. Sort the shells by size to facilitate the creation of a future composition.
Step 3. First glue the first row of small or medium shells (about the same size) around the mirror.
Step 4. Now start pasting the largest shells. Previously you can play with the layouts and choose the best. If you use epoxy glue, after all the parts are glued, leave the frame to dry overnight.
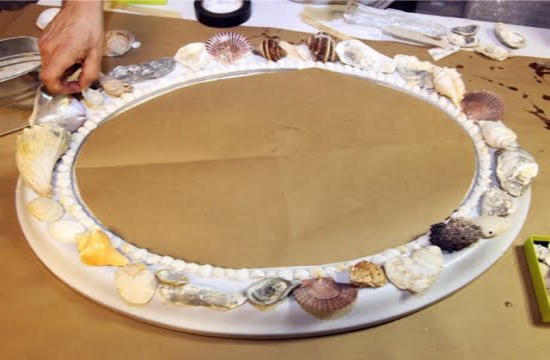
Step 5. Next, fill in the gaps between large shells, medium and small shells.
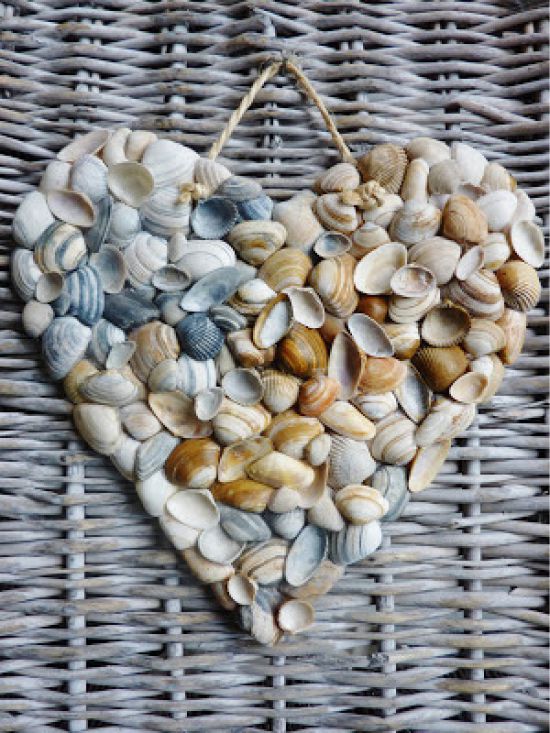
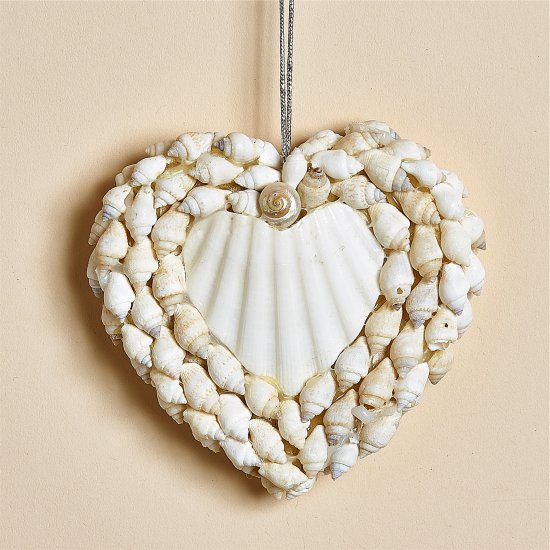
Idea 2. Mastering Valentine's Panel
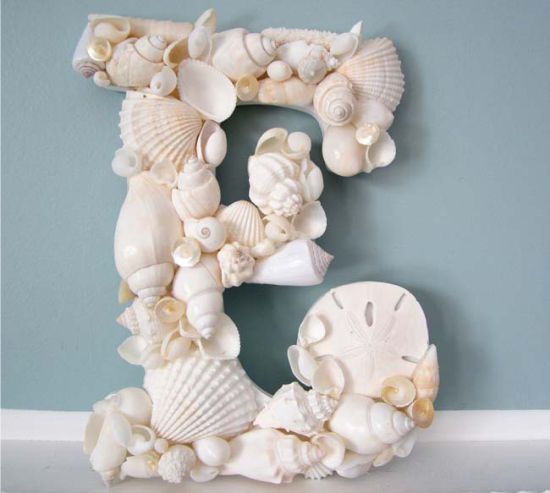
From the collection of shells of different shapes and sizes you can make a panel in the form of a valentine. However, you can cut out of cardboard / plywood any other shape, say, the same seahorse or letter.
Materials:
- Glue gun or any glue of strong adhesion;
- Collection of river and sea shells;
- Cardboard;
- Scissors;
- Twine.
Instruction:
Step 1. Cut out the cardboard base for heart shaped panels.
Step 2. Using a knife or an awl, make two holes for the twine.
Step 3. Begin to stick the shells, trying to keep minimal spaces between them. Leave the holes for the loop open.
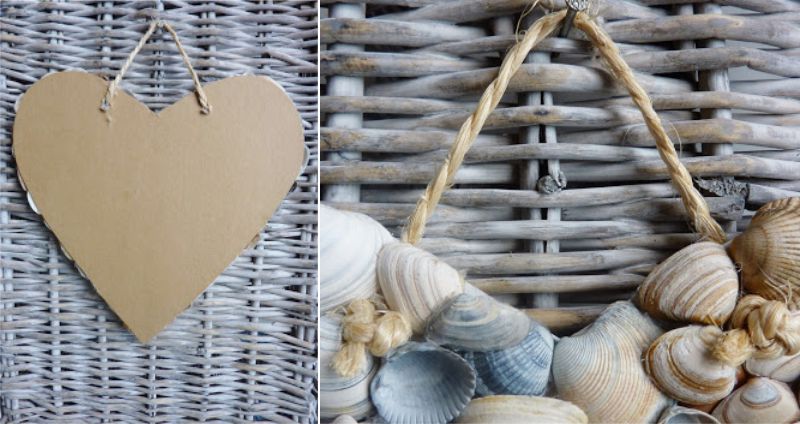
Step 4. Cut the twine of the desired length, pass the two ends of the rope into the holes from the inside of the panel and tie it on double knots.
In the next video you can see a visual master class on making crafts from seashells with your own hands in the form of a Valentine's panel.
Below are other ideas for creating seashells panels.
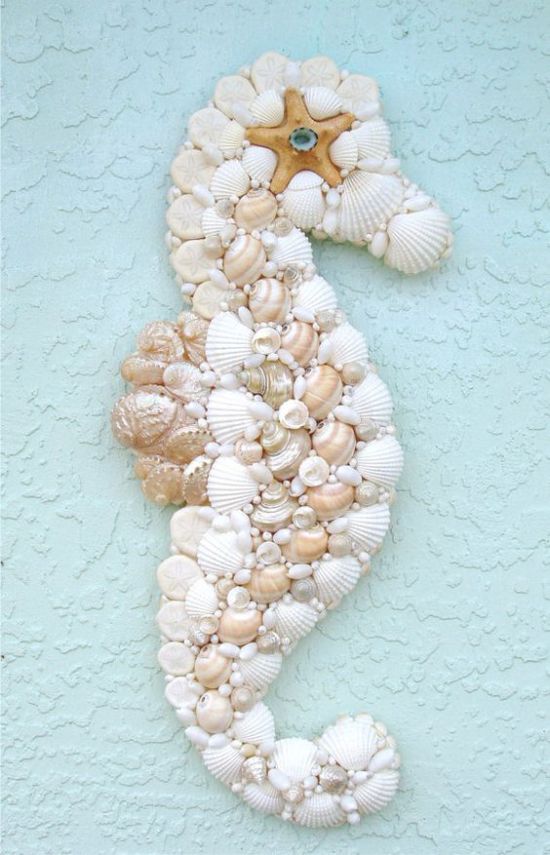
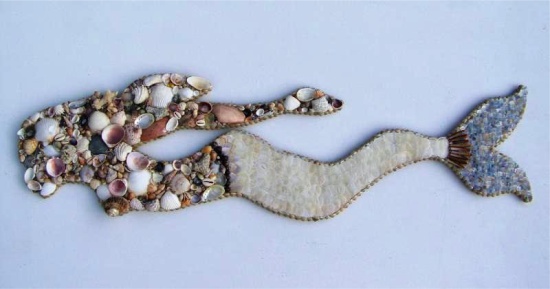
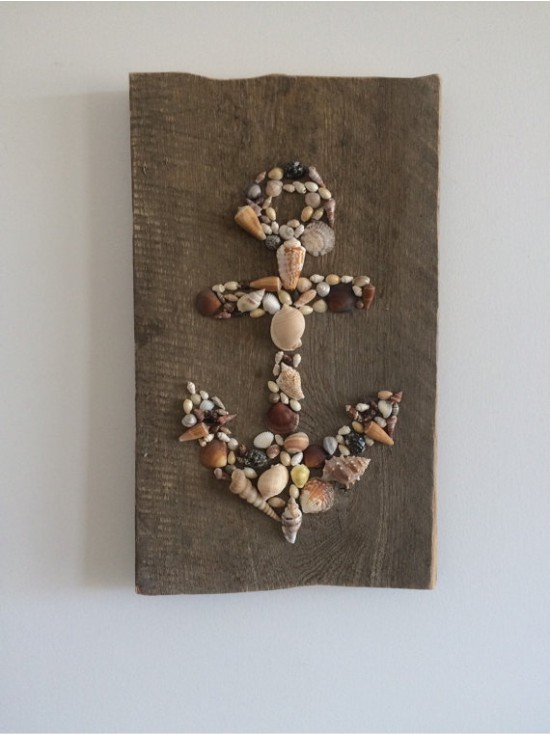
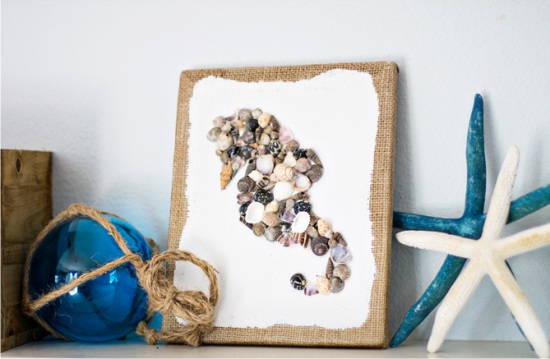
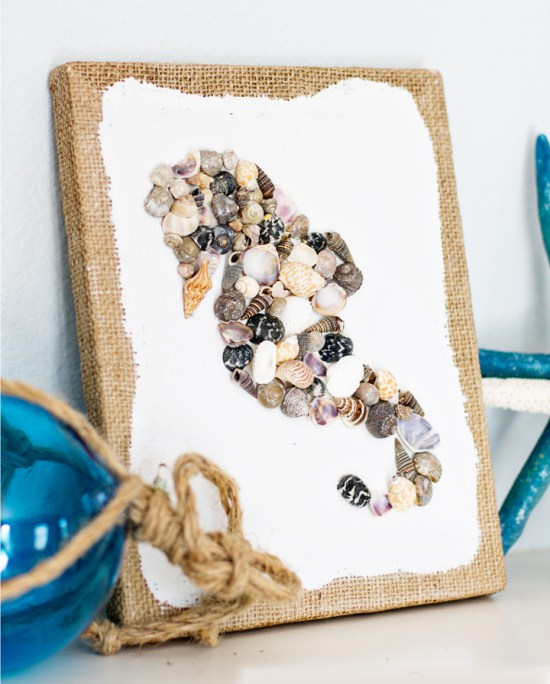
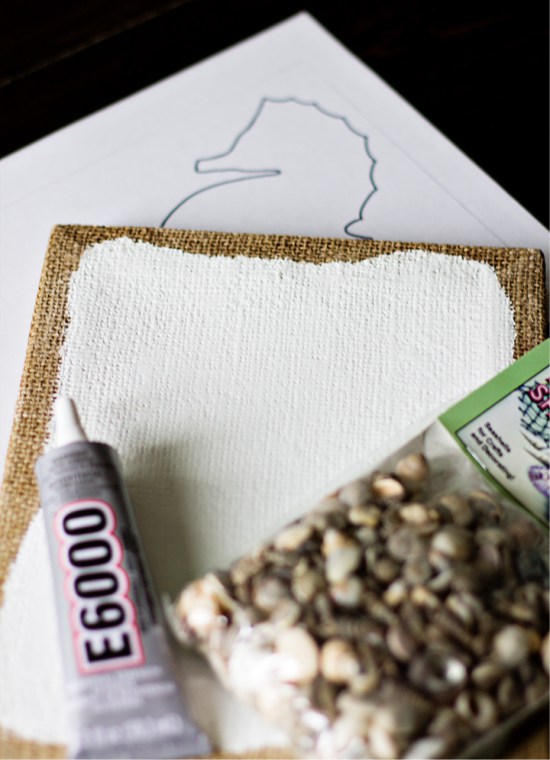
Idea 3. “Writing” a picture on canvas
And here is another idea to create wall shells from seashells.
Materials:
- Canvas on stretcher;
- Seashells;
- Glue gun or other glue of strong adhesion, eg, "Moment";
- Template or stencil of the desired pattern, printed on paper;
- Acrylic paint to create a background (optional);
- Brush (optional).
Instruction:
- If you want to repeat the idea of a picture of this master class, then first create a background for a composition of seashells. To do this, use a brush and acrylic paint of the desired color. Wait until the background is dry, and proceed to the next step.
- Fix the template or stencil on the canvas with masking tape, and then circle its outlines with a pencil.
- Begin to stick shells on the pattern, without going beyond its boundaries.


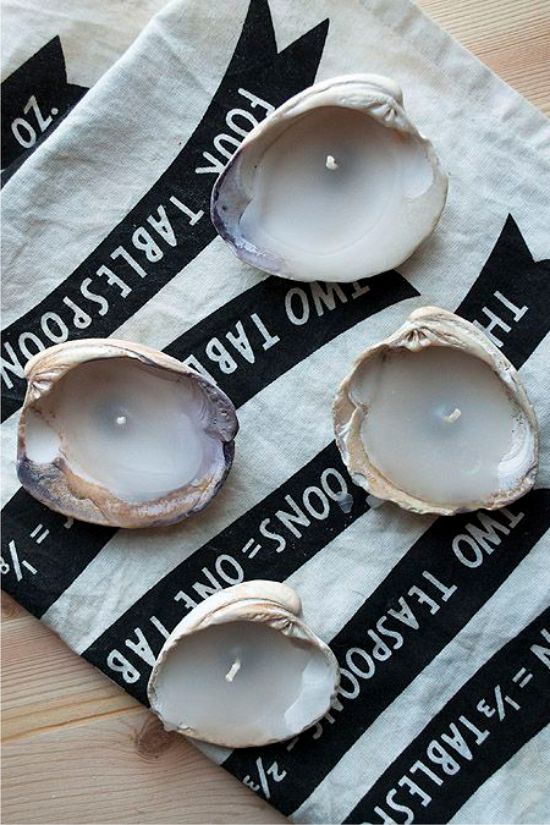
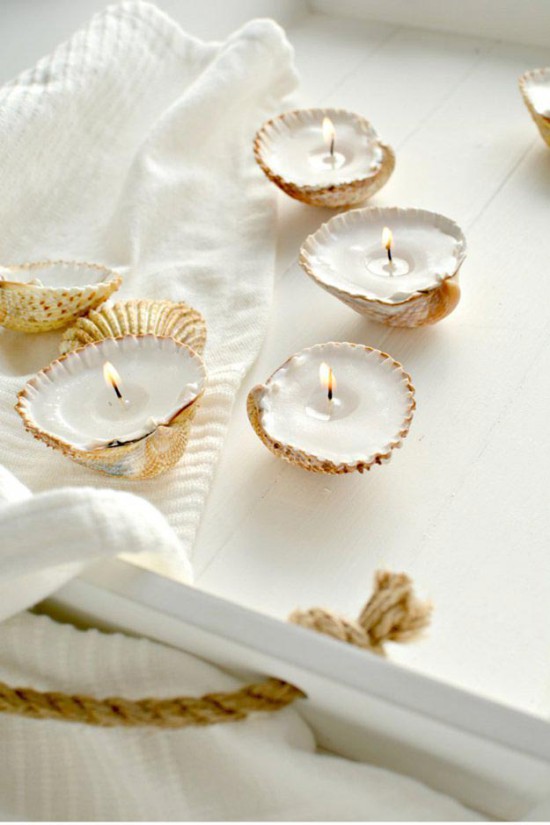
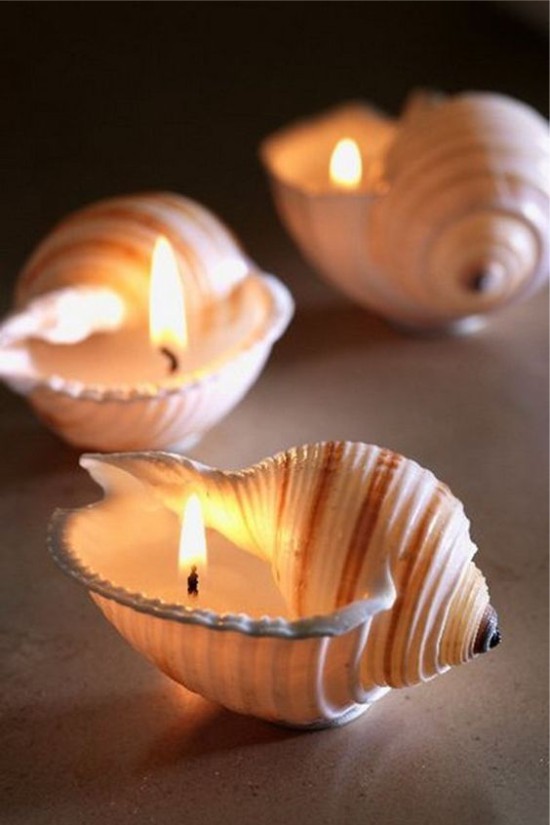
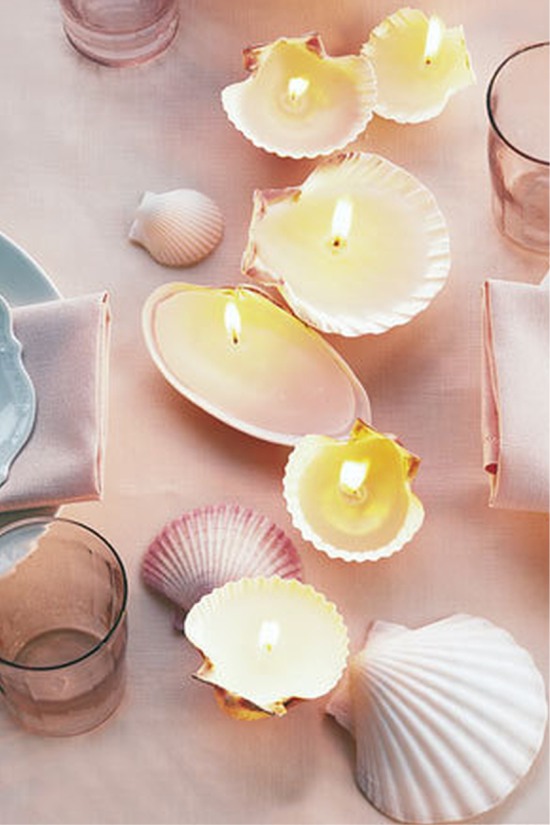
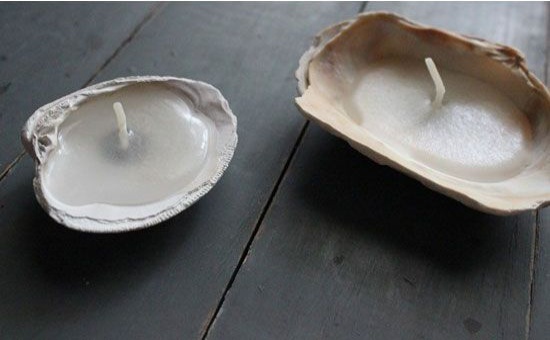
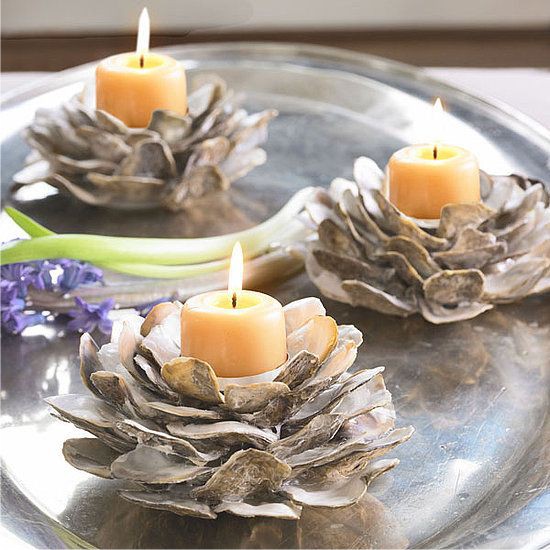
Idea 4. Cooking candles for mini candlesticks
Seashells are practically finished miniature candlesticks that are just waiting to be complemented with paraffin and wick. You can use the resulting candles for table setting, a romantic picnic or just to decorate the interior.

Materials:
- Sea or large river shells;
- Small round candles in tin cups;
- Water and pan for a water bath;
- PVA glue or double-sided tape.
Instruction:
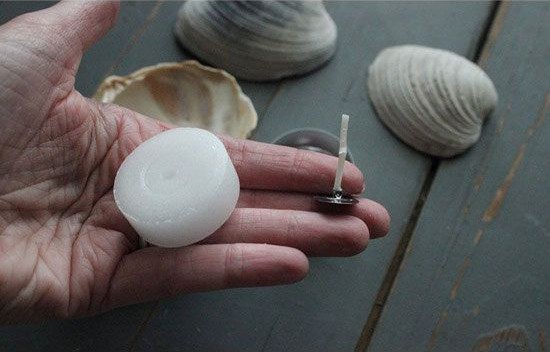
Step 1. Remove the candle itself from the tin container, and then remove the wick from it by pulling the metal base at the bottom of the candle (see photo). Put the wicks, and the candles themselves return in the molds.
Preparation of paraffin and wick
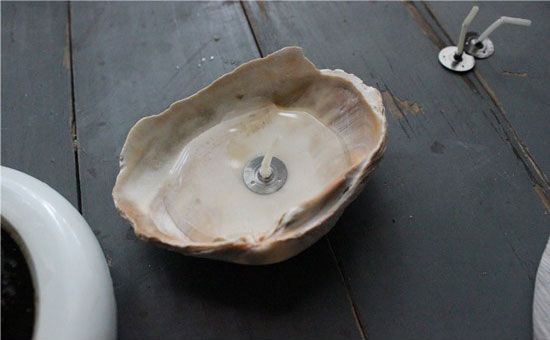
Step 2. Glue each wick on double-sided tape or PVA glue in the center of the shell.
Step 3. Now we need to melt the paraffin to completely liquid state. This can be done in three ways:
- Bring the water in a saucepan to a boil, then loosen the heat so that the water stops boiling and dip the molds into it.
- Put the candles on the stove, heated to a minimum heat, and make sure that the wax does not burn.
- Heat the wax with a hair dryer.
Step 4. As soon as the paraffin melts, remove the tins from the heat and proceed to filling the shells. It is best to use for this any tongs or a pair of Chinese sticks. Do not forget to pre-protect the surface of the table with a newspaper.
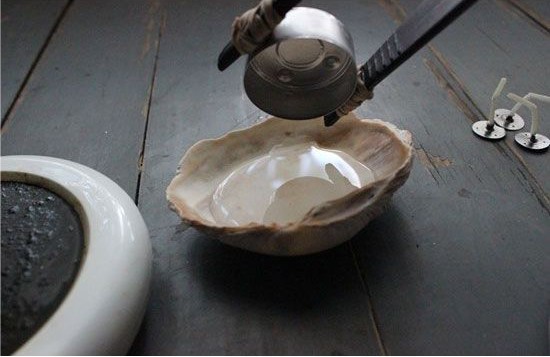
- If the shells are too unstable, and you are afraid that the paraffin will harden unevenly, then it is better to spread the candles into the egg packaging cells or fix, for example, with soft clay that leaves no traces.
After about 20 minutes, the paraffin will completely harden, and you can enjoy the light of the candles from the shells.
 Paraffin hardening
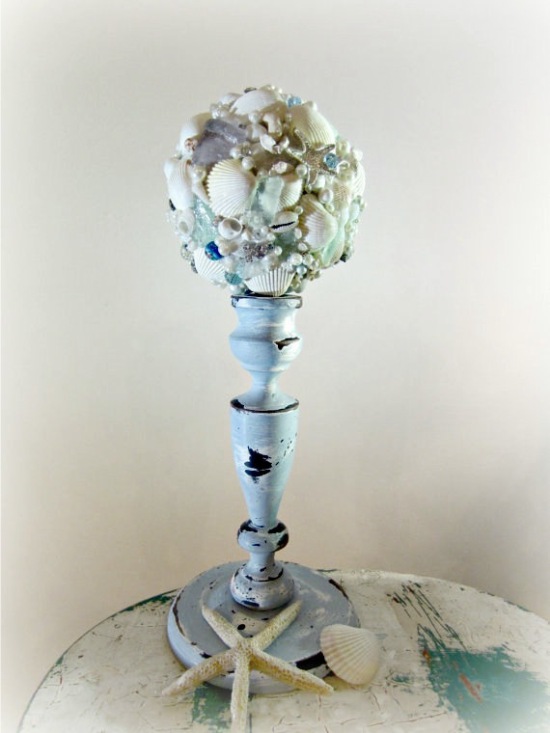
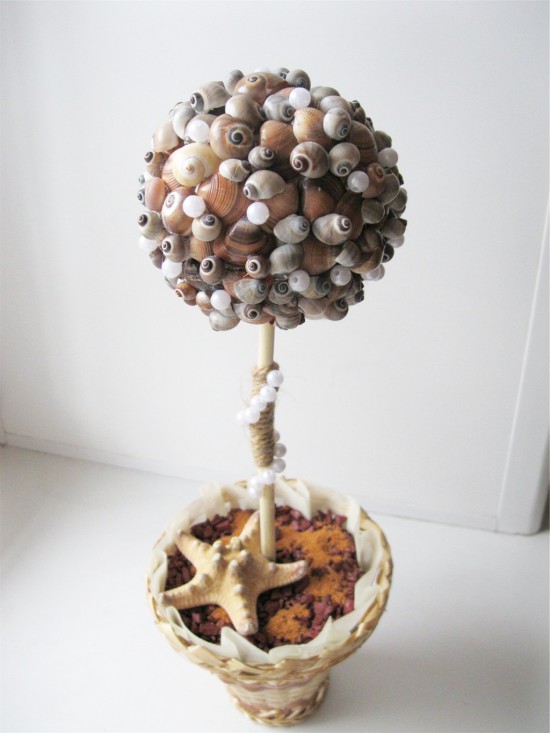
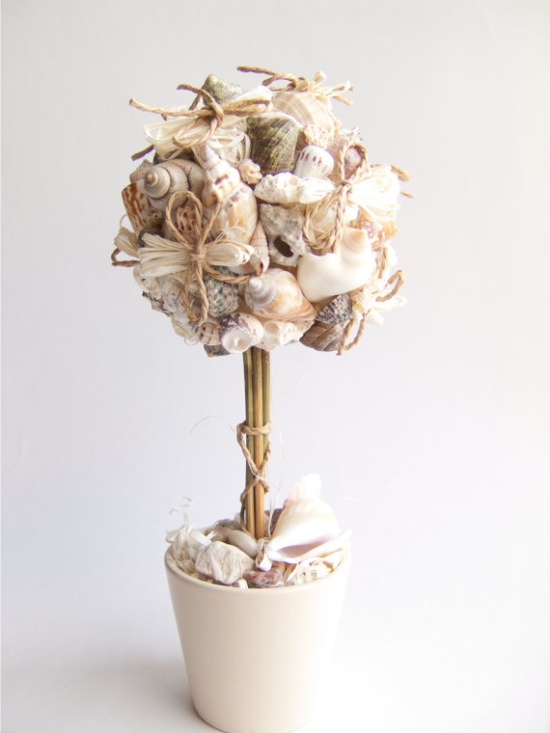
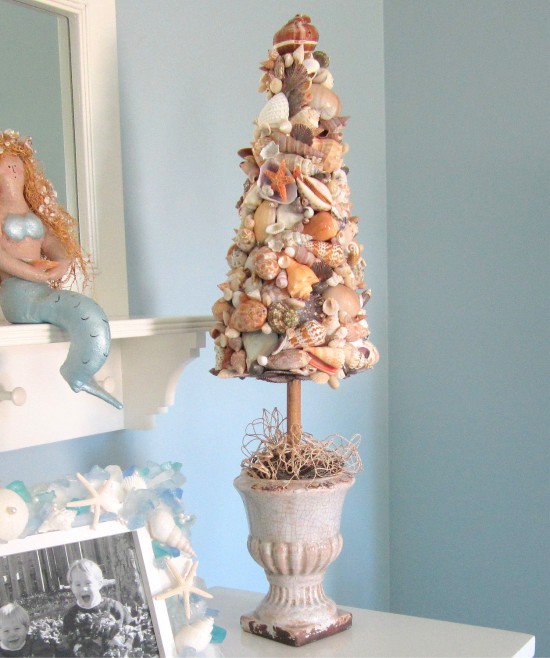
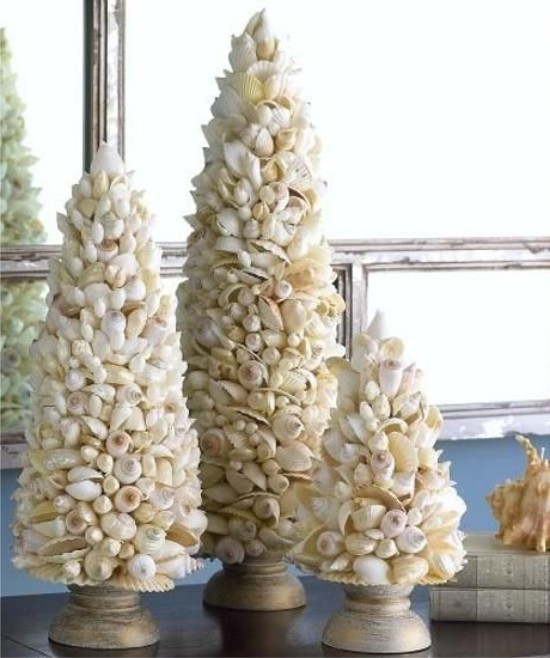
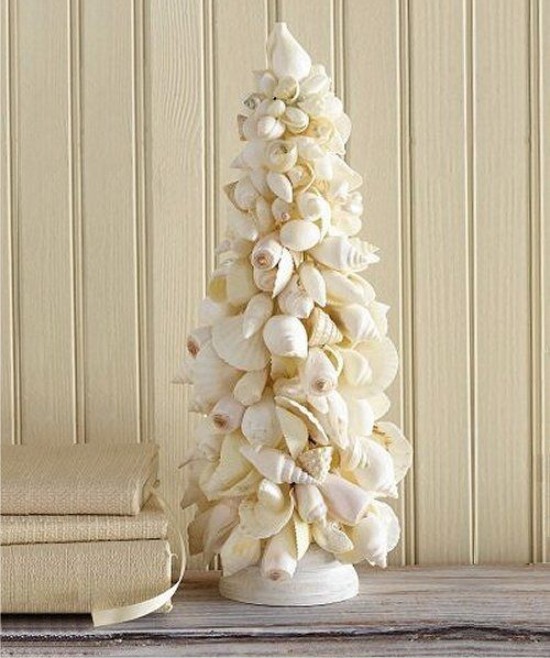
Idea 5. We do topiary in a nautical style.
Topiary is a small decoration in the form of a tree in a pot. You can learn the principles of making a shell topiary yourself. in our master class or from the next video lesson.
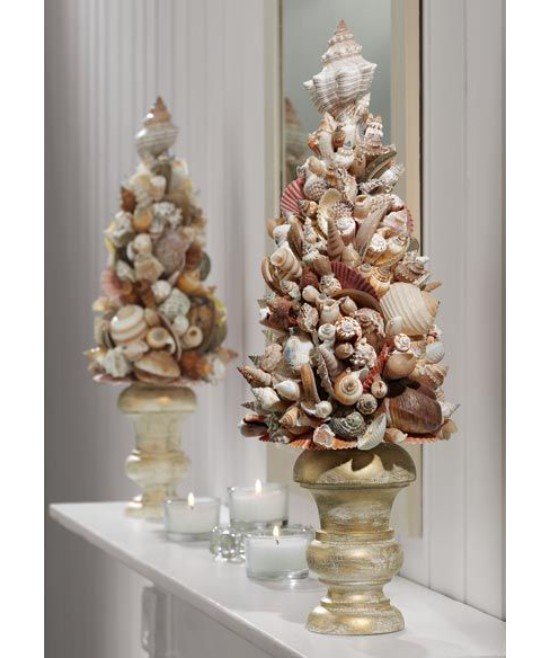
And in this collection of photos you can get ideas for decorating a topiary made of shells of traditional round shape or as a New Year tree.
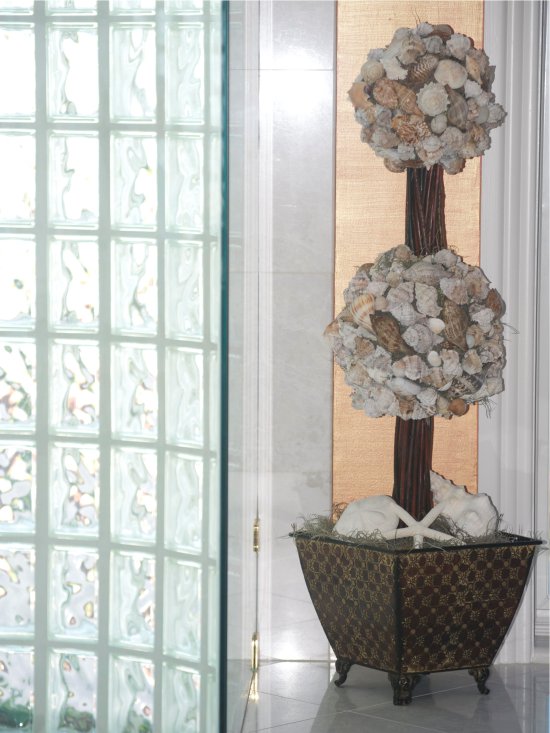 Double Shell Topiary

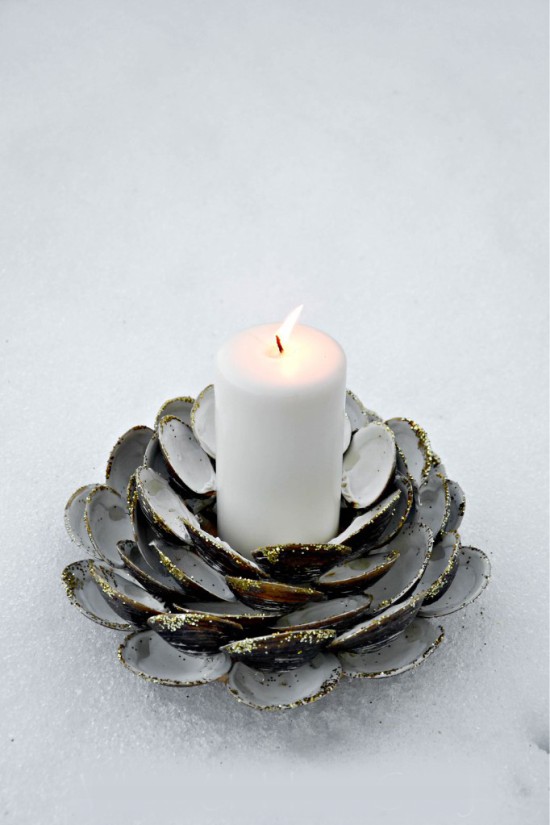
Idea 6. Master candlestick-flower
If you have a sufficient number of clam shells, then you can make one beautiful candlesticks in the form of flowers.
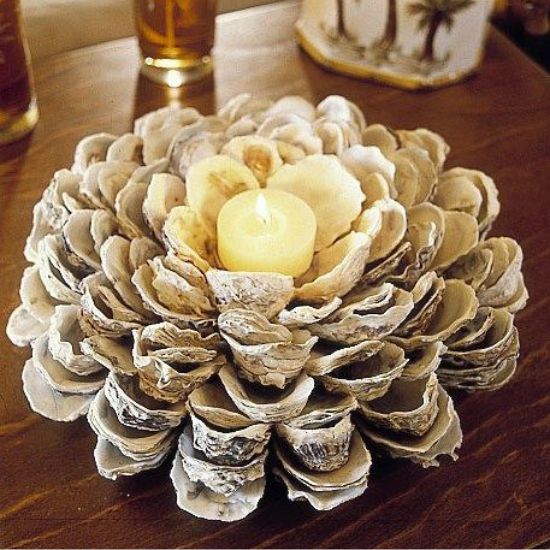
Today we propose to make just such a craft made of mussel shells.
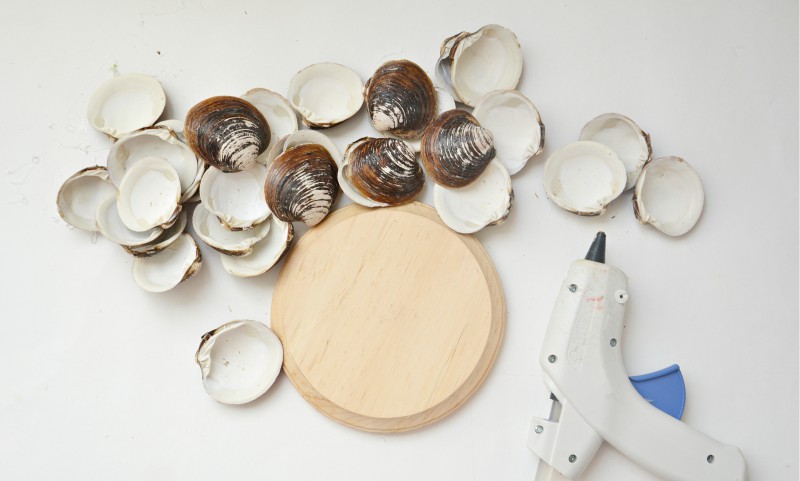
Materials:
- Bivalve shells;
- Any round base of small diameter;
- Glue gun;
- PVA glue (optional);
- Glitter (optional).
Instruction:
Step 1. Prepare the shells - wash them with soap, remove the remains of organic matter and, if desired, whiten them with chlorine-containing products (see the instructions at the beginning of the article).
Step 2. Paint the round base of the candlestick in a neutral color, for example, white.
Step 3. While the base is drying, sort your set of shells by size.
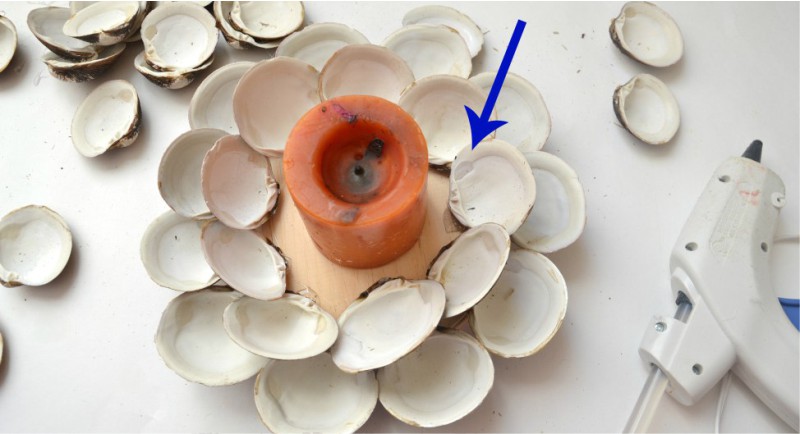
Step 4. Begin to glue 1 row of sinks on the sides of the base with thermo-glue.
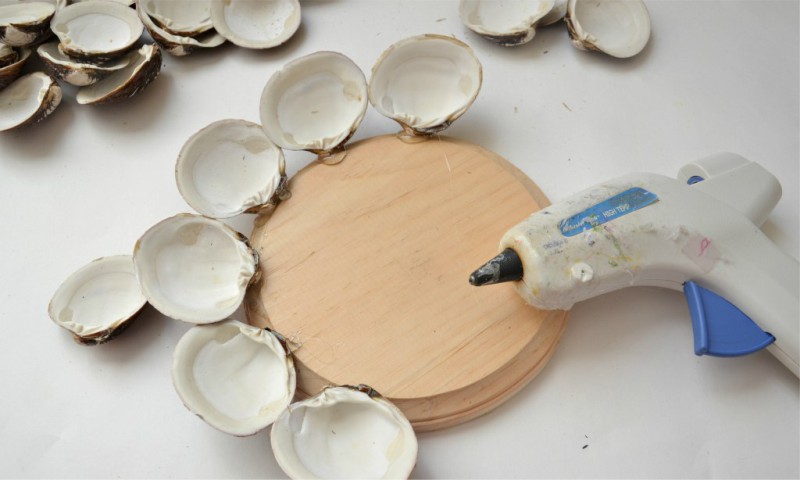
Step 5. When the first row dries out a little, proceed to the creation of the second row, placing each new shell overlapped with the previous one and so that it is located between the two shells of the first row. As a result, you will form the layout of the shells of two rows in a staggered manner as shown in the photo.
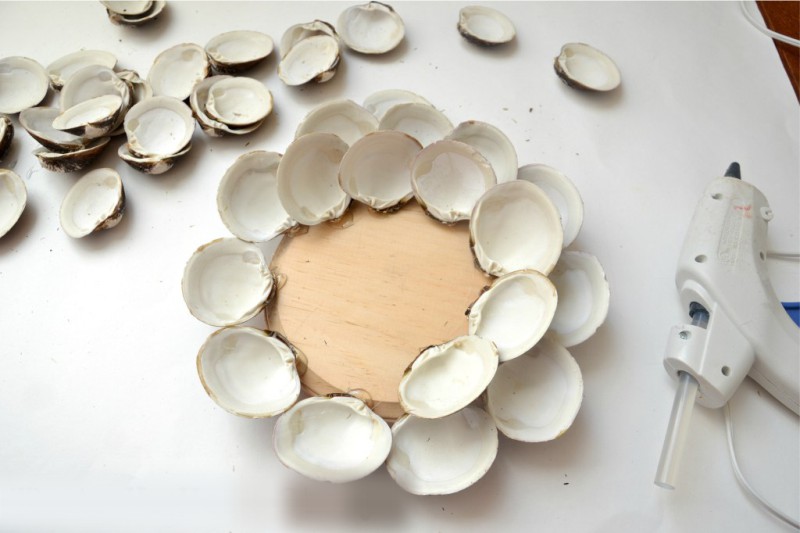
Step 6. Glue the third and all subsequent rows according to the same principle, but not on the base, but on the joints of the sinks of the previous row (the place is indicated by the arrow in the photo below).
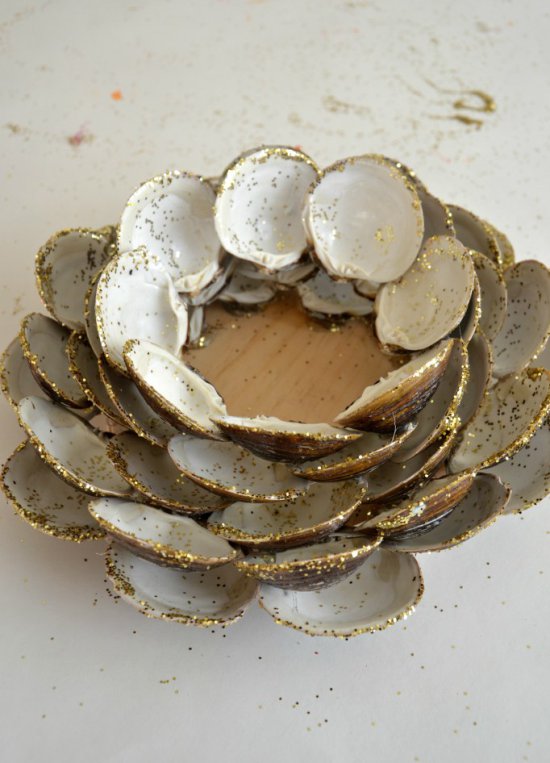
Step 7. When you glue the last row, look at the candlestick and add another one or two rows where you think this is necessary.
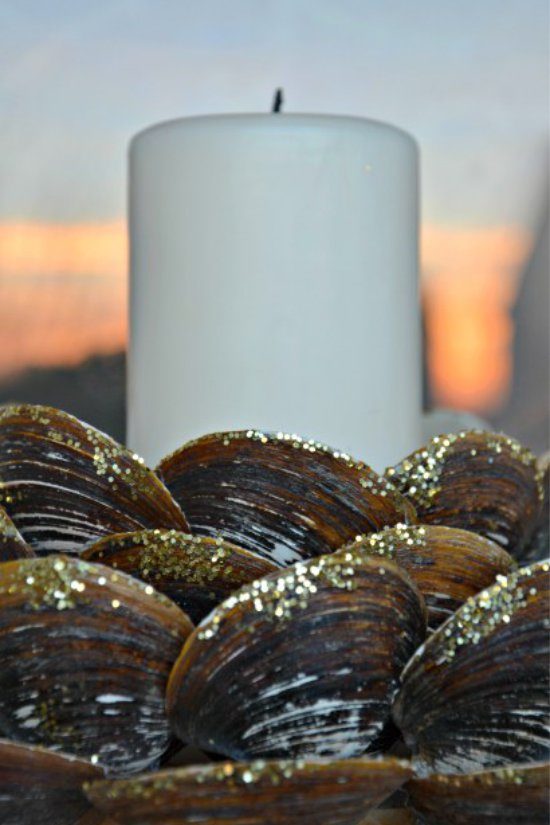
Step 8. Hooray, a seashell candlestick is ready! If you wish, you can additionally decorate it with sparkles. For this you need to perform the following steps:
- Treat the shells with PVA glue inside or just around the edges.
- Sprinkle glitter on the craftwork generously, let the glue dry, then shake off any excess.
See also the material: Flowers from ribbons do it yourself - 6 workshops for beginners.
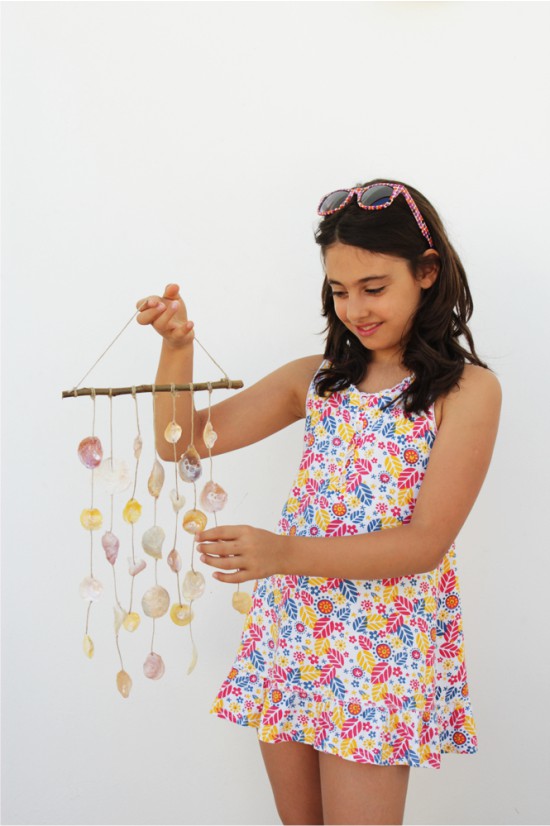
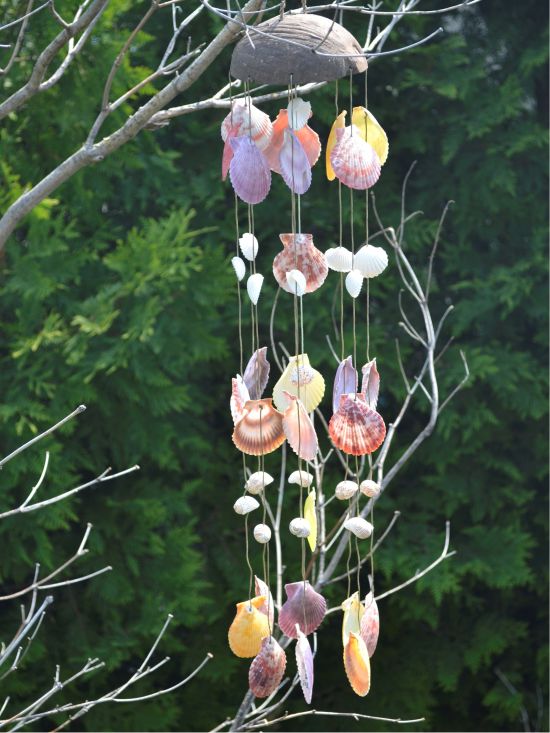
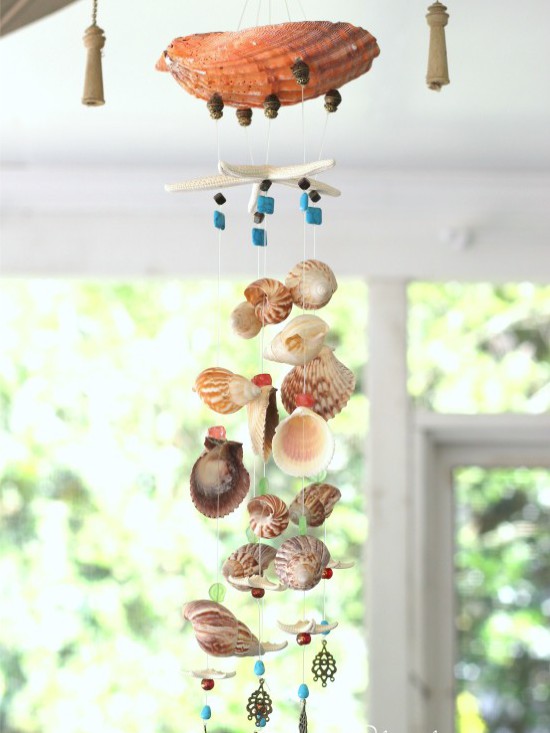
Idea 7. Create the music of the wind
Shells are an ideal material for making wind music, because the “chime” of such sea bells is very pleasant to hear.
Materials:
- Twine, fishing line or any thread.
- Twig or wooden stick.
- Scissors.
- Hot glue gun or tool for drilling small holes (a drill with a 2 mm drill or just a needle and nail scissors).
- Seashells.
Instruction:
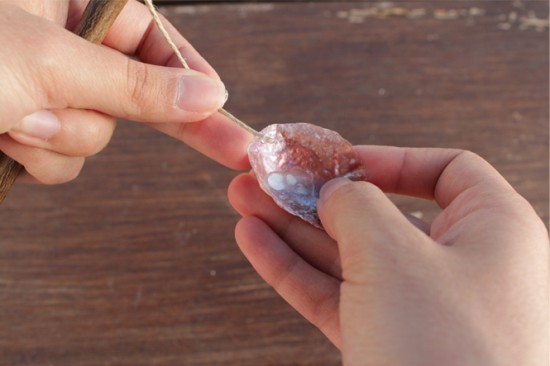
Step 1. If you want the shells to be tied to the threads, first drill holes into them (see the Basic Instruction at the beginning of the article). If you do not have the tool, and you are satisfied with the adhesive method of attachment, then immediately proceed to the next stage.
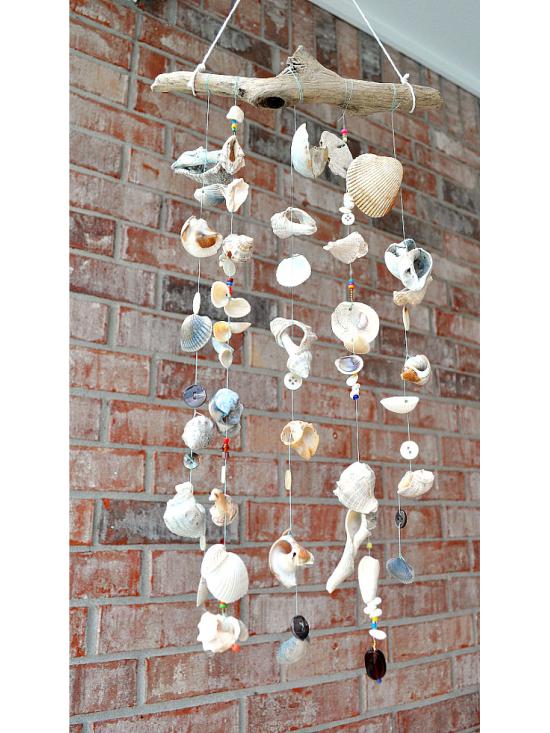
Step 2. Tie a twine to the branch as shown in the photo, measure about 7 cm in length from it and cut off the excess.
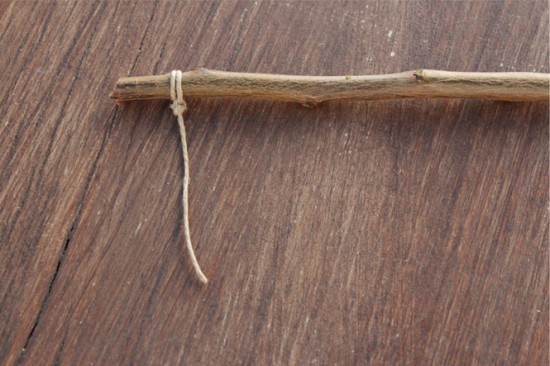
- If you use shells with holes, then the twine should be cut off immediately of the desired length with a margin on the nodules.
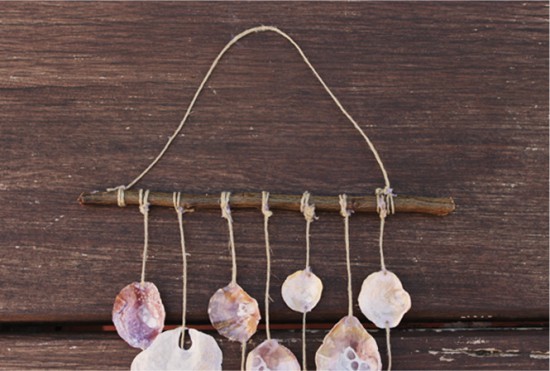
Step 3. Glue the shell to the string with a drop of thermal adhesive. Then, at the other end of the shell, glue another 7-centimeter string of twine. Continue to work until you are satisfied with the length of the first row.
- Shells with holes can be tied to the thread in at least two ways: tying knots around the holes or under them (the knot must be larger than the hole).
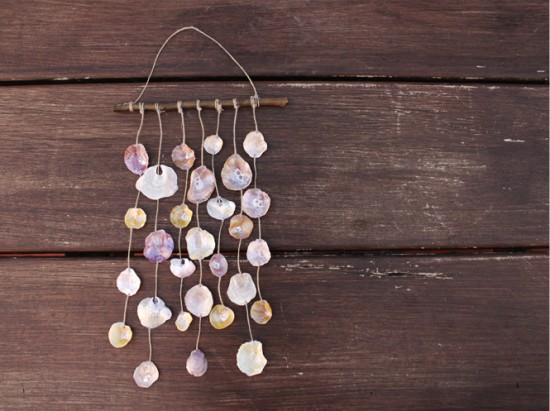
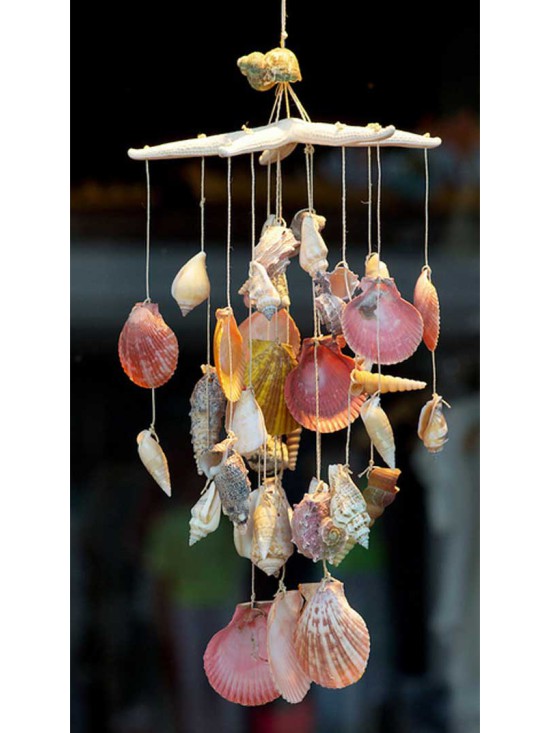
Step 4. Continue hanging threads with shells until the desired number. In this case, you can play with the length of the rows to form, say, an arch or a ladder. In this case, wind music has alternating short and long threads.
Step 5. When the product is ready, tie another piece of twine at both ends of the branch.
According to the principles of this master class, but replacing a branch with a hoop or adding seashells with starfish, beads, feathers and other decor, you can create more fanciful designs of wind music.
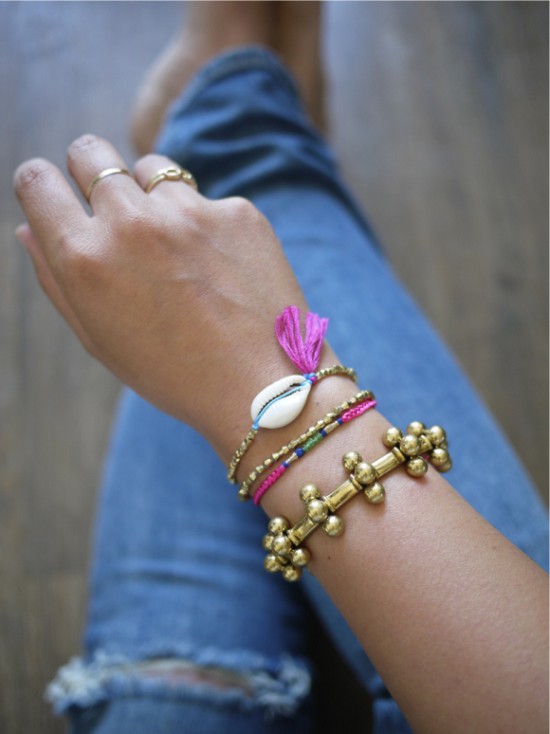
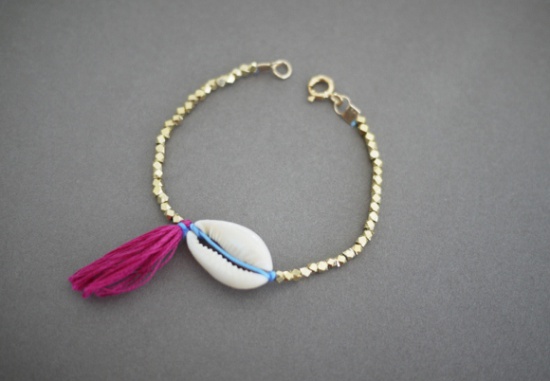
Idea 8. Making a cowry shell bracelet
If you have at least one cowrie shell, then you can make a boho bracelet for your hand or foot with it. You can buy all accessories for such decoration in stores for needlework or in large sewing stores.
Materials:
- One cowrie shell;
- 1 m silk lace;
- Half a skein of floss in a contrasting color;
- Beads (in this master class copper beads from the old bracelet are used);
- A pair of crimp terminators with loops (designed for cords and bracelet making);
- Clasp for jewelry (in the form of a ring or carabiner);
- Fastener ring (detachable);
- Scissors;
- Pliers.
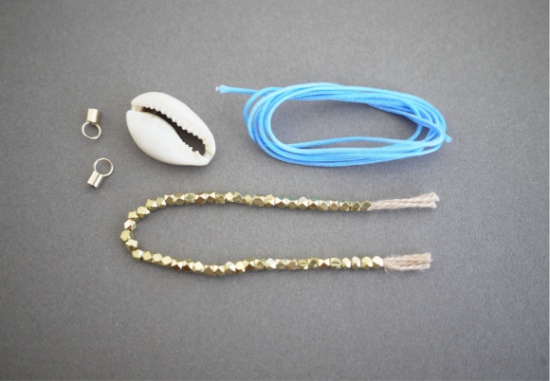
Cowry shell, silk lace, beads from the old bracelet and limit switches
Instruction:
Step 1. Drill a small hole at the two ends of the kauri (see the Basic Instruction at the beginning of the article).
Step 2. Cut about 15 cm from the skein of silk lace and set this line aside for a while.
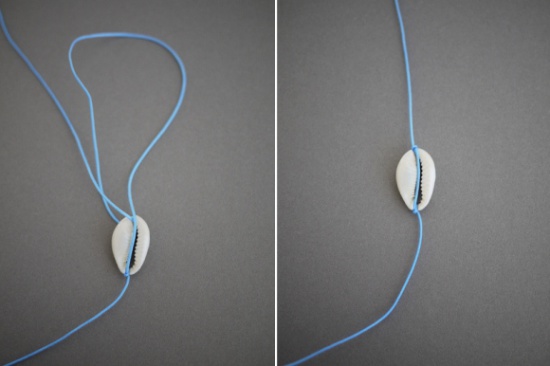
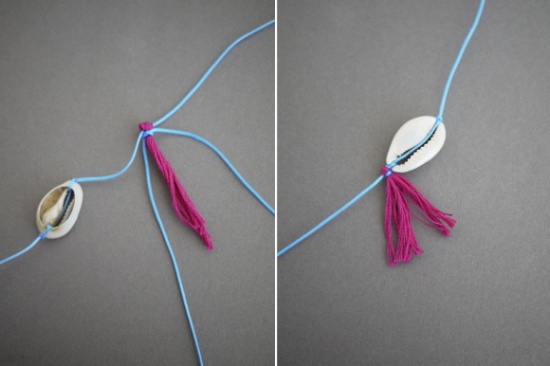
Step 3. Pass the silk cord about half the length through one hole of the shell and tie a knot.
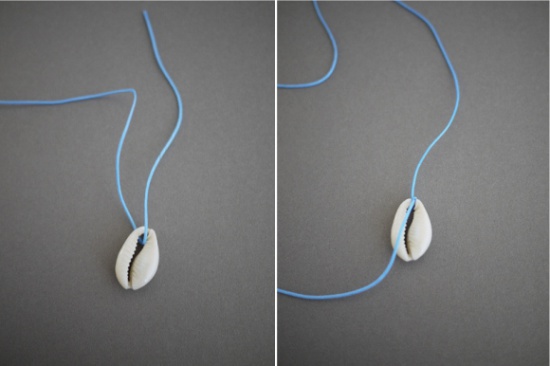
Step 4. Pass the other end of the cord through the middle part of the sink and tie a knot in its second hole.
Step 5. Cut a few floss threads, collect them and fold the resulting bundle around the silk lace next to the shell as shown in the photo.
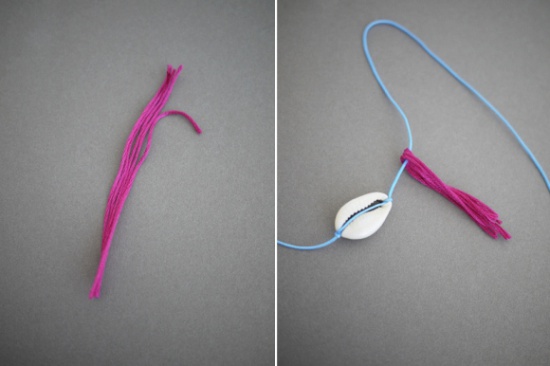
Step 6. Take a short piece of lace, tightly wrap it around the top of the folded floss threads, tie a knot and cut off the excess.You get a brush. Fan it and, if necessary, trim it with scissors.
Step 7. Begin stringing beads on both ends of the bracelet. After the desired length is reached, bend the ends of the cords in half and stick the resulting tips into the crimp-off switches.
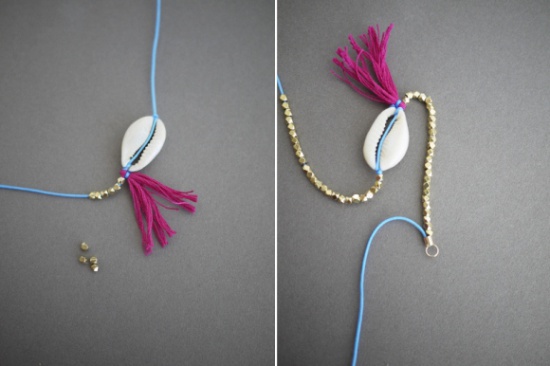
Step 8. Use pliers to clamp the ends on the ends of the bracelet, and then cut off the excess cord.

Step 9. Using pliers, attach a ring to one end switch, and a fastener to the other. Your seashell bracelet is ready!

 (Rate the material! Already voted:19 average rating: 4,47 from 5)
- Crafts from pasta - 15 ideas for adults and children
- 6 workshops and ideas of autumn crafts for adults and children
- 10 ideas crafts from cereals for children and adults
- 12 wall decoration ideas for the kitchen
- 12 super ideas for home and kitchen
- Topiary made from cones, acorns and chestnuts - photo-ideas and 2 master classes