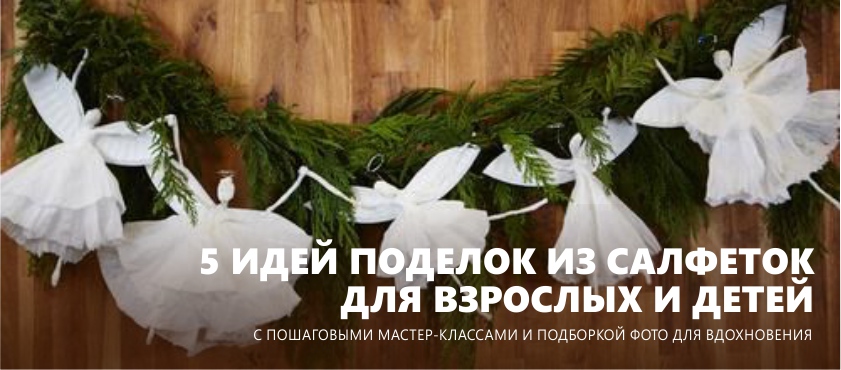
You will be surprised when you find out how many beautiful handicrafts can be made from paper or openwork napkins. In this material, we presented 5 step-by-step master classes, following which you can make decor items, tableware, Christmas decorations, gifts for loved ones or toys for children. By the way, all ideas are designed for both adults and children's creativity.
Master Class 1. Dancing paper napkin dolls
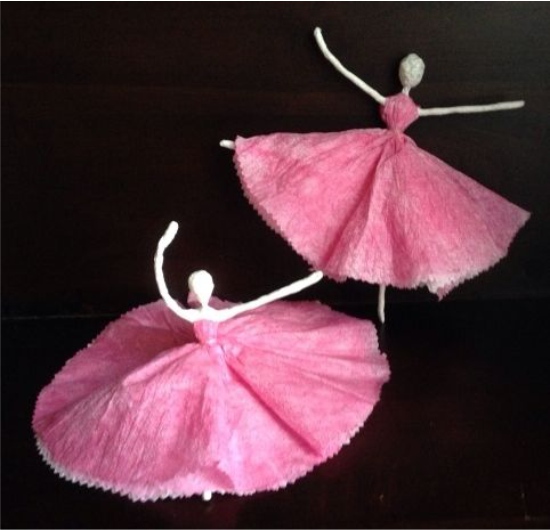
Looking at these graceful figures of ballerinas and fairy fairies, it seems as if they were made by a real master. In fact, even children from the most ordinary paper napkins can make such crafts with their own hands.
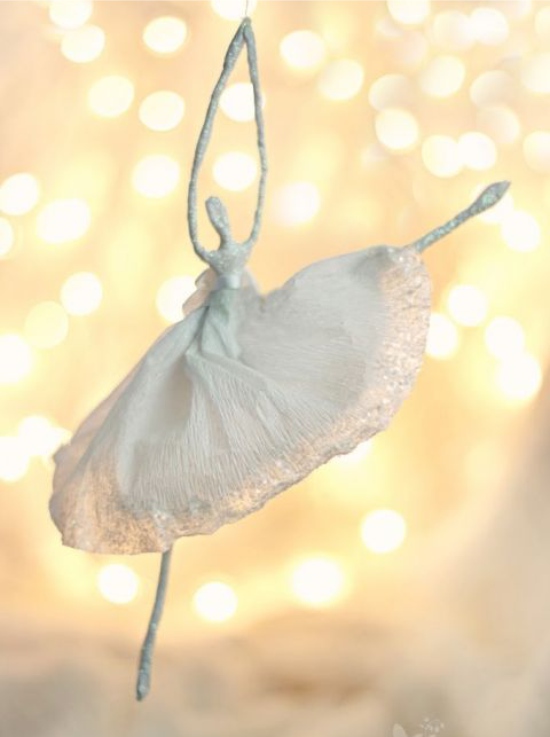

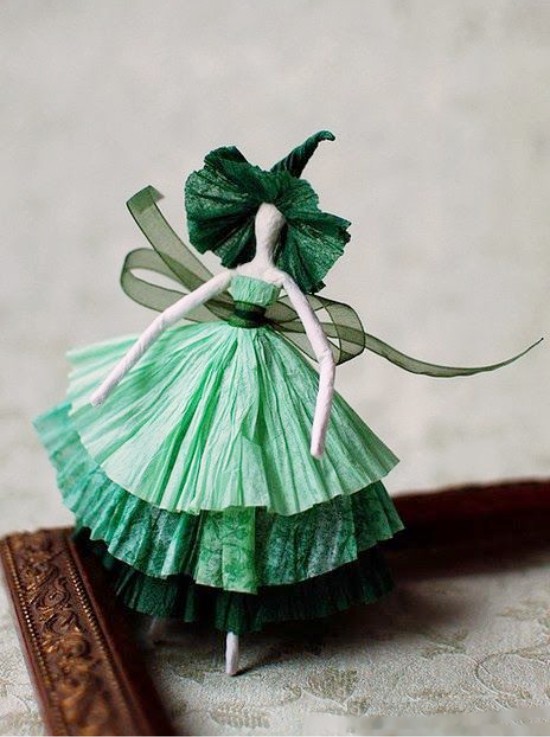
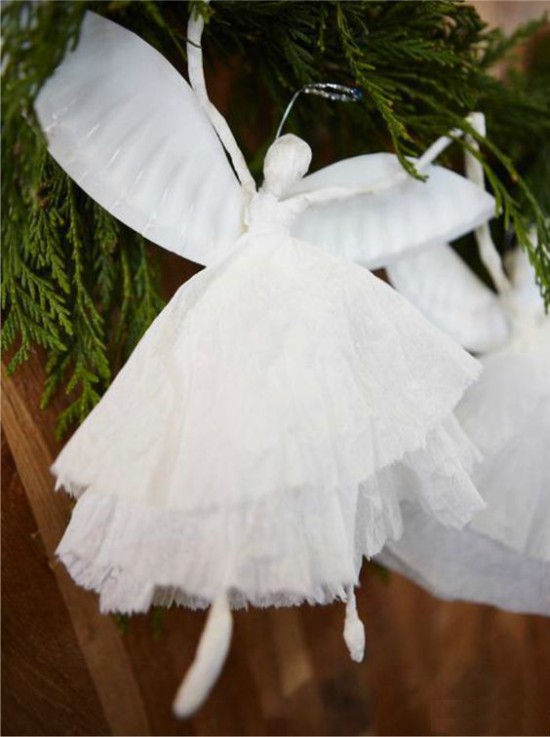
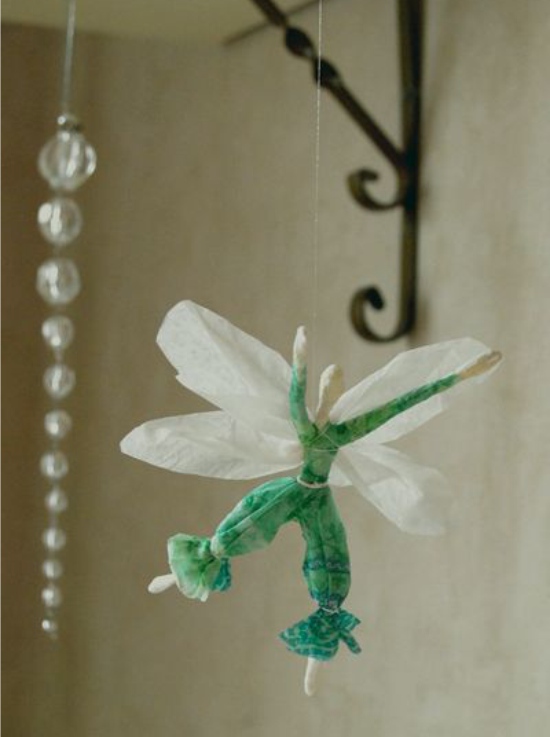
There are a lot of ways to use paper ballerina. For example, it can be hanged on a New Year tree, put on a shelf as a figurine, presented to a loved one, used as a doll, or from several ballerinas make a children's mobil as in the photo below.
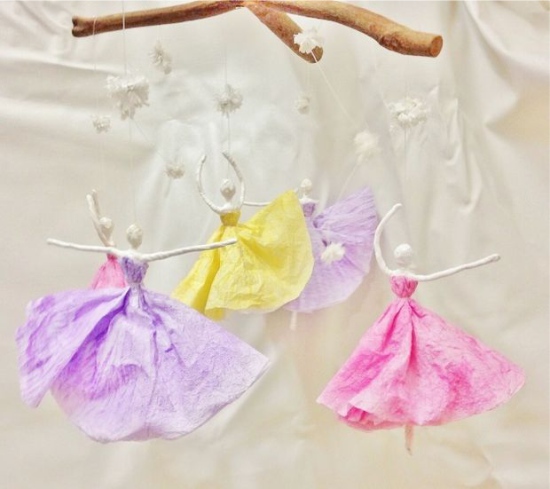
Mobiles with napkin ballerinas
What you need:
- Flexible wire about 1.5 m long;
- Monophonic napkins of any color (in this project napkins 30 × 30 cm are used);
- PVA glue and brush for its application;
- Needle with thread;
- Scissors.
How to do it:
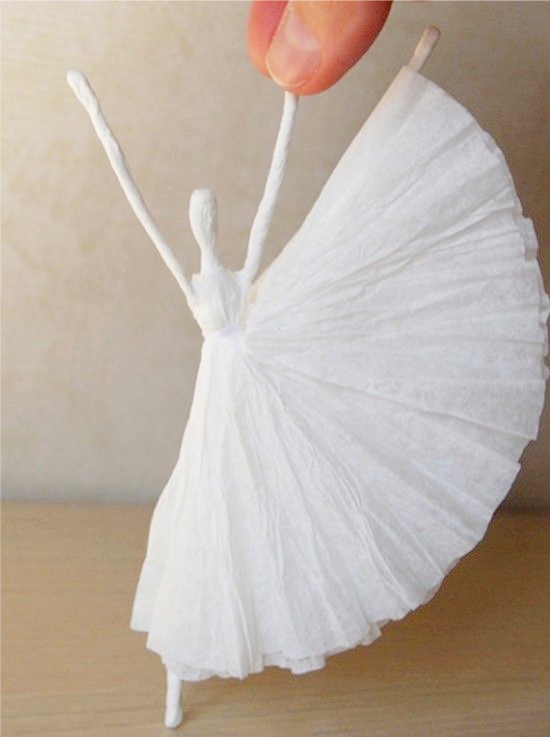
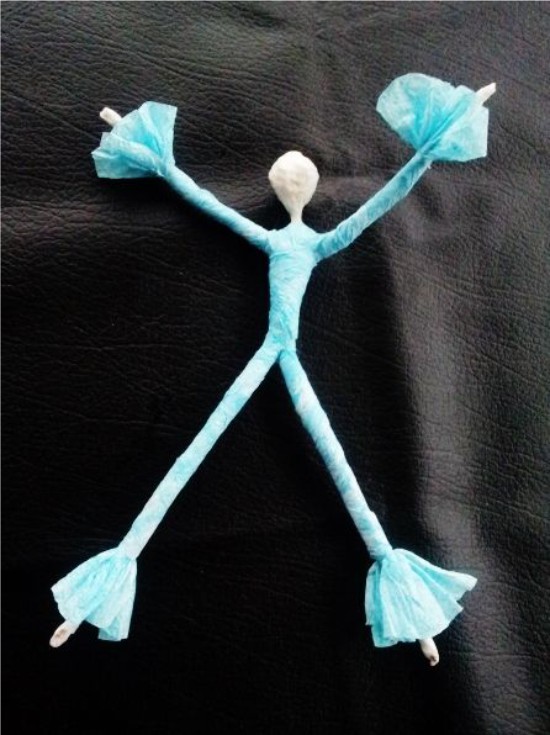
Step 1. First we need to make a "skeleton" of the ballerina from wire. To do this, divide your wire into two unequal parts: a long wire should have a length of 90 cm, a short one should be about 40 cm. You can make a ballerina of a different size, but keep in mind that her dress will be made of napkin, which means “skeleton” should not be too big. In this master class, the size of the "skeleton" is designed for a dress from a napkin 30 × 30 cm.
Step 2. Fold the long wire in half, twist it a little, and then form a small loop (see photo below). It will be a head. Spread the two ends of the wire to the sides to make your legs, then make a loop on each leg.
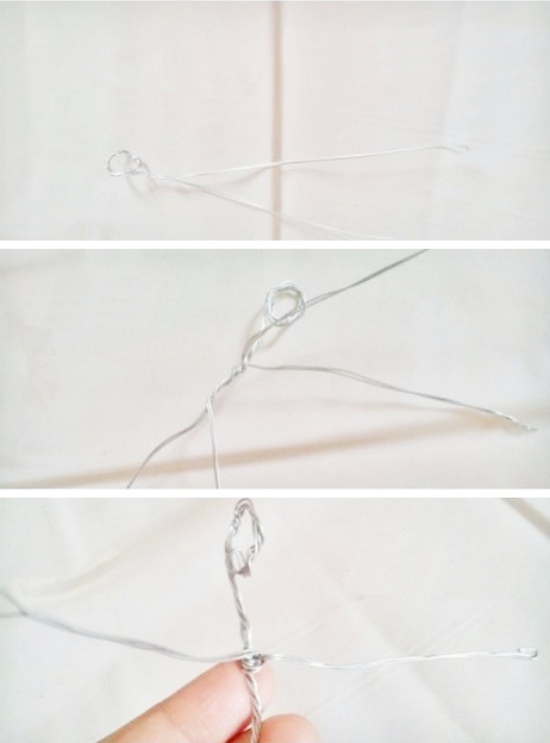
Step 3. To make the hands, fold the short wire in half, twist it, forming a loop at the ends. Then wrap and tie the resulting billet of a ballerina's body just below the neck. As a result, each hand will be 7-8 cm in length, and the "skeleton" will look something like the photo.
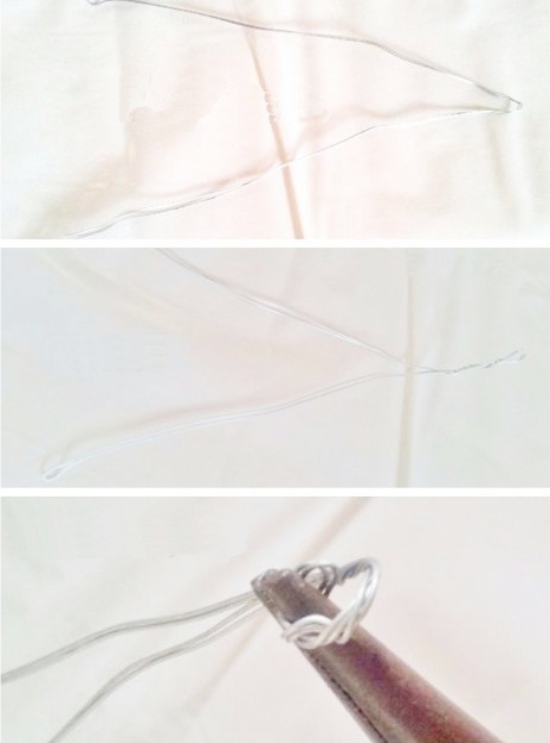
Step 4. Now let's do the "muscles". Cut or simply tear the napkins into narrow strips and begin to wrap the “skeleton” with them, lubricating the paper layers with white glue with a brush. When the figure is ready, leave it to dry.
Step 5. While our ballerina dries, you can make her a dress. Take a folded square napkin (that is, in its original form), fold it into a triangle, then fold the top of the triangle to the fold line and cut the workpiece along the curve as shown in the photo below.
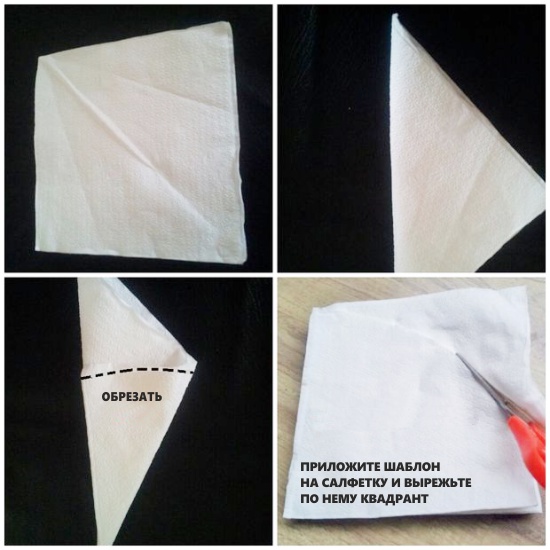
Straightening a napkin, you will see that it is cut in the shape of a quadrant (quarter of a circle).Attach the quadrant on the folded 2-3 napkins and cut out the blanks for the dress.
Step 6. Twist each blank so that the dress is soft and textured. If desired, at this stage napkins can be painted.
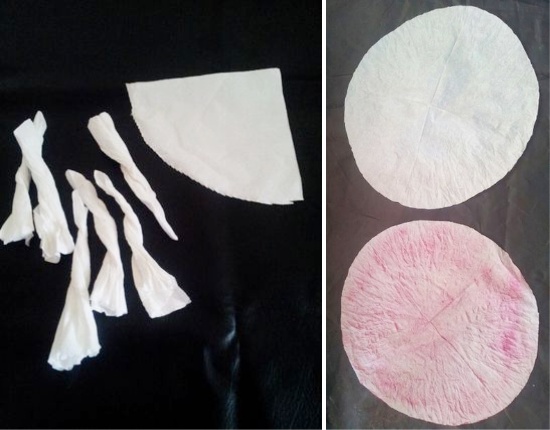
Step 7. Take 2-3 blanks for the dress, fold them as shown in the photo and at once cut off their tips (quite a bit!).

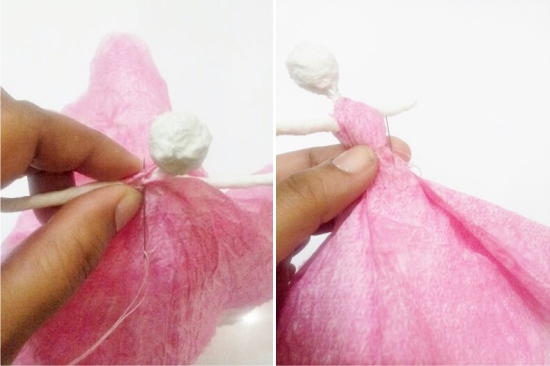
Step 8. Now put the dress on the ballerina through the hole, pull it up to the shoulders, then sew the back and front parts together. Hooray, almost done! It remains only to pull the waist with a thread / ribbon and tie / glue an eyelet to it (eg, to the back or arms raised to the top).
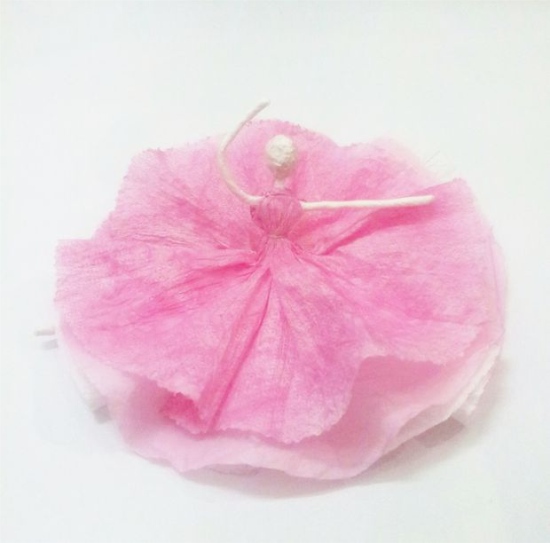
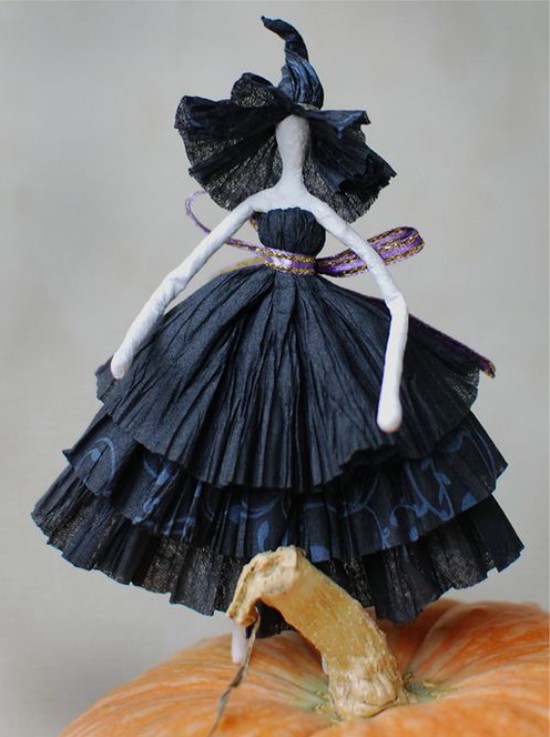
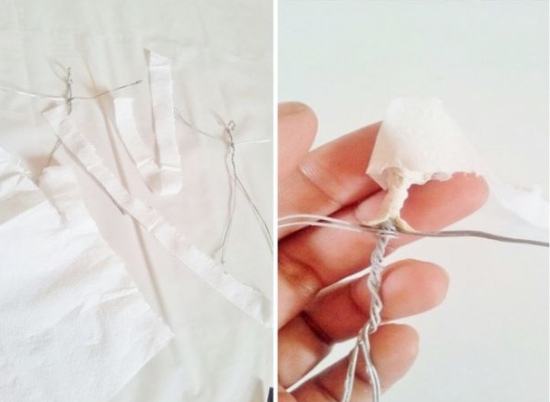
Experimenting with color, length and style of dress, as well as the position of hands and feet, you can create a whole collection of dolls unlike each other.
See also the material: DIY paper flowers - 4 workshops for beginners.
Master class 2. Volumetric balls of openwork napkins
Now we offer to make crafts from lace napkins in the form of voluminous balls that will be able to decorate any holiday, and especially the New Year and Christmas.
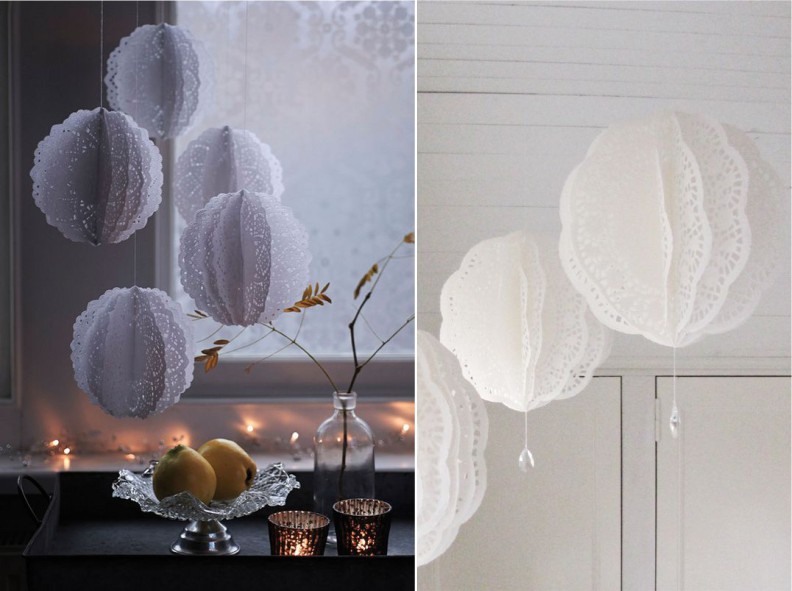
And still from lacy balls it turns out beautiful mobiles.

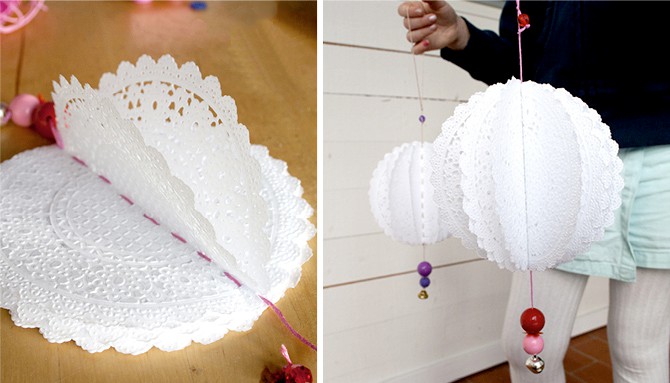
These small balls on the children's mobil are made of 4 napkins, which were previously decorated with colored paper.
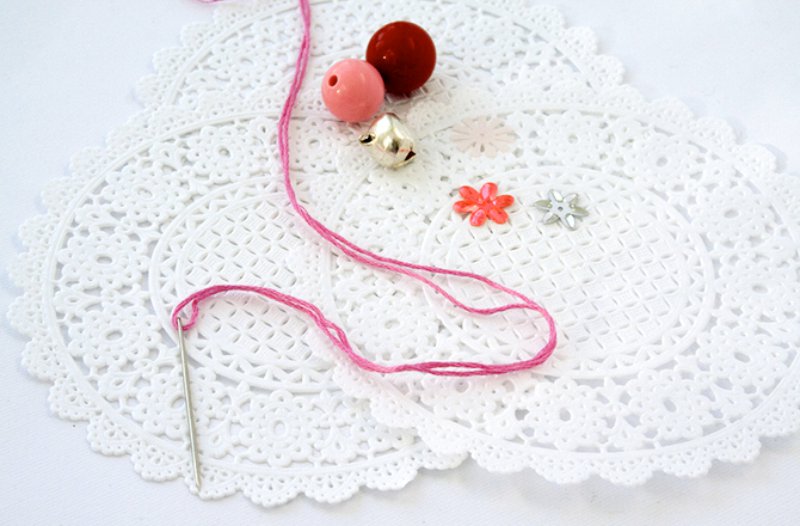
What you need:
- 10-12 openwork napkins for the cake (you can use openwork napkins of smaller diameter for making small balls, in this case you will need about 4-10 napkins for one ball);
- Thread (colored or white);
- Needle;
- Beads for decoration (optional).
How to do it:
Step 1. Fold 10-12 napkins for the cake in a stack and draw a line in the middle.
Step 2. Sew a stack of napkins straight along the line. Use clothes pegs to secure sheets for sewing time.
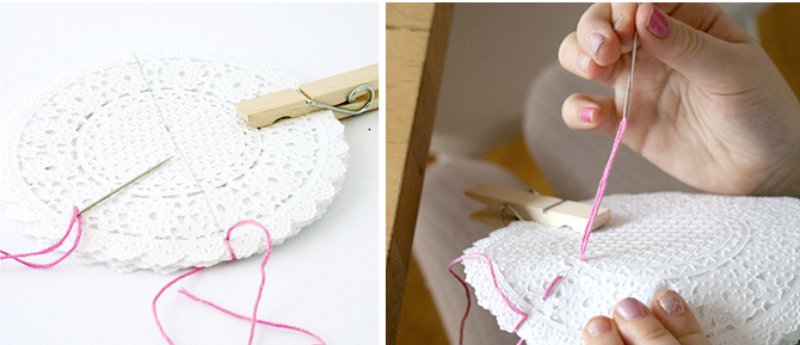
Step 3. Spread your ball.
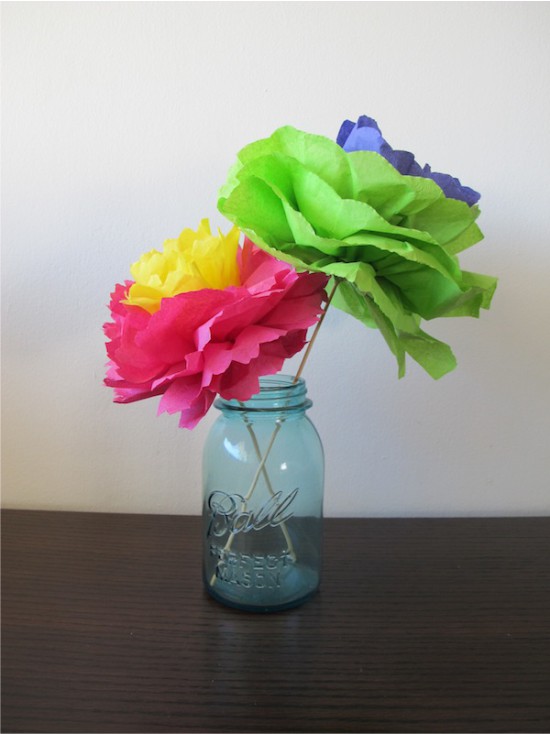
Master class 3. Lush flowers
These beautiful paper flowers can be put in a vase or pasted onto a wall, say, for birthday sweet table decorations, wedding or March 8.
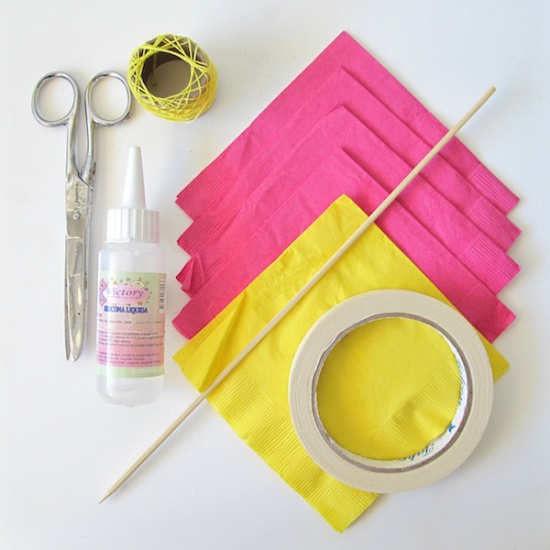
What you need:
- 4 napkins of one color;
- 1 Napkin in contrasting color;
- Thread or ribbon;
- Scissors;
- A wooden skewer or any other wooden stick;
- Glue;
- Scotch.
How to do it:
Step 1. Spread your napkins and stack them.
Step 2. Take a contrasting napkin in its original form (that is, folded into a square) and cut off its edges about 2.5 cm wide on the right and bottom side.

Step 3. Spread the contrasting napkin, put it on top of the rest, then fold the harmonica from the resulting stack. Squeeze the harmonica in the center and tie it with a thread.
Step 4. Give the rounded or reed shape to the harmonica ends with scissors.
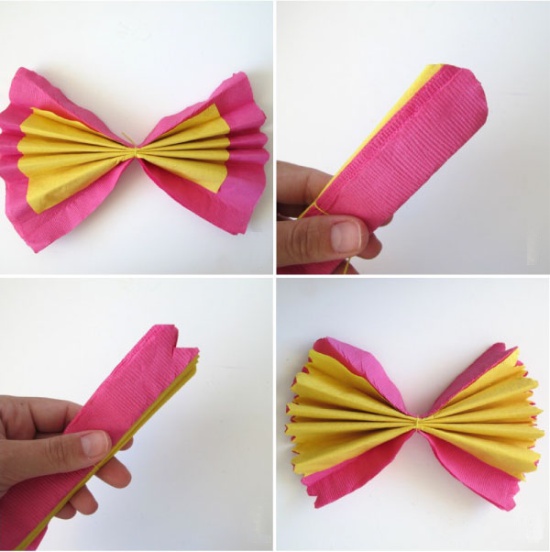
Step 5. Spread your harmonica so that it resembles a bow, then begin gently lifting each layer of paper toward the center to “fluff” the flower.
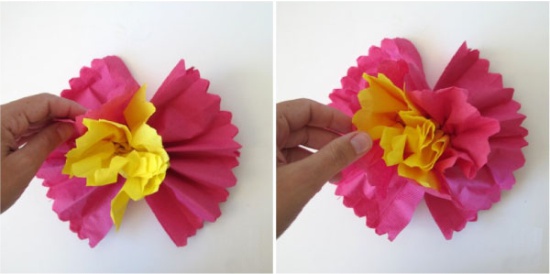
Step 6. Using a scotch tape, glue a wooden skewer-stem to the wrong part of the flower, then disguise the scotch tape with a piece of napkin. Hooray! Your craft is ready! By the way, if you paint the stems of flowers with green paint and supplement them with artificial leaves, the flowers will turn out to be more believable.
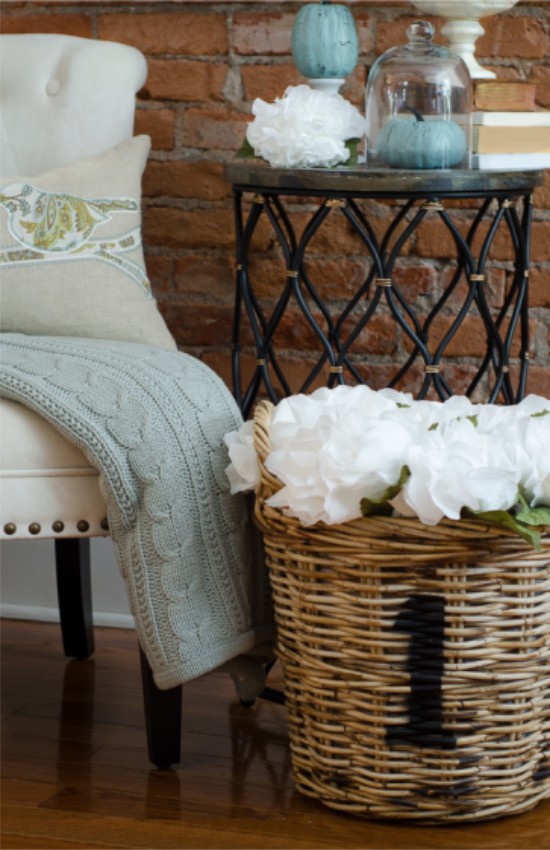
Who would have thought that the white hydrangeas in the photo are made of paper napkins. To make one hydrangea, make two flowers according to our instructions and glue them together or just use more napkins. It is desirable to cut the edges of napkins with waves, paint the stems and add them with large artificial leaves.
See also the material: How to make flowers from fabric - 4 workshops for beginners.
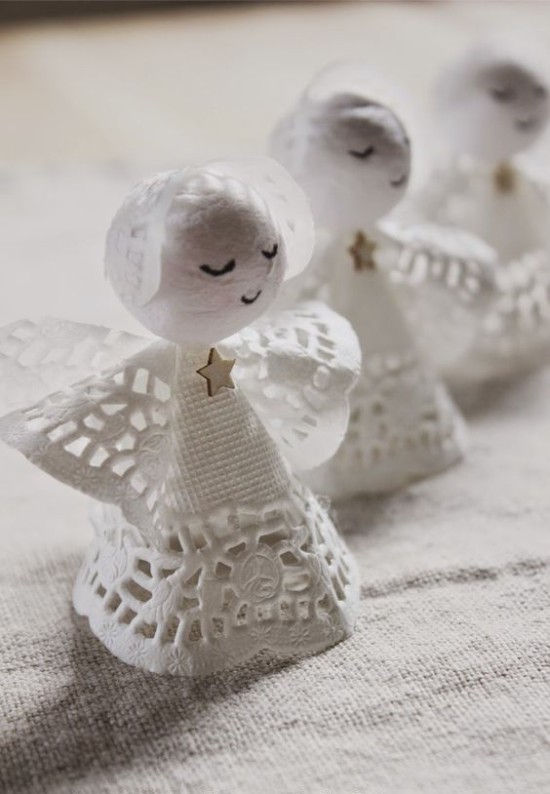
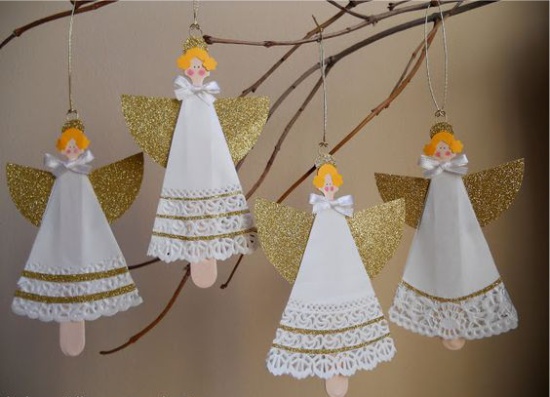
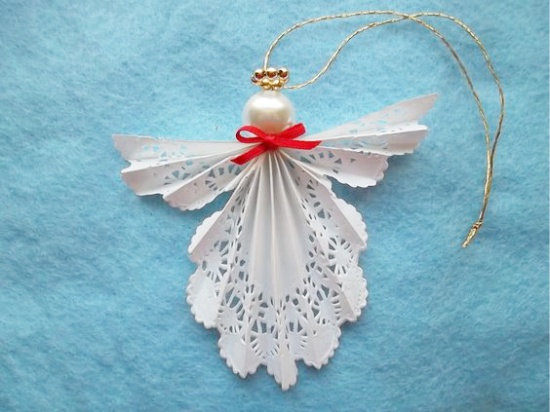
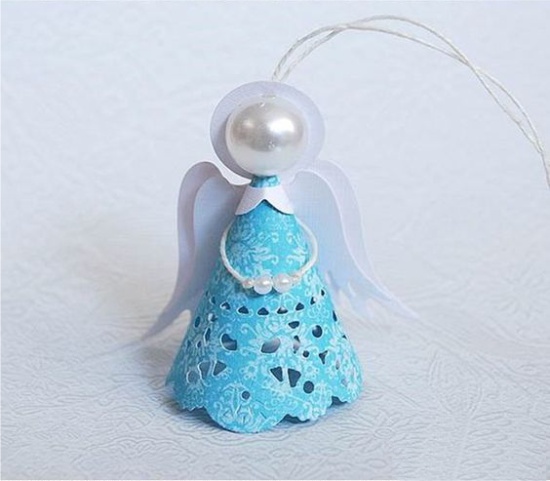
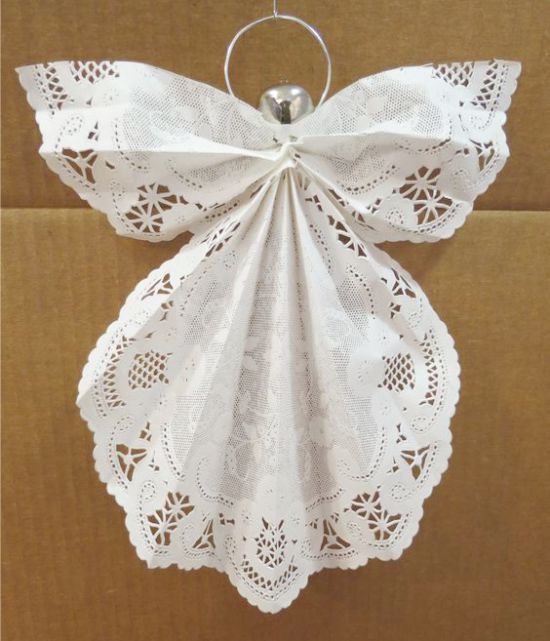
Master Class 4. Angels from openwork napkins
Another idea of New Year's crafts from openwork napkins is angels for decorating a Christmas tree or a festive table setting.
What you need:
- Openwork napkins;
- Scissors and stationery knife;
- Paper glue;
- Markers;
- A blue wire or pipe brush (sold in tobacco stores) in silver / gold.
How to do it:
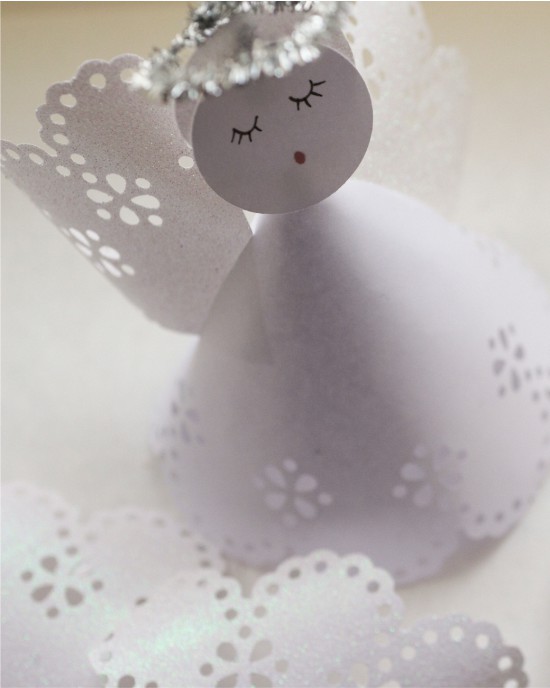
Step 1. First we need to make an angel body.To do this, cut the napkin in half so that you have two semicircles. Then, using a clerical knife, make small slots for the wings in one of the semicircles. Glue the edges of the semicircle to make a cone.
Step 2. Now let's make the wings. Take the remaining semicircle and cut it into two parts. Insert the resulting quarters into the slots on the back of the angel (corners).
Step 3. Finally, let's make an angel face. Draw two identical circles (diameter determine on the eye and to your taste), cut them, then on one of the circles draw closed eyes and mouth. The second circle will become a bonnet; you need to glue it behind the face and just above it. By the way, if you have shiny silver or gold paper, then it is better to cut the angel's cap out of it.
Step 4. The angel is almost ready, it remains only to make a nimbus. To do this, take the blue wire or a pipe cleaning brush, make a round loop at one end and tilt it slightly. Next, glue the angel's face to the wire and finally insert the wire into the top of the cone (body) and secure it with glue or tape (on the inside of the cone).
Here are some more ideas from handwork napkins in the form of angels, which are not difficult to do with your own hands even without instructions.
Angels of openwork napkins and plastic balls
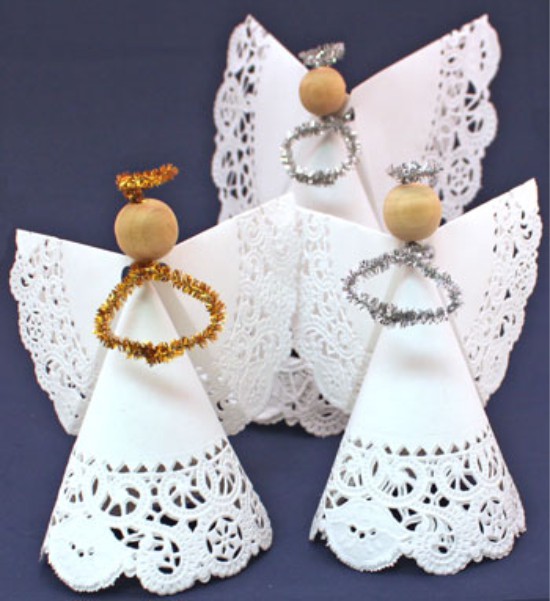
Crafts were made of openwork napkins, wooden beads and blue-colored wire
See also the material: Flowers from ribbons do it yourself - 6 workshops for beginners.
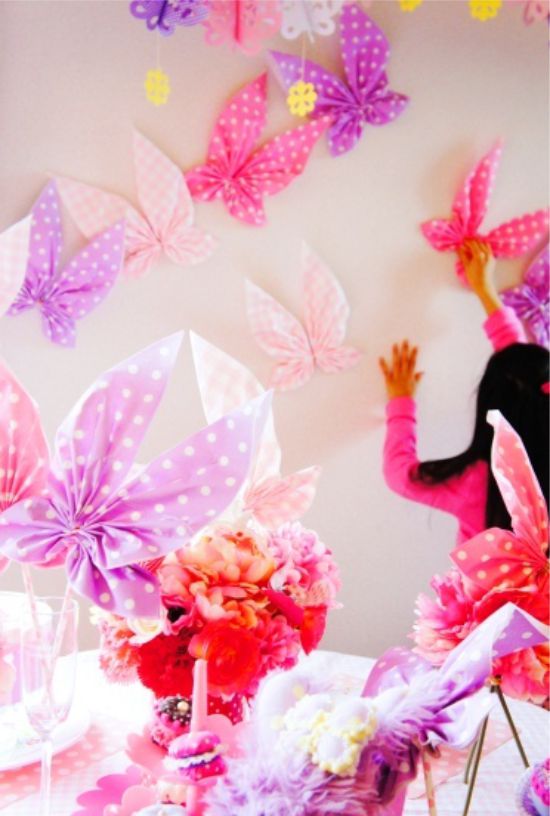
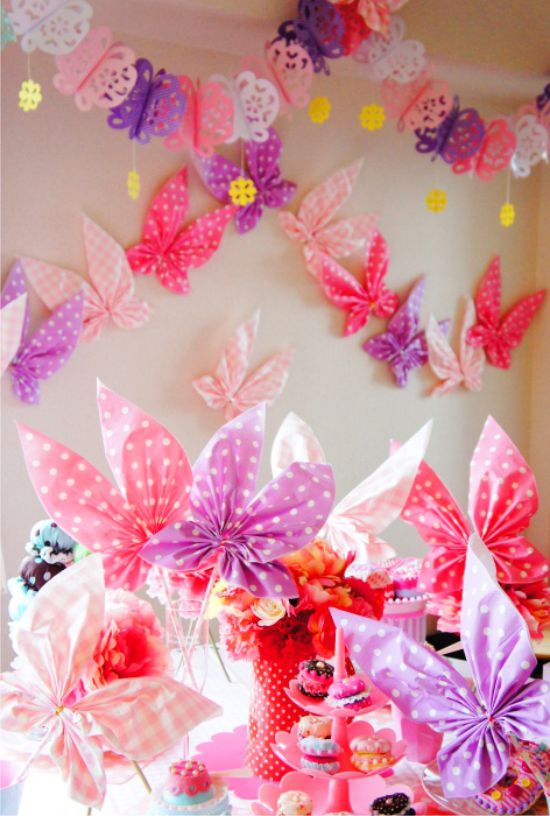
Master class 5. Butterflies to decorate the holiday
Now we will acquaint you with how to make such butterflies in a few minutes. This master class is so simple that even the smallest craftsmen will cope with it.

What you need:
- Two paper napkins;
- Wire (preferably in colored braid);
- Pin.
How to do it:
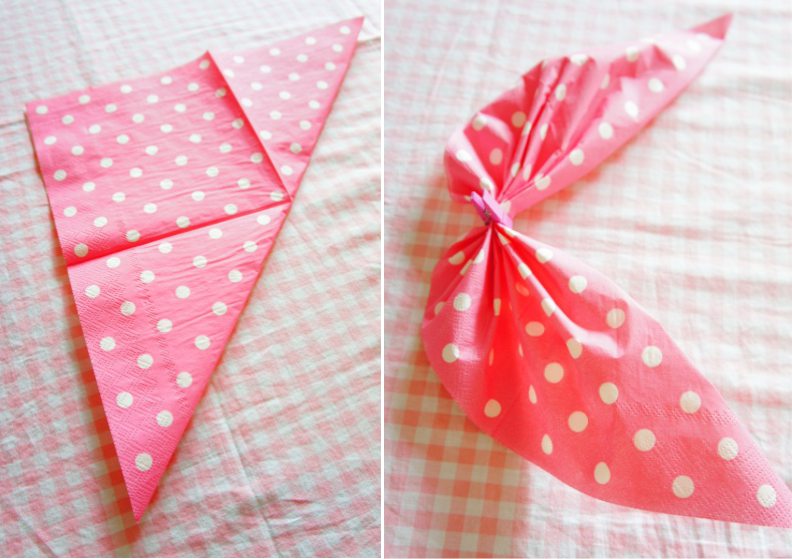
Step 1. First make the top pair of wings. To do this, fully unfold the napkin, then fold it with a triangle. Fold the triangle accordion and clamp the center of the clothespin.
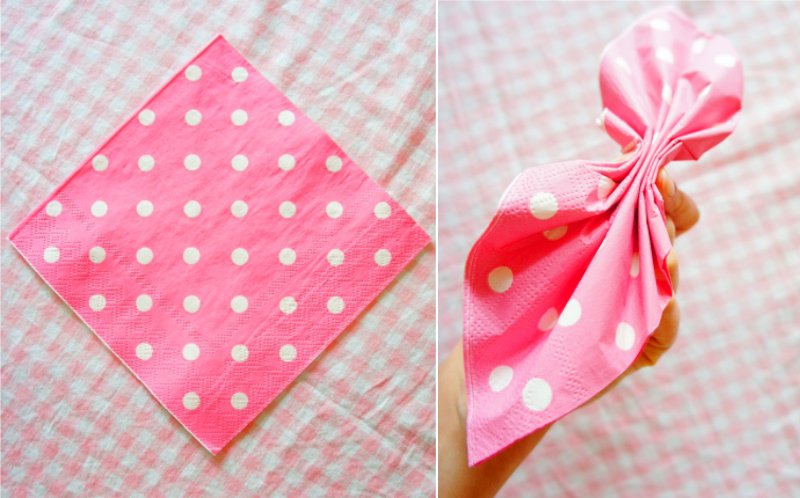
Step 2. Now we will make the lower wings. Take an unwrapped napkin and place it in front of you with a diamond. Fold the harmonica as shown in the photo.
Step 3. Connect the upper and lower wings with wire and remove the clothespin.
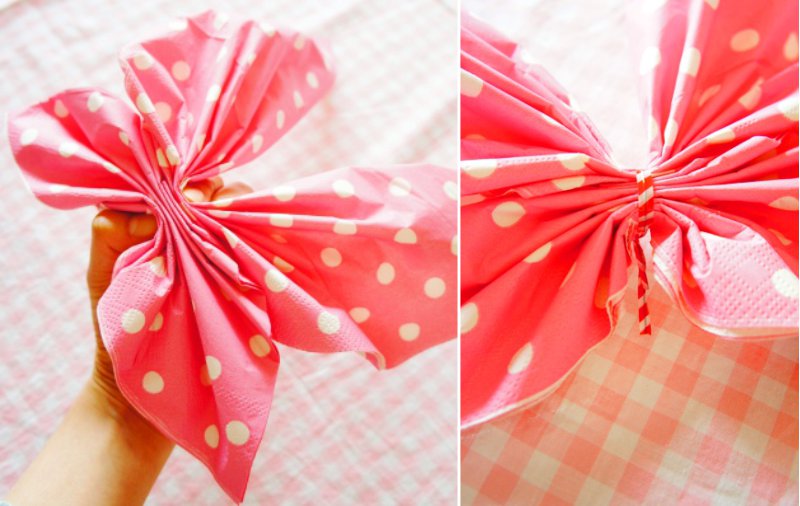
Step 4. Tie a straw over the two ends of the wire or use a butterfly tape to decorate the wall with a butterfly.

 (Rate the material! Already voted:13 average rating: 4,31 from 5)
- Crafts from pasta - 15 ideas for adults and children
- 12 wall decoration ideas for the kitchen
- 8 seashell ideas for beginners
- 6 workshops and ideas of autumn crafts for adults and children
- Topiary made from cones, acorns and chestnuts - photo-ideas and 2 master classes
- 10 ideas crafts from cereals for children and adults