Hand-made crafts in the form of roosters will be relevant not only during the holidays in the New 2017, but also every year at Easter. And even without them, it is simply impossible to imagine an interior in Provence, Country or Rustic style. In this material, we presented 6 step-by-step master classes on how to make cute crafts in the form of roosters to decorate a house, a Christmas tree or a festive table from improvised and even junk materials.
Master class 1. Candy in the shape of a rooster
Looking at this elegant candy, it is difficult to imagine that it can be made with your own hands, and even from ... cardboard boxes for eggs. In fact, to make such a handsome man does not require much time or the skills of an artist-sculptor. By the way, even a child can do most of the work, so this is a great idea of Christmas crafts for a school or kindergarten.
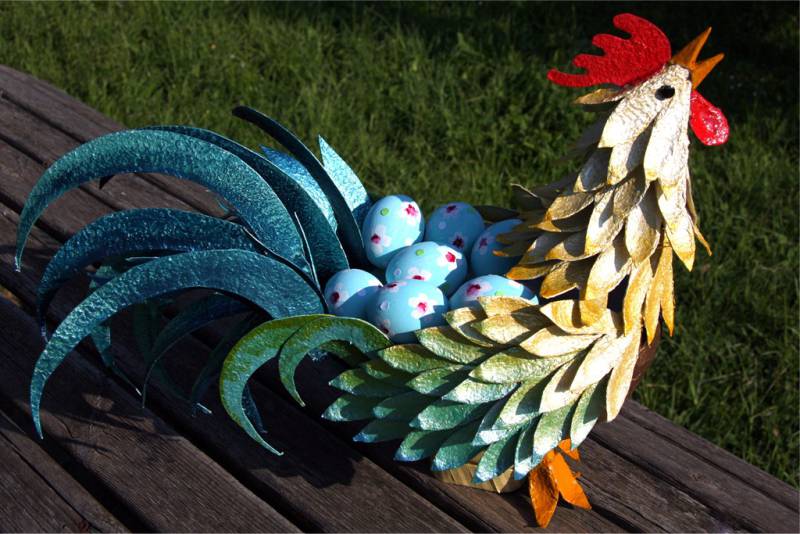
With such candy can you decorate a festive table and surprise your guests. However, it can be filled not only with candies, but also with tangerines, small presents for contests, and prediction notes. And the rooster can be put under the Christmas tree along with a gift.
Materials:
- 7 packs for a dozen eggs;
- Scissors;
- Acrylic paints and brushes;
- Hot glue gun;
- PVA glue (not less than 250 g);
- Balloon;
- Old newspapers;
- White paper.
Instruction:
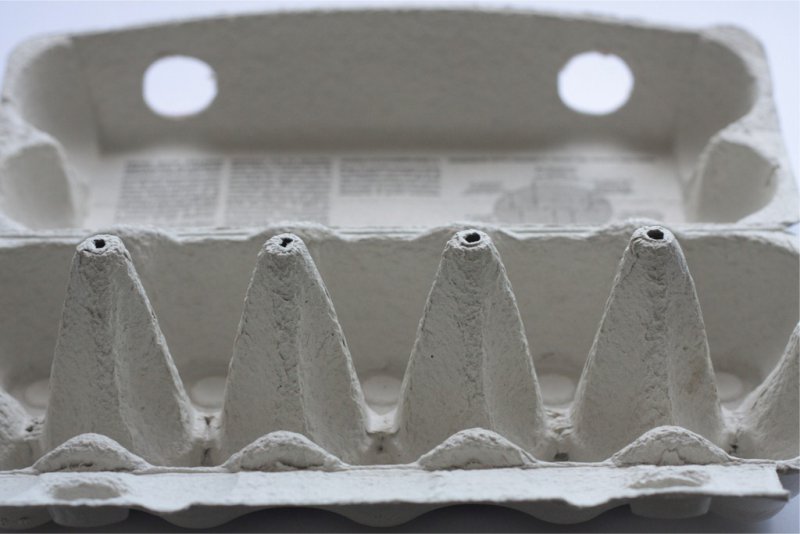
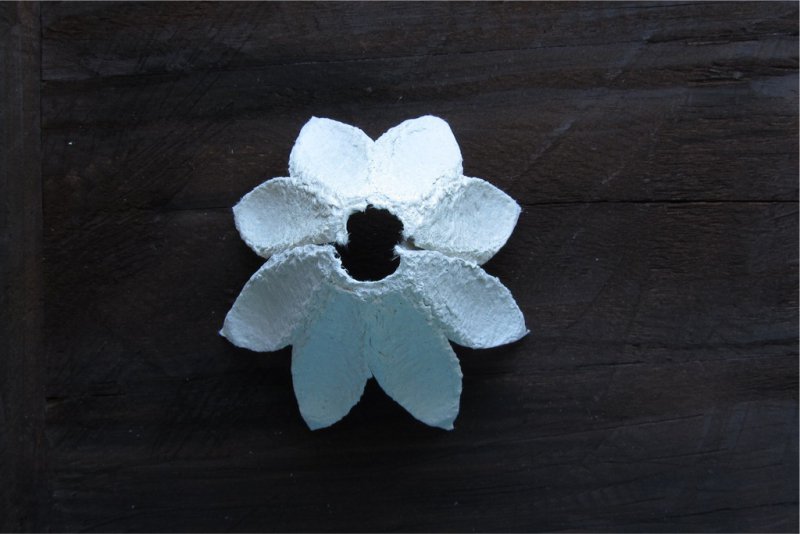
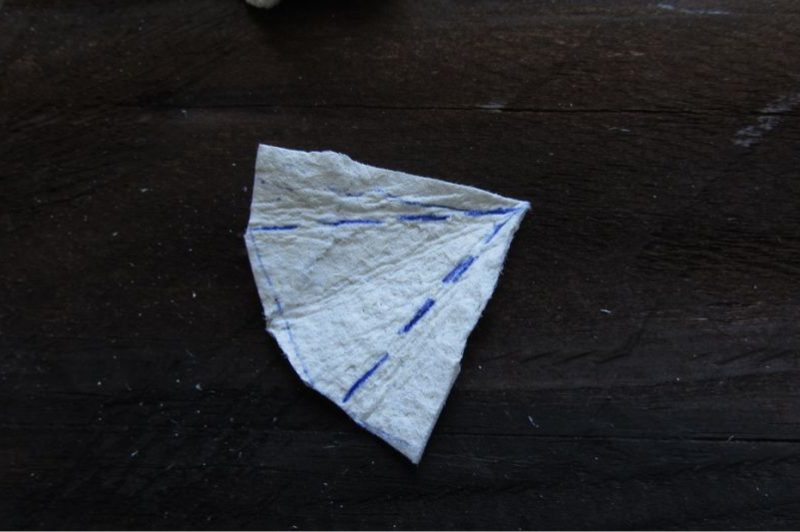
Step 1. Cut out the cones located in the middle of the tray, then cut their sides into feather-leaves. Each cone should have 4 feathers.
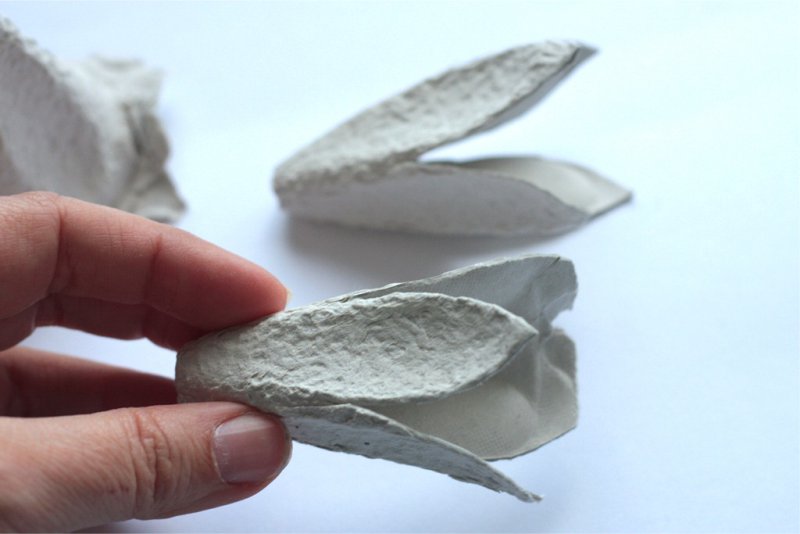
Next, cut each cone between the two petals to the very base as shown in the photo below.
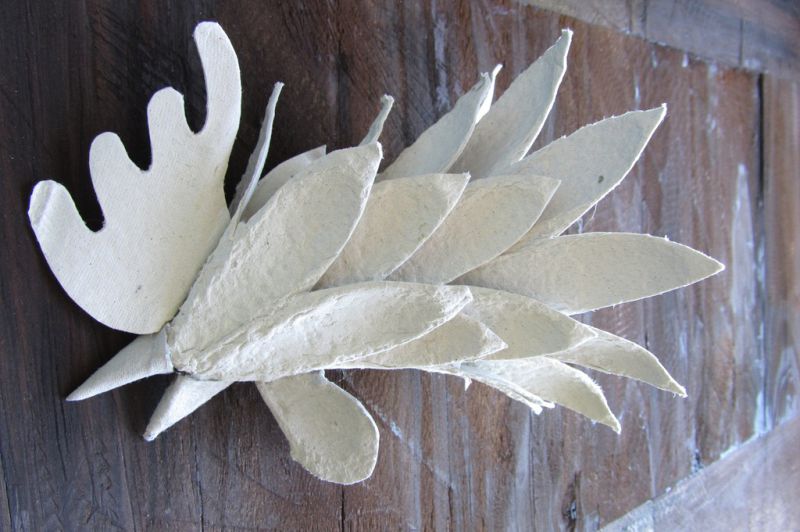
Step 2. Now we need to make blanks of the head and throat of a rooster on the principle of building feathers to cones: the head will consist of 5 feathers, the second cone (throat) - 6 feathers, the third cone - 8, the fourth - 10, the fifth - 12 feathers And finally, make the sixth billet, but in the form of a fan of 8 feathers, and not in the form of a cone, since this part will cover the beginning of the backrest. To build feathers, use scotch tape, sticking it from the inside of the blanks.
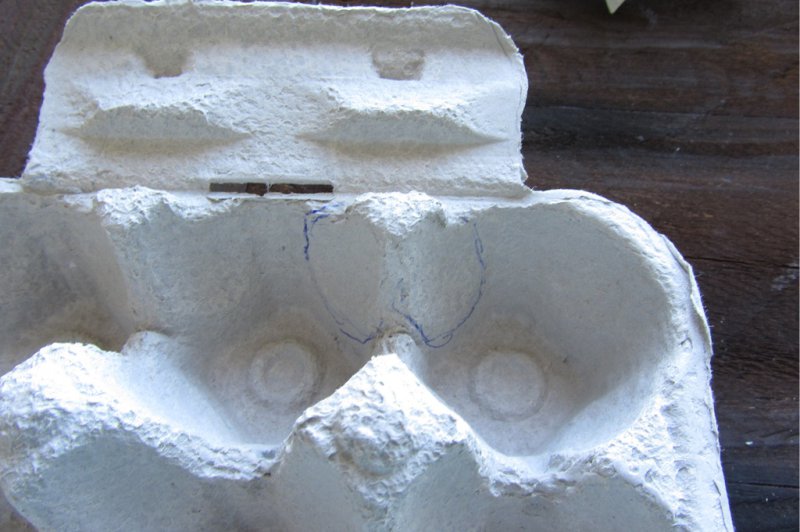
Step 3. For now, lay down the cones and cut out the beak, comb, and beard of the rooster. Scallop just need to draw and cut. For the manufacture of small beards need to cut the workpiece from the two sides of the adjacent cells of the tray (see photo).
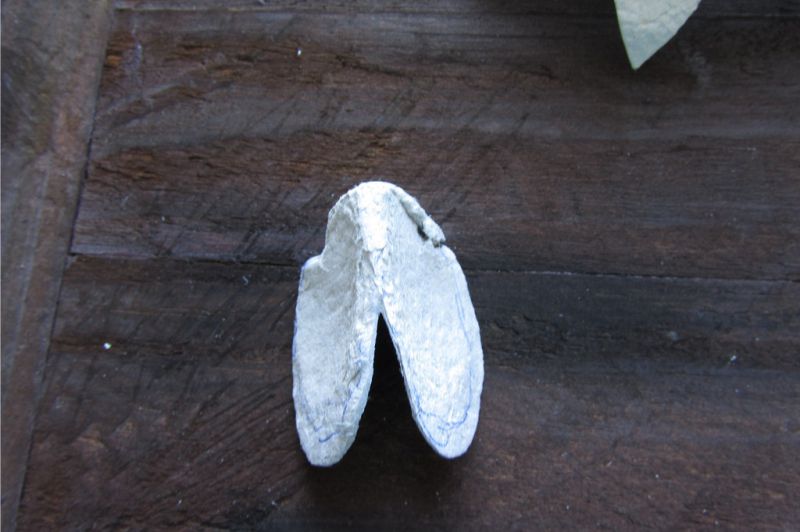
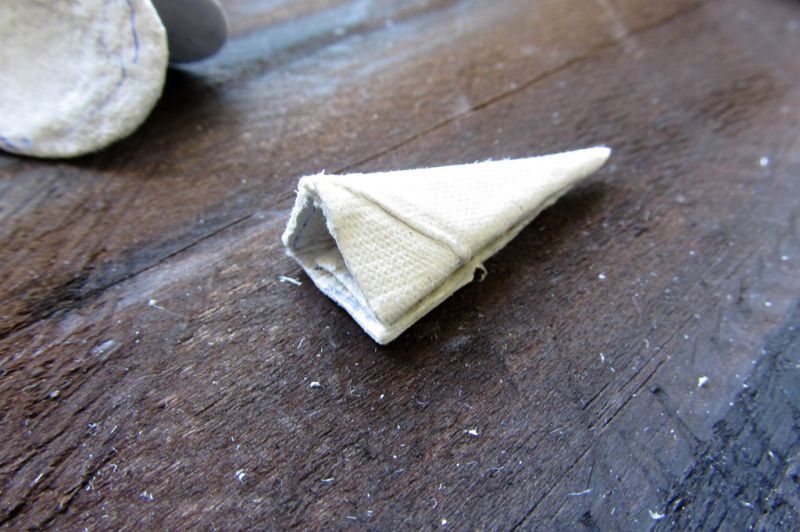
The following two photos show the principle of making the beak of our crafts. Please note that the beak consists of two cones, because our cock must crow!
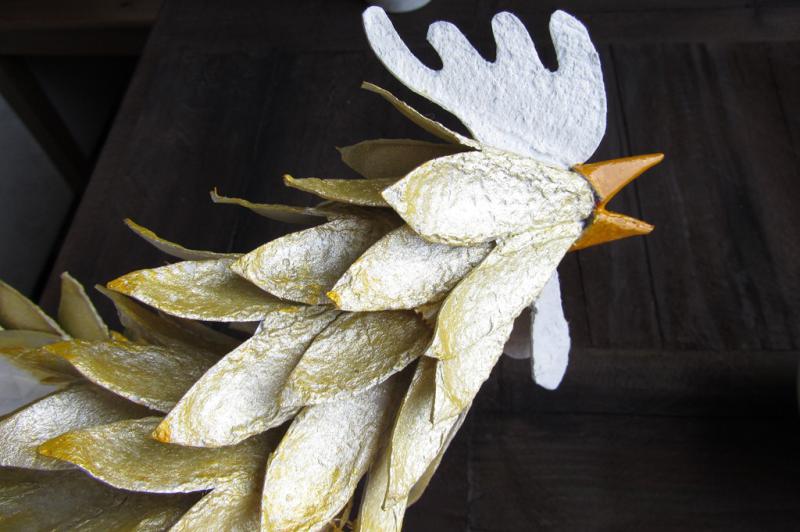
Step 4. Now we begin to form the shape of a rooster, namely the head and throat. Glue all the cones, starting from the smallest and ending the largest with a hot glue gun. Glue also beak, beard and scallop.
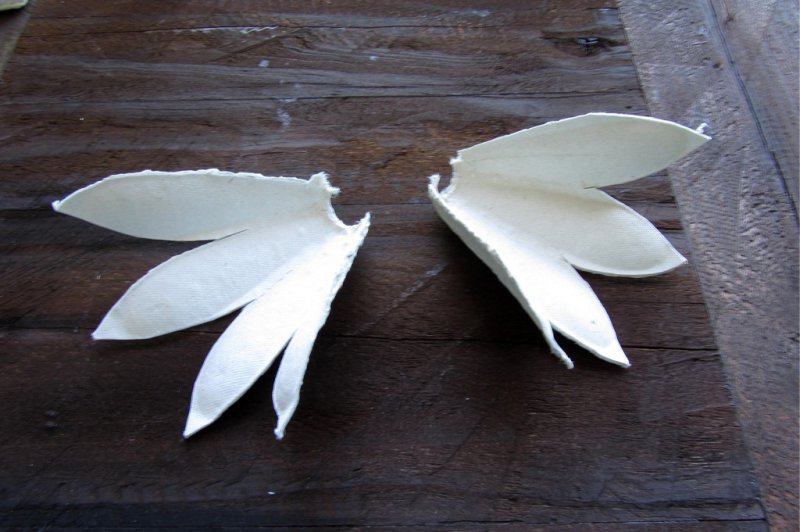
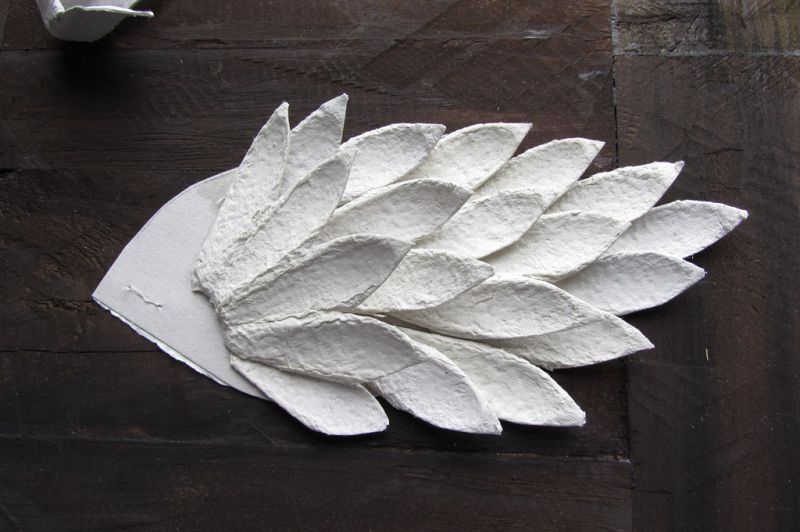
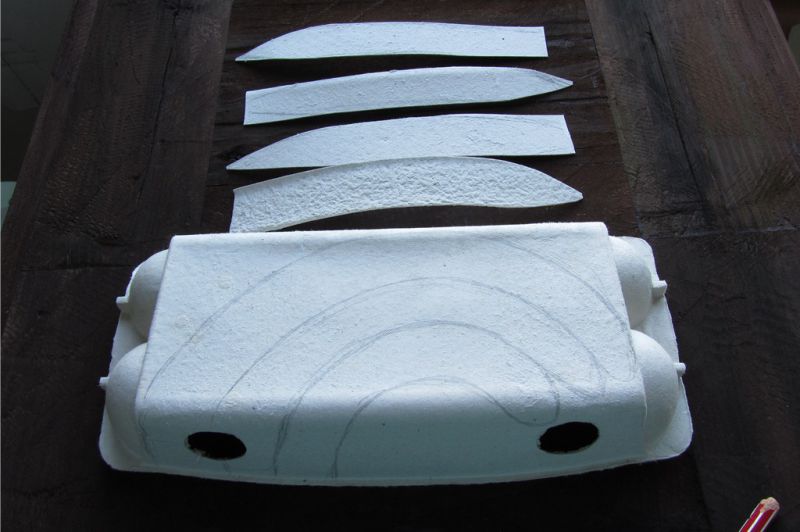
Step 5. Draw and cut two blanks in the form of wings 15 cm long, then with a glue gun, cover them with feathers ... from the same cones.
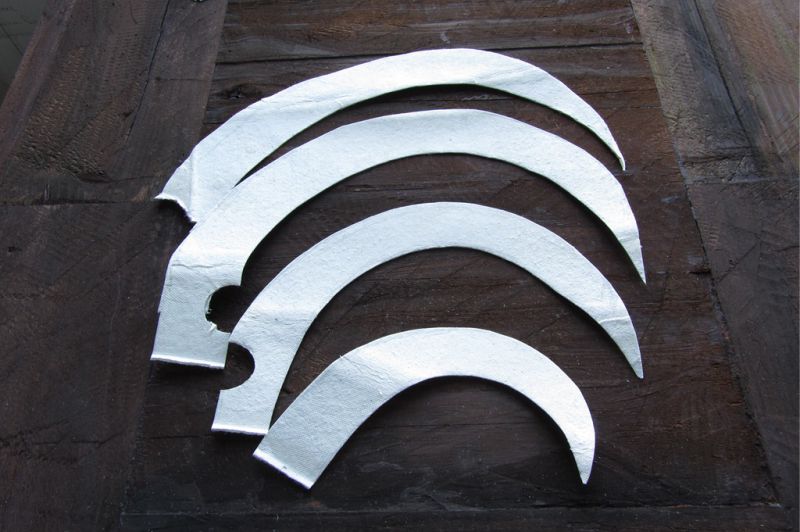
Step 6. Cut out the feathers for the rooster's tail from the lids of the trays (you should get 4 feathers from one lid).
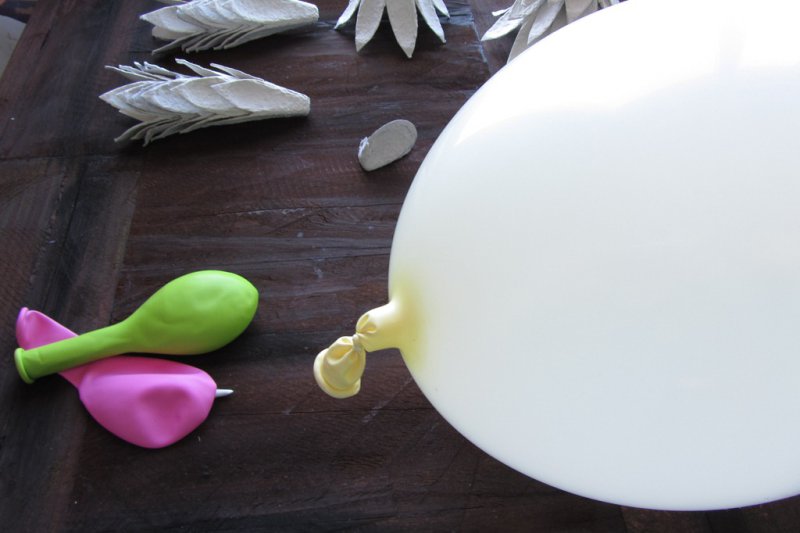
Step 7. Let's move on to making bowls for papier-mâché sweets:
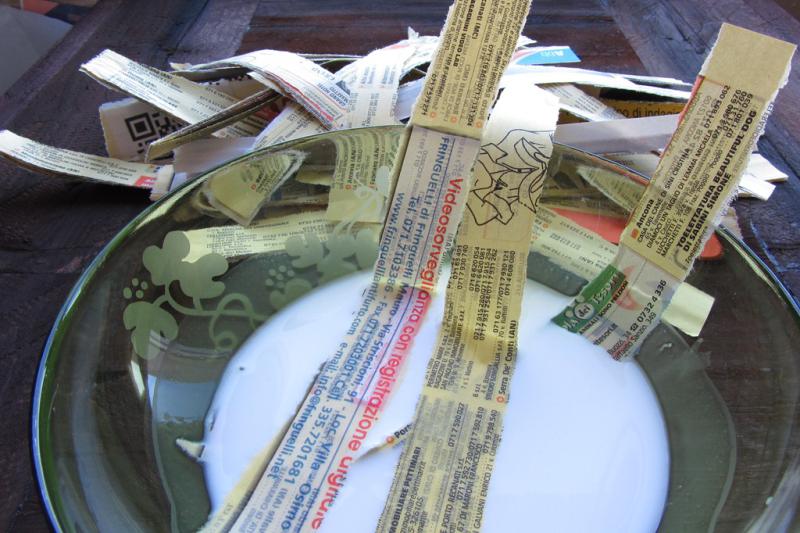
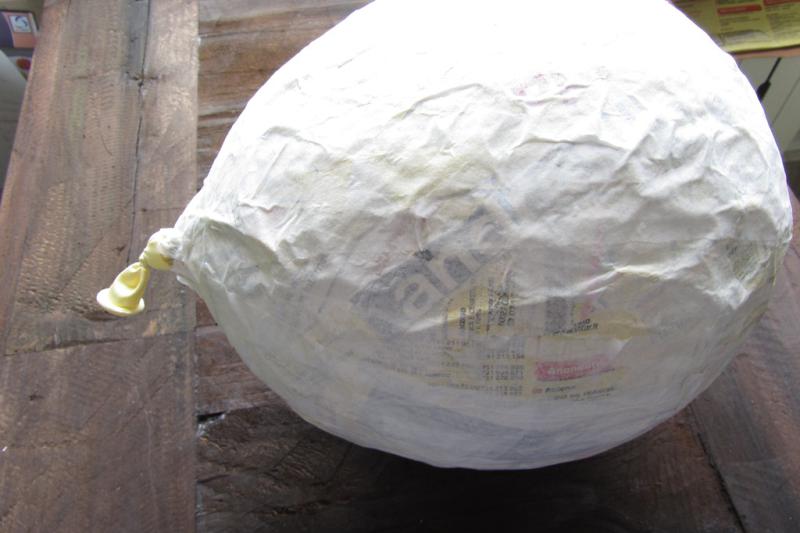
- Inflate the balloon and cut strips of white office paper and strips of old newspapers.
- Tightly cover the entire bead with strips moistened with PVA glue (the glue can be slightly diluted with water). The first and last layers must be white. There should be at least 4 layers of paper.
- The next day, when the paper is completely dry, burst the ball and cut the resulting "egg" into two unequal parts (one half should be slightly larger). Then put a small part in a large and glue to make a bowl strong.
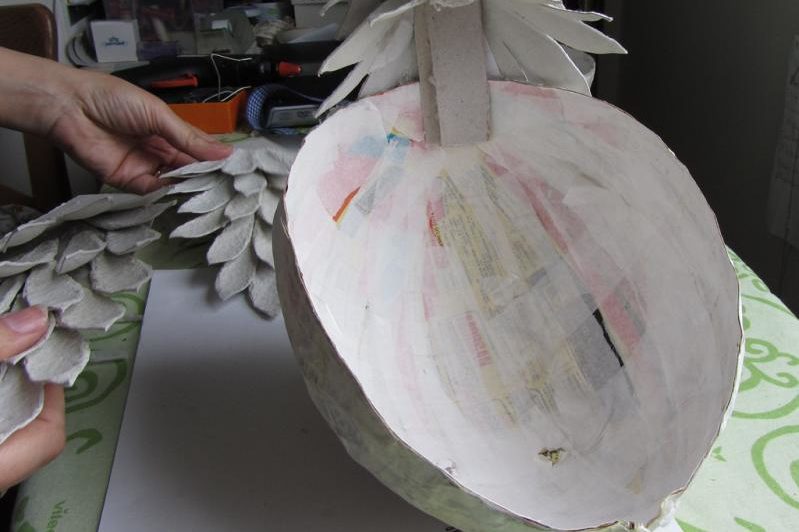
Step 8. Attach the head of the rooster to the belly with a cardboard backing (on the inside). Using hot glue, glue the wings and tail to the body of the rooster. Our craftwork in the form of a rooster already looks surprisingly believable!
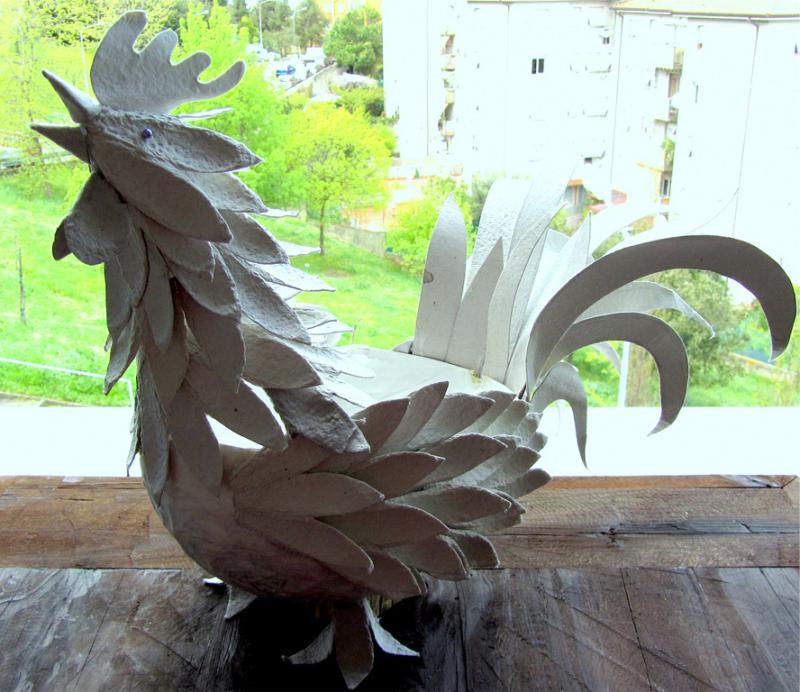
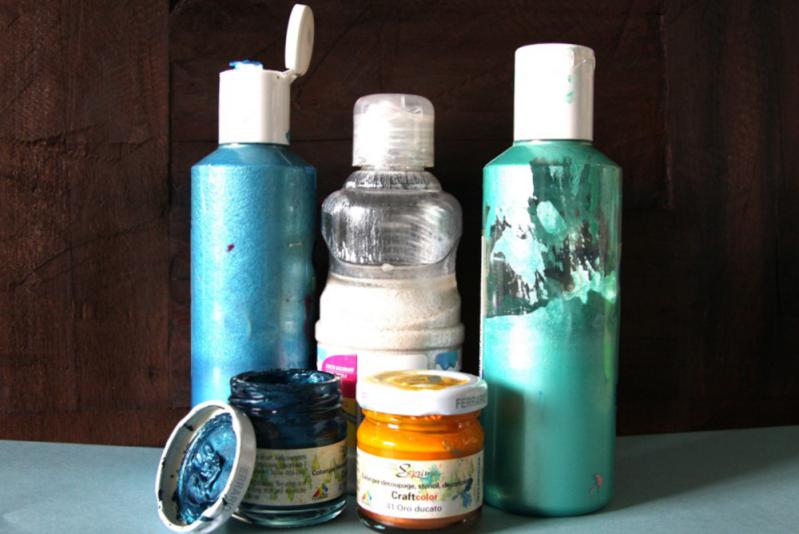
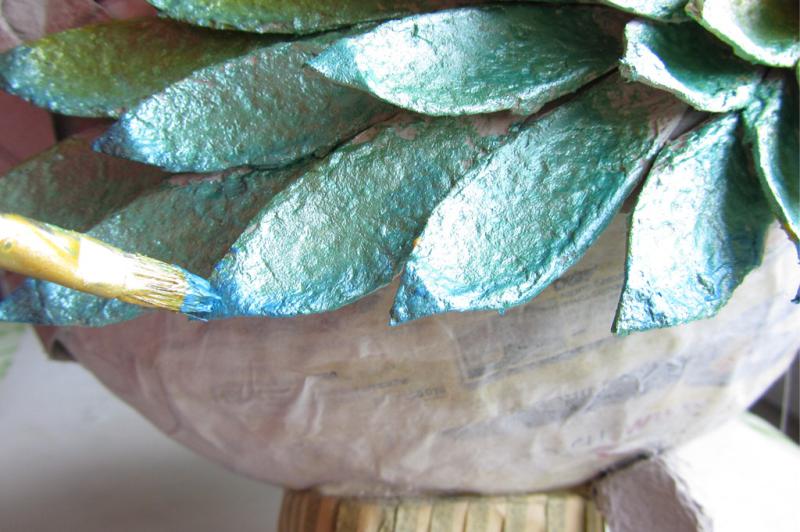
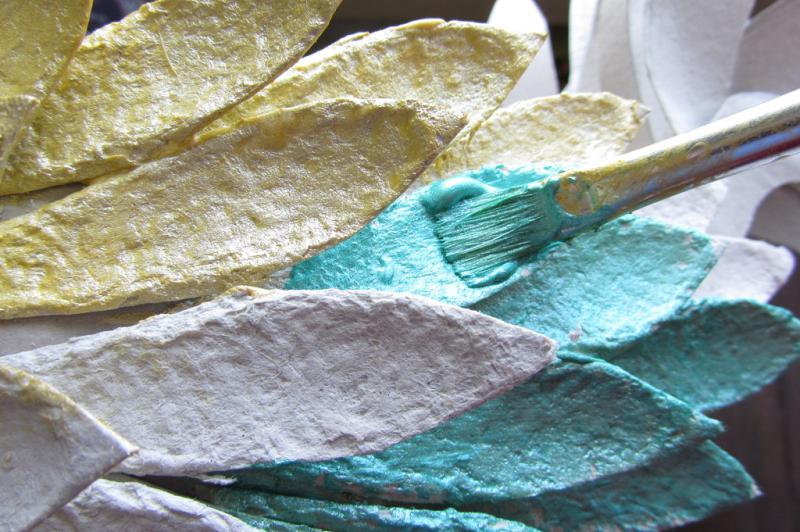
Step 9. It is time to color candy. You can choose the shades of paint to your taste, because the roosters are different and it is not at all necessary to achieve complete realism. Perhaps your rooster will be beautiful in all gold plumage? In the same project were used brilliant colors for paws, beak, scallop and beards, and for dyeing feathers - mother-of-pearl.
Pay attention to the fact that the color transitions on the cockerel are smooth: from pearl white to golden and then to green.
Step 10. In order to ensure greater stability of your candy, stick to the bowl some square support and, of course, two legs made of cones with 3 petals. Finally, paint the paws, fill the bowl with candy and put your handsome on the most prominent place. Now he is ready to cheer up all the guests at the New Year or Easter table!
Master class 2. Christmas decorations in the form of roosters
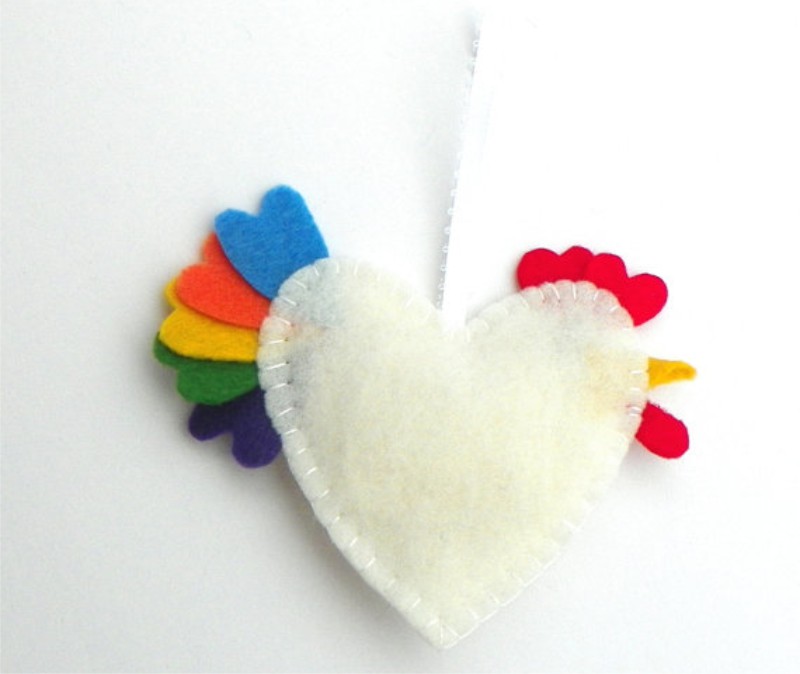
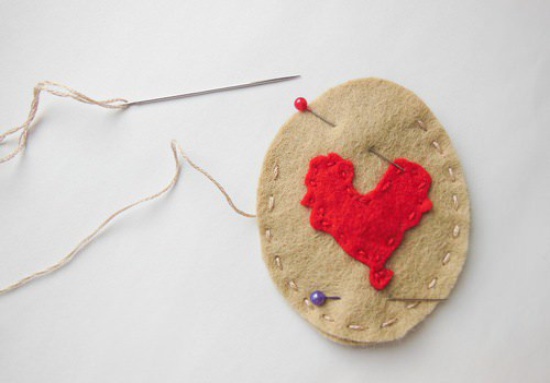
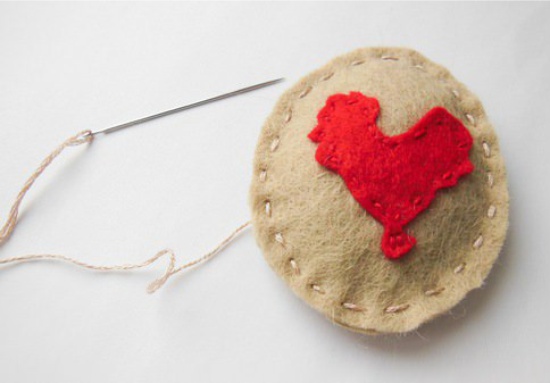
In the upcoming 2017, the tree must be decorated with ornaments in the form of roosters. With your own hands to make Christmas decorations easier and better from felt, because it is so bright, affordable and easy to work.
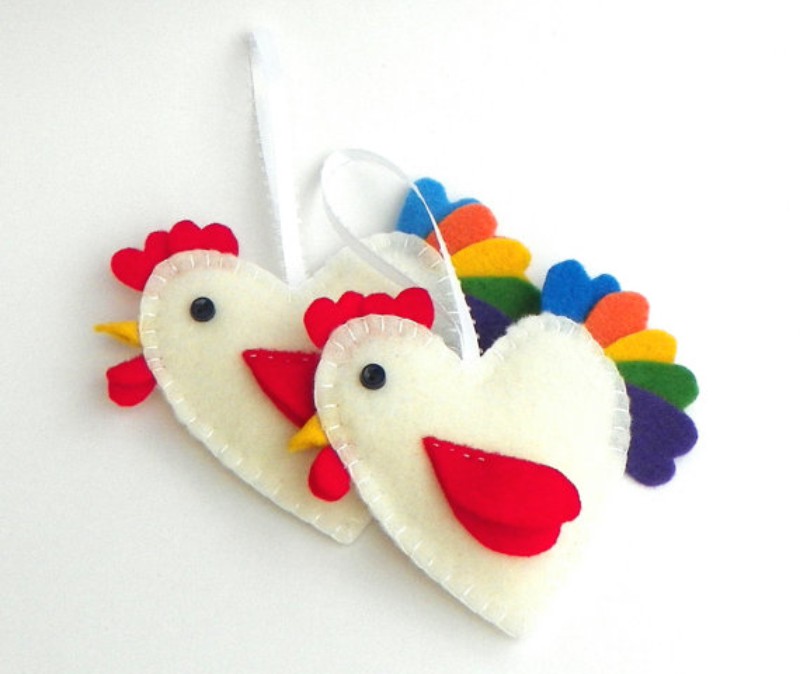
And here is a video tutorial on how to make crafts in the form of heart roosters with your own hands.
In this video you can see the general principle of making felt articles in the form of cockerels.
The following is a master class in pictures for making not New Year's, but Easter "cock" decoration of felt with your own hands.
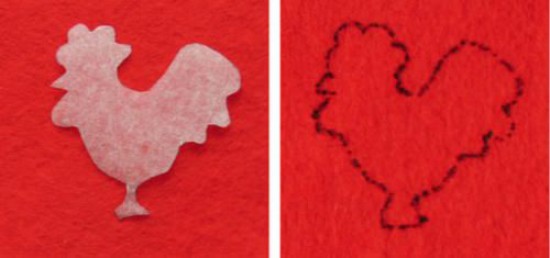
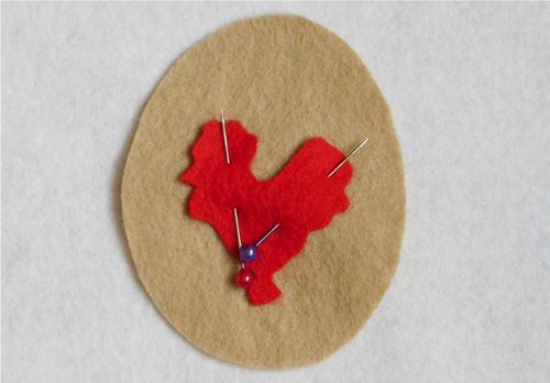
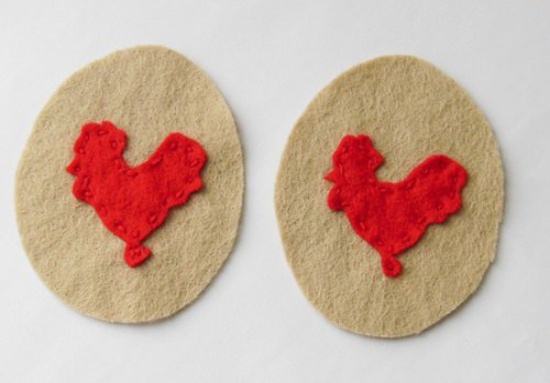
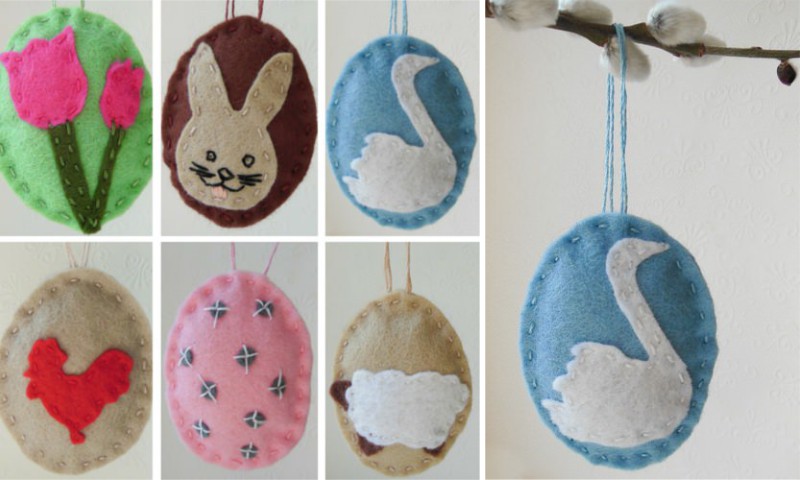
In addition to the rooster egg, make a few more felt hangers and decorate willow branches with them for Easter.
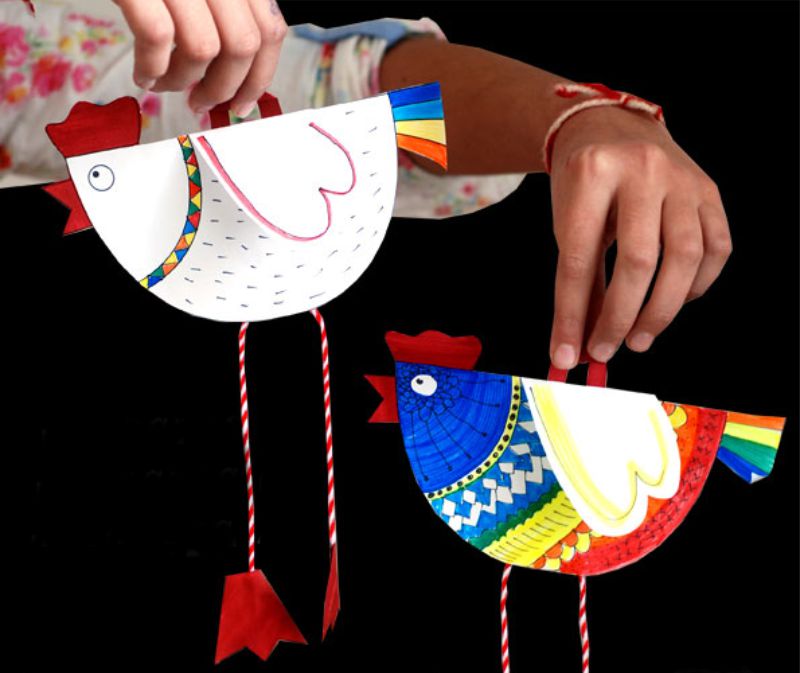
Master class 3. Paper roosters with hanging legs (for children)
But the idea for children's crafts on the theme of the symbol of 2017, which can be made for the school / kindergarten, and to decorate the Christmas tree or walls of the house.
Instruction:
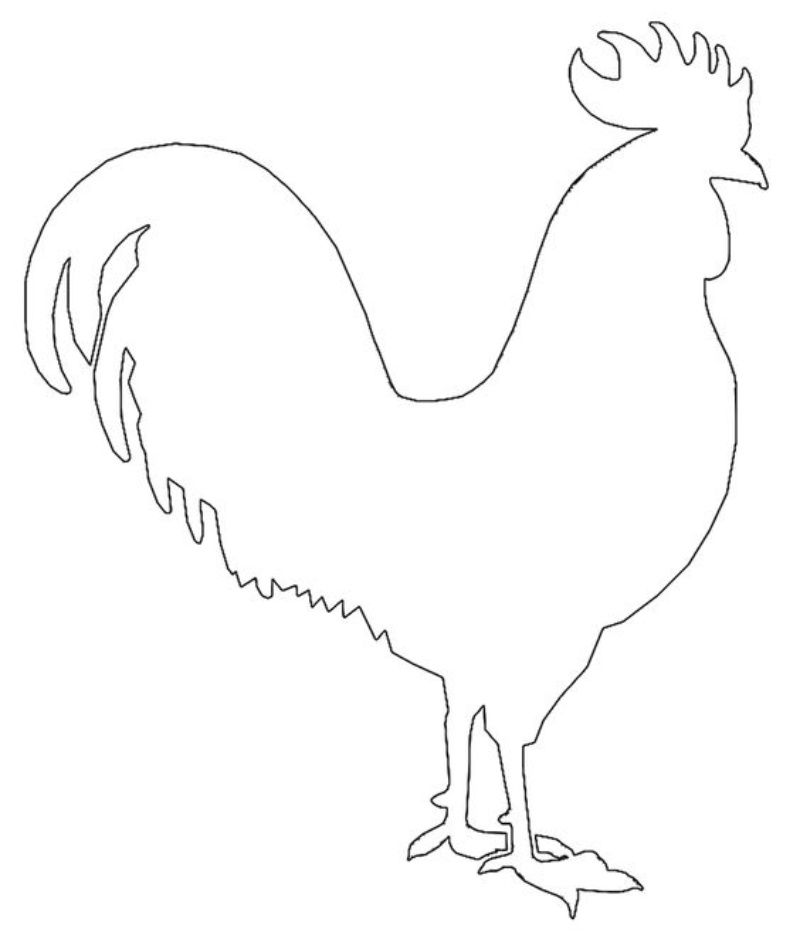
Step 1. Download and print the template, then cut out all the details.
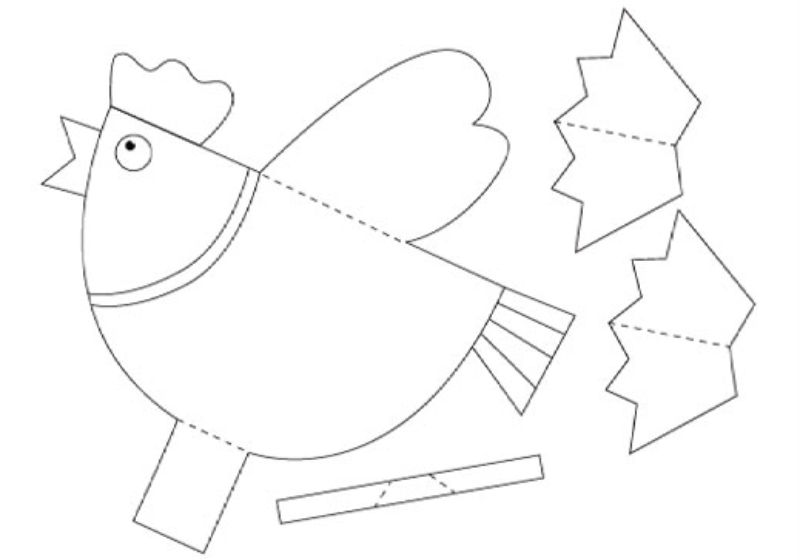
Step 2. Cut one rope, glue the legs to its ends - these are the legs.
Step 3. Put the legs on the bottom loop, bend it along the dotted line and glue it to the body.
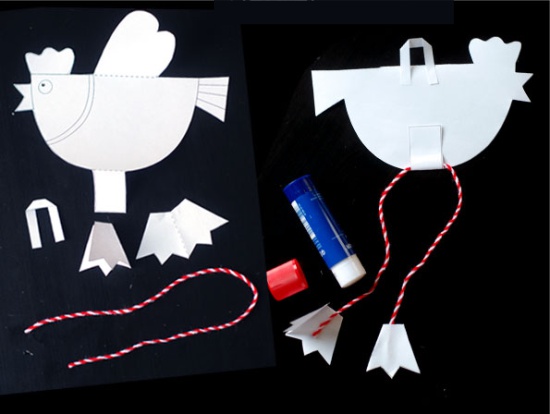
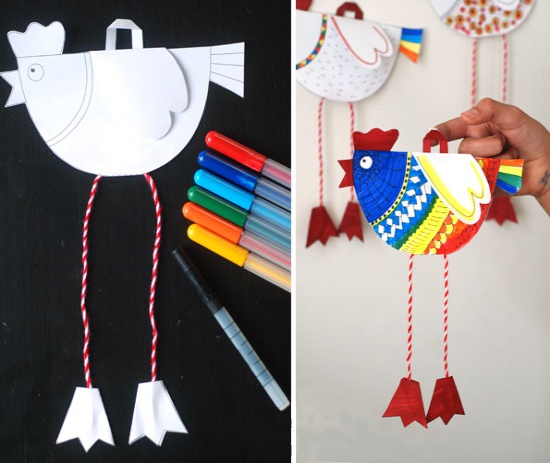
Step 4. Glue the top loop.
Step 5. Well, that's all, now it remains only to color the cockerels to your taste.
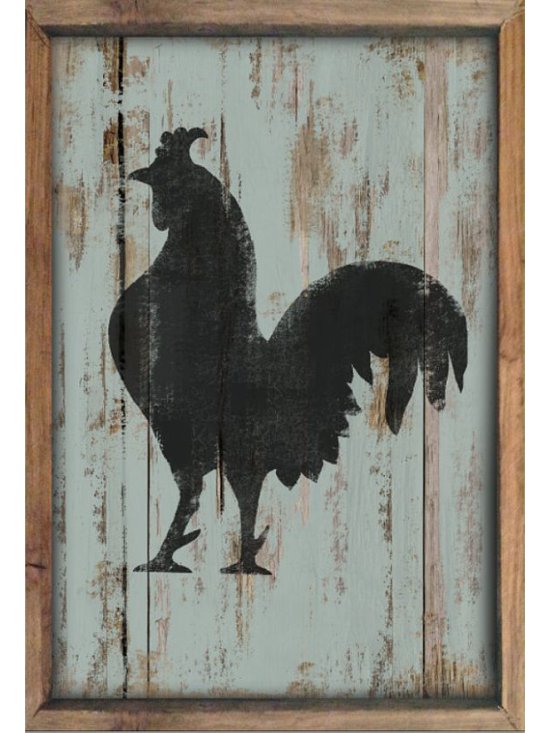
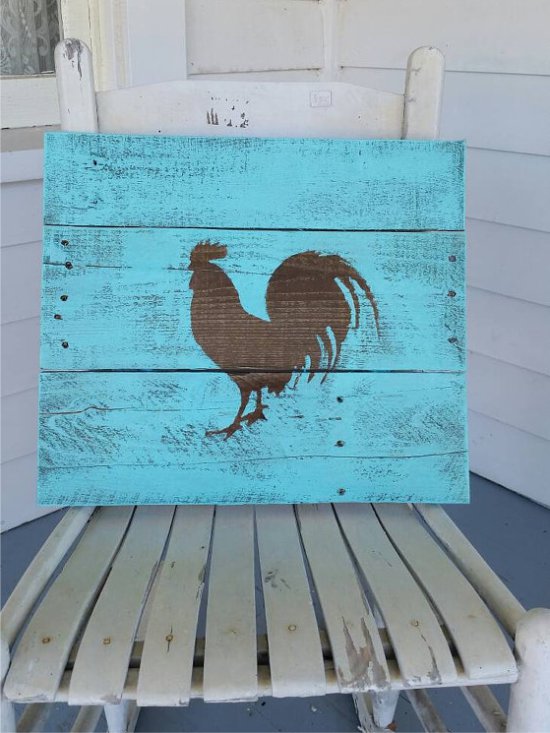
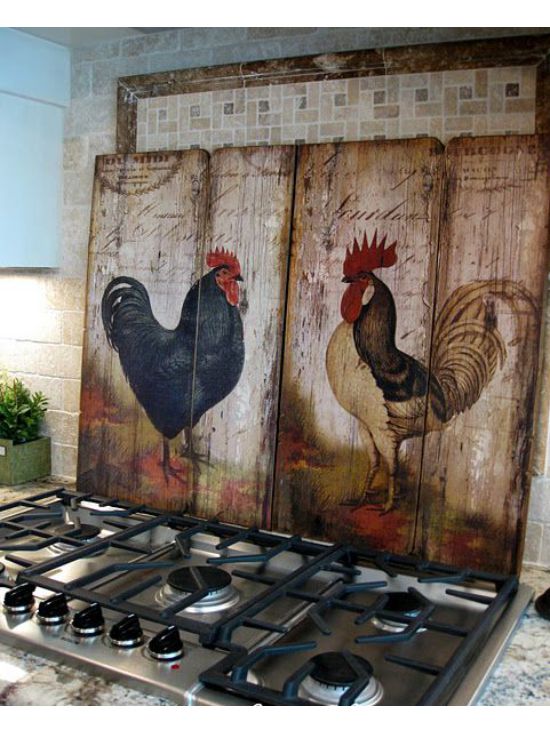
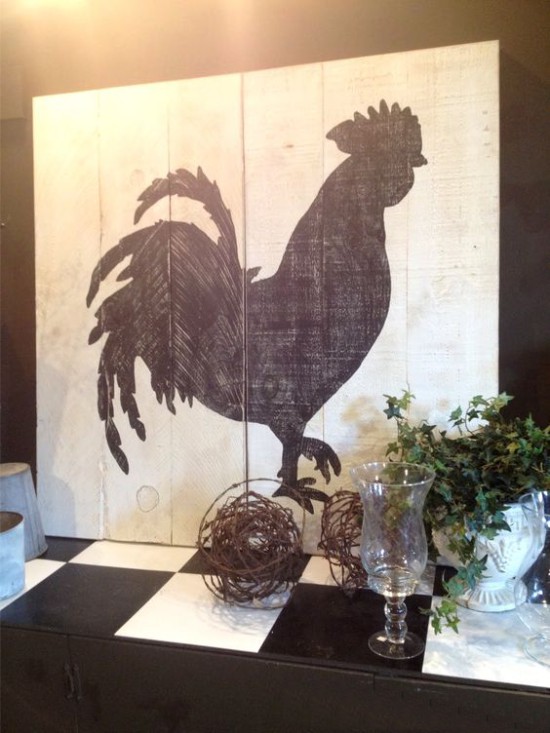
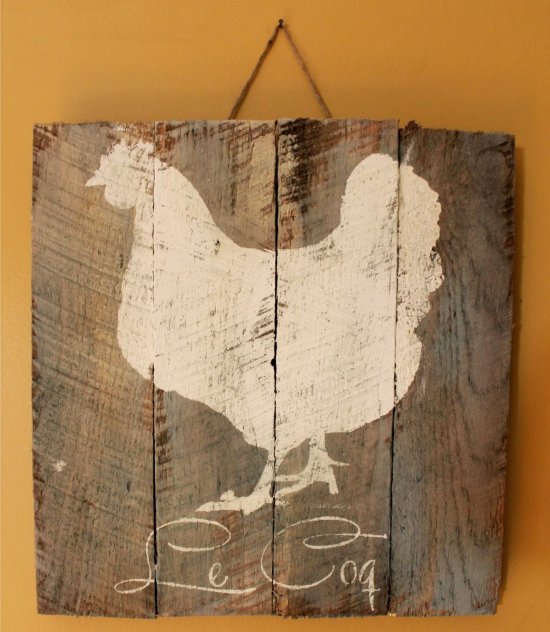
Master class 4. Panel with a silhouette of a rooster in the style of Provence
The silhouette of a rooster, painted on roughly cohesive old boards, will be a great decoration. Provence style kitchens, rustic or country music. And a panel with a symbol of 2017 can be a great New Year gift. The following photo compilation presents several ideas for such handicrafts.
Materials:
- Wooden boards of small thickness. In this master class, boards made of pallets (pallet) were used; boards made from a wooden box for fruits would also be suitable. Whatever boards you picked up, fresh or old, before making crafts they need to be cleaned and dried.
- Saw or jigsaw.
- Small nails.
- Hammer.
- Stain or acrylic paints of the desired color for the background.If desired, you can use chalk paints, which are sold in finished form or divorced independently (from acrylic paints with the addition of gypsum). With their help, it will be easier to create the effect of an old tree.
- White acrylic or chalk paint for the image of the silhouette of a rooster.
- Colorless matte primer for wood (preferably).
- Matt varnish (desirable).
- Brushes.
- Sandpaper fine grain.
- Pencil.
- Paper.
- Office or mock-up knife and scissors.
- Wood wax transparent or dark (optional).
Instruction:
Step 1. Think about how many boards you need to put together a panel of the desired size.
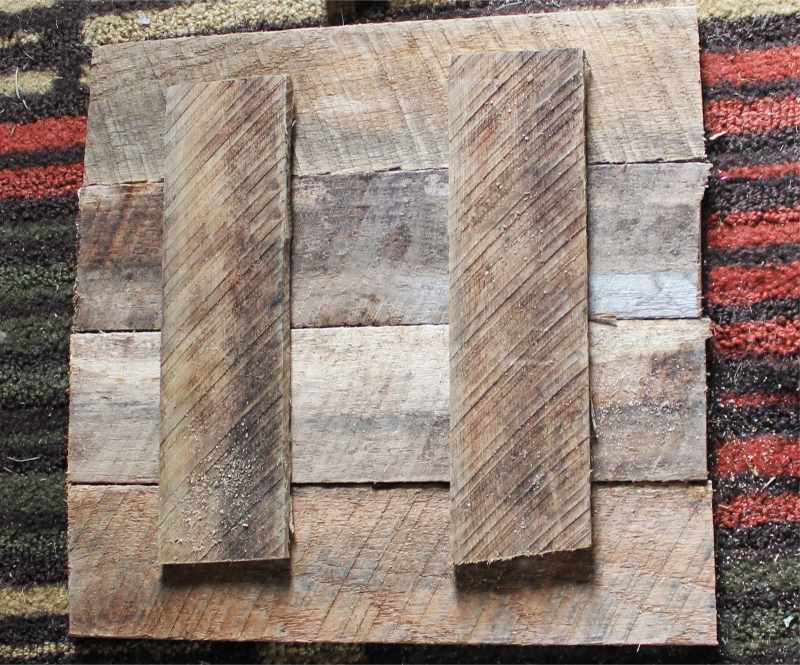
Step 2. Measure and cut boards of the same length. Also prepare two smaller boards - they will play the role of crossbars and connect all the other boards.
Step 3. Fold the main boards face down, align them, then lay two smaller boards across as shown in the photo below. Now, nail each board to the cross rails.
Step 4. Clean the surface from dust, then apply the primer on the panel in 1-2 layers, allowing each layer to dry. This step is not necessary, because we need a rough and “old” look of wood and paint, but still you need a primer if you want to extend the life of your painting and make it easier to care for it.
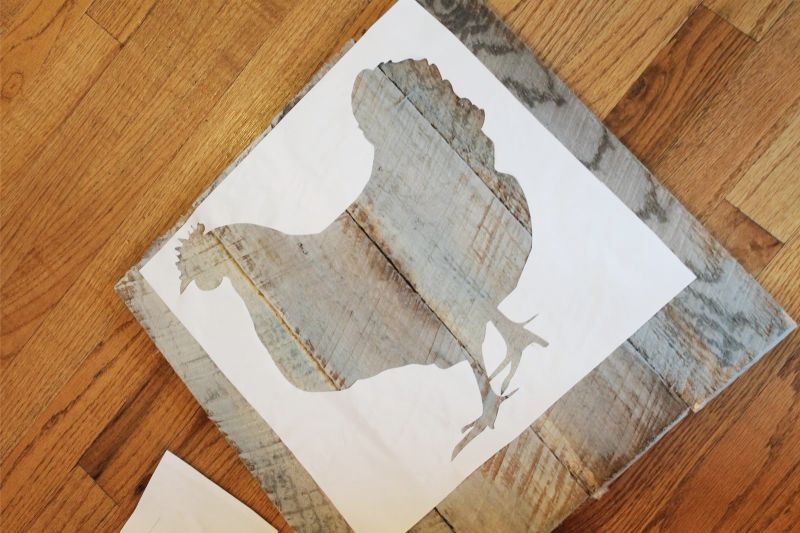
Step 5. Now we need to paint the boards, that is, to create a background for our rooster. To create the effect of faded paint, in this project a white and blue water stain was used, which was applied unevenly. There is another way of coloring the old: paint the boards with acrylic paint in 1 layer, wait for the paint to dry, then wipe the surface with sandpaper in some places or over the entire area.
Step 6. It's time to start making a stencil. If you make a small panel of approximately A4 size and less, then you can simply print out the picture below, having previously adjusted its dimensions in any photo editor. Then you will only laminate the paper with transparent tape and cut out the silhouette of a rooster using a clerical or mock-up knife. Voila, the stencil is ready!
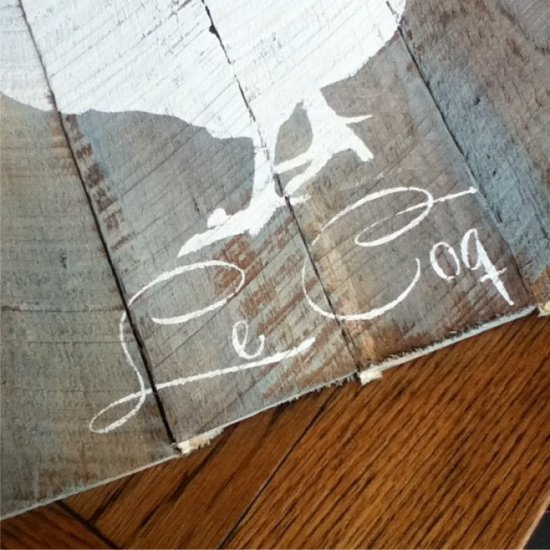
If you want to make a larger panel, for example, A3, then the picture will have to be printed in two parts (or more). To do this, upload the silhouette of a rooster to the site. rasterbator.net, print the resulting PDF file, cut out the details, then assemble them as a mosaic. Then you can laminate the stencil with scotch tape or transfer the stencil contours from office paper to thicker or laminated paper (see photo).
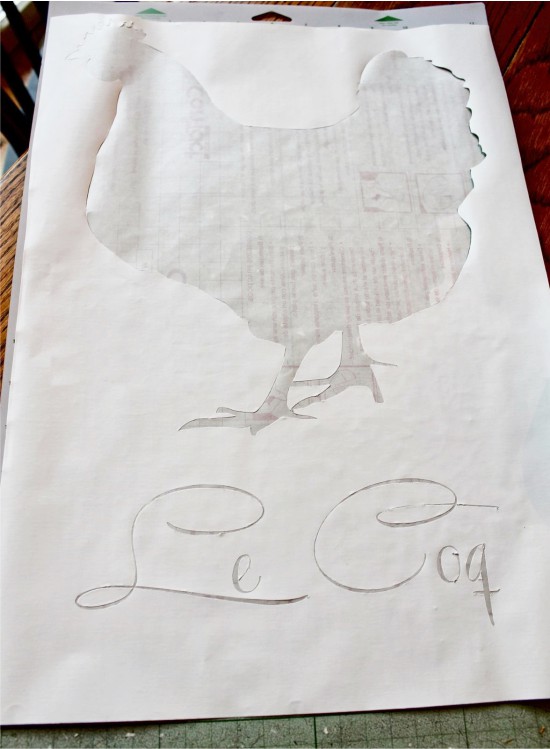
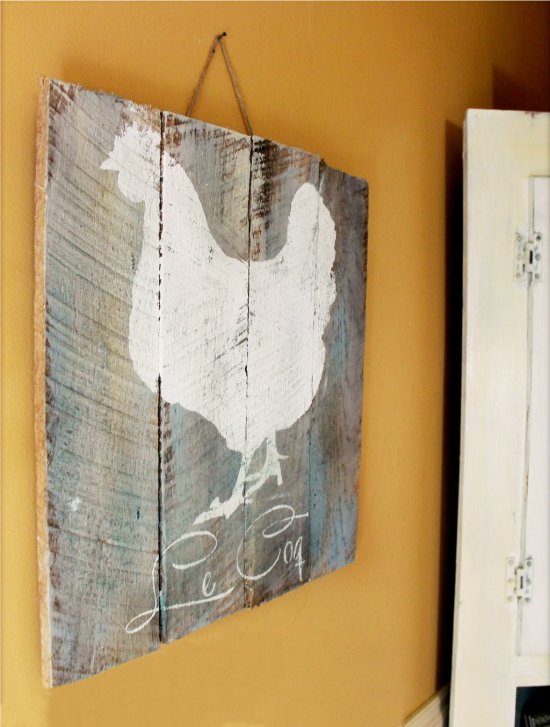
As you can see, on this stencil, in addition to the silhouette of a bird, the French word "Le Coq" is cut out (translated as "rooster"). You can repeat this idea or come up with your signature, for example, “Bon appétit!”
Step 7. Fix the stencil on your panel with masking tape and start painting the silhouette with white paint. When the paint is dry, work through some areas of the pattern with fine-grained sandpaper to create an old-fashioned effect.
Step 8. Hooray! Almost done, it remains only to apply a layer of wax on the panel and polish it. Keep in mind that dark wax will give your panel an even more “battered” look, and transparent wax will simply protect.
Read also the material: Panels for the kitchen - ideas and instructions.
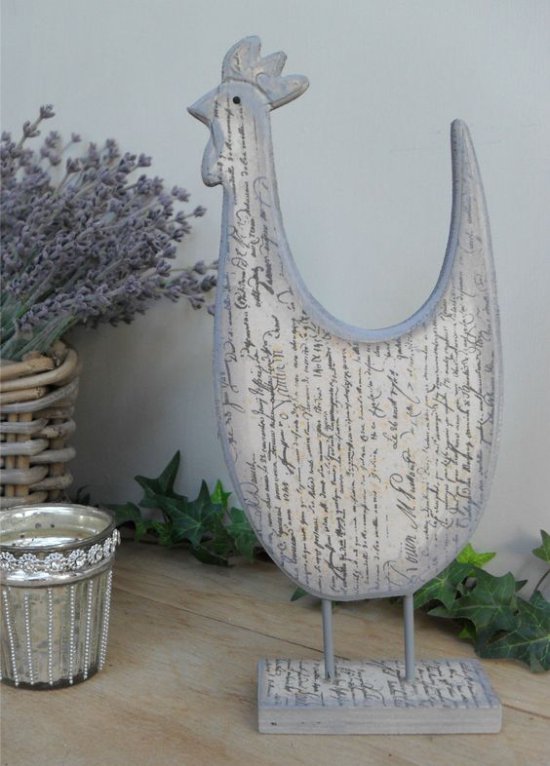
Master class 5. Cock on the leg
Another idea of table decoration, which can be a real talisman in 2017, an Easter attribute or just a beautiful piece of furniture in the Provence style.
Materials:
- Wooden board with a thickness of 20 mm (can be replaced with plywood);
- A piece of plywood for the wing thickness of 6-8 mm;
- Wooden stick with a diameter of 10 mm and a length of 13 cm;
- Jigsaw with files for wood (for a clean cut);
- Sandpaper or sanding block;
- Drill and drill 10 mm;
- Finishing nails 20 mm;
- Pencil;
- Acrylic paints of desired colors (not necessarily those in the picture), but the comb should be made red and beak yellow;
- Brushes.
Instruction:
Step 1. Print and cut the rooster pattern.
Step 2. Transfer the outlines of the template to the board / plywood and cut out all the details: the body of the cock, one wing (the figure will be one-sided) and the base in the shape of a square.
Step 3. Cut out all the details of your craft, then process the edges with emery paper.
Step 4. Drill a hole with a diameter of 1 cm at the base of the figure to a depth of approximately 1.5 cm.
Step 5. Drill the same hole in the square base of the rooster.
Step 6. Now attach the wing to the body of the rooster using three finishing nails.
Step 7. Place a wooden stick in the holes in the cock figure and in the square base.
Step 8. Paint the rooster like in our master class or to your taste. To create an old-fashioned effect, after the paint dries, rub the rooster in some places with fine grain sandpaper.
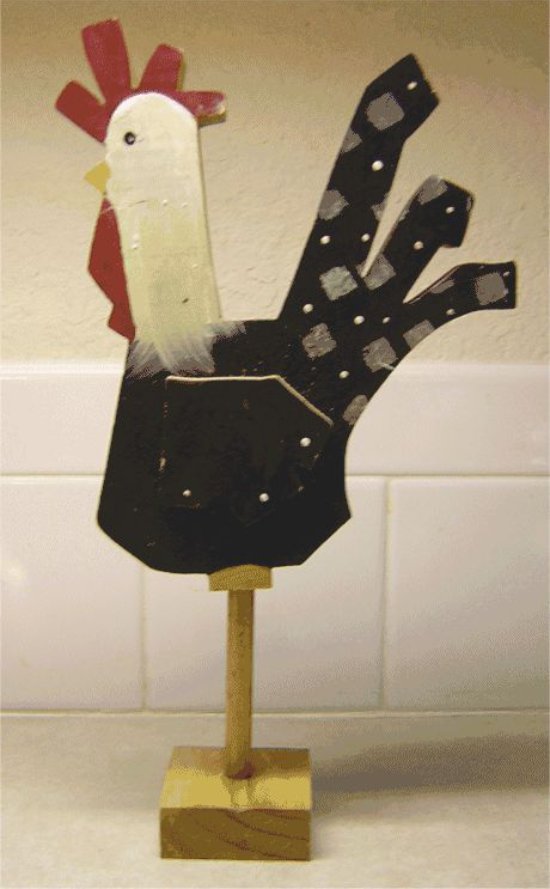
Below are the photo examples of crafts of roosters, which you can do yourself using our instructions, but using other patterns, paints and decoration techniques.
Decoupage Rooster
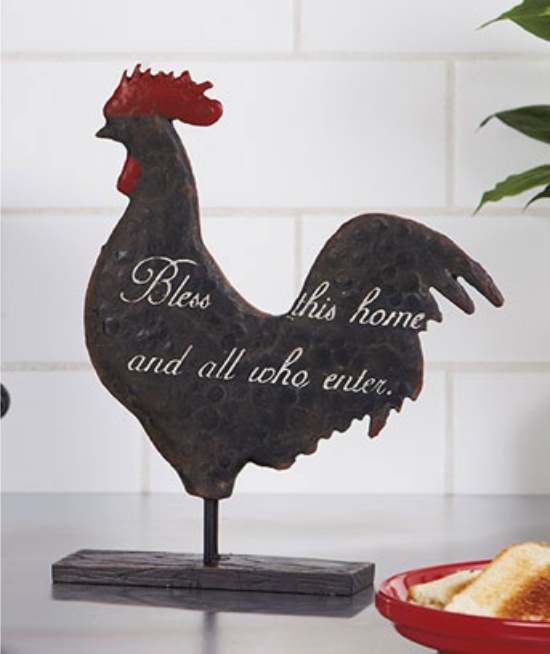
Craft in the form of a rooster, painted with slate paint
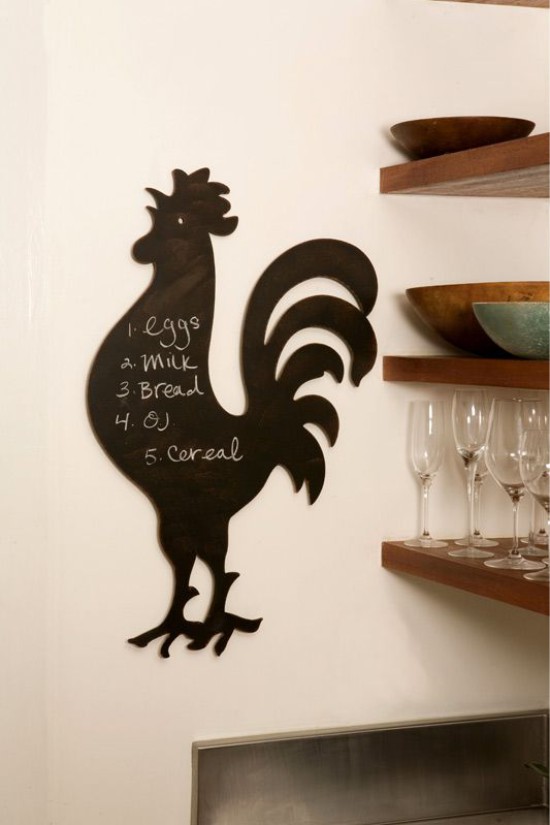
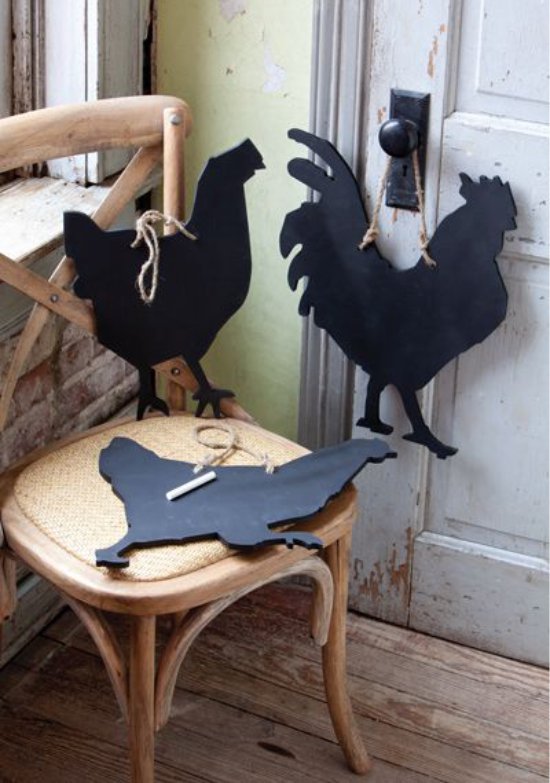
Master class 6. Wall board for notes
Materials:
- Plywood;
- Jigsaw;
- Sandpaper;
- Pencil;
- Slate paint;
- Primer;
- Brushes;
- Scissors.
Instruction:
Step 1. Make a stencil with your own hands (see Master class number 4, step 6).
Step 2. Transfer the pattern to plywood, cut out the silhouette of a rooster with a jigsaw, then polish the edges with sandpaper.
Step 3. Cover the figure with a primer, let it dry, and then apply 2-3 layers of slate.
Step 4. When the paint is dry, drill a pair of holes in the upper part of the craft, then tie a rope to it, for example, jute (see photo below). You can also not drill holes, but simply glue the hook for hanging to the wrong side of the rooster.
 (Rate the material! Already voted:3 average rating: 5,00 from 5)
- New Year's decor windows in the kitchen: decoration ideas with ready-made decorations and do it yourself
- How to make a garland with your own hands
- How to make a candlestick with your own hands: 70 photos, 7 ideas and workshops
- We serve New Year's table: 6 steps to the holiday on your table
- New Year's kitchen decor: TOP - 10 best ideas
- Table setting - theory and practice in 6 steps