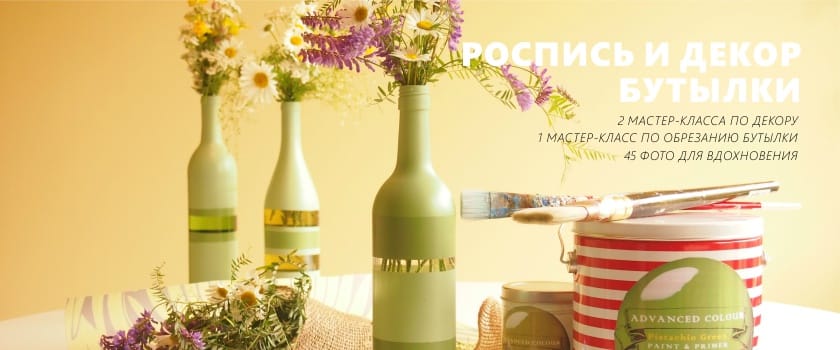
Glass bottles for wine, brandy, champagne, milk, oil and even beer are excellent materials for making your own flower vases. It is possible to decorate with painted and decorated vases and vases not only a dining table and shelves in the house or in the country, but also serving at a wedding or a party, and you can make a wonderful gift from decorated bottles.
Master class number 1: Stylish and easy
Bottles of any shape and color of glass are suitable for such painting of bottles, in this master class transparent bottles for milk are used.
Materials: for degreasing - acetone or alcohol, as well as cotton pads, for painting - acrylic paints in jars or cans (better for glass and ceramics), nylon brush, and also masking or regular adhesive tape of the desired width. Instead of adhesive tape, you can use rubber rings. If you are using spray paint, then you may need foil, food wrap or plain paper.
Instruction:
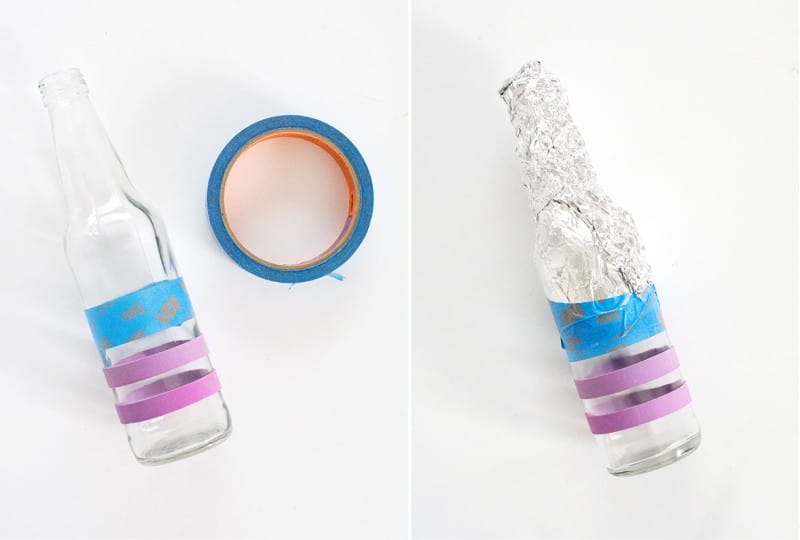
- Prepare the glass - remove the labels, wash off the glue, wipe the bottles dry, and then degrease the surface with nail polish remover or ethyl alcohol.
- We paste over the future vase with scotch tape, forming a pattern: stripes of different widths, zigzags or spirals. Scotch here plays the role of a stencil.
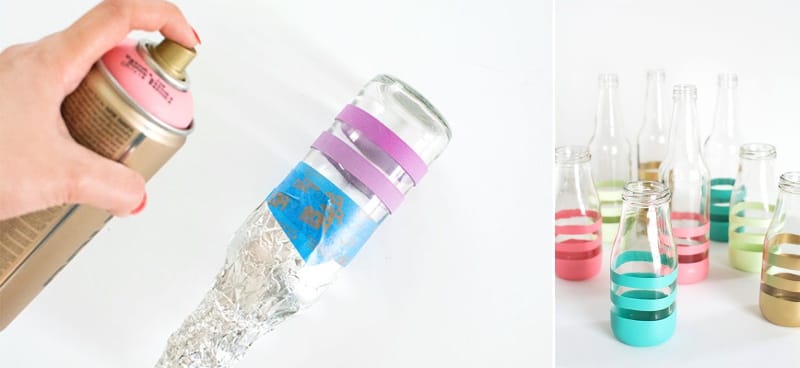
- We start to paint the vase in the right places.
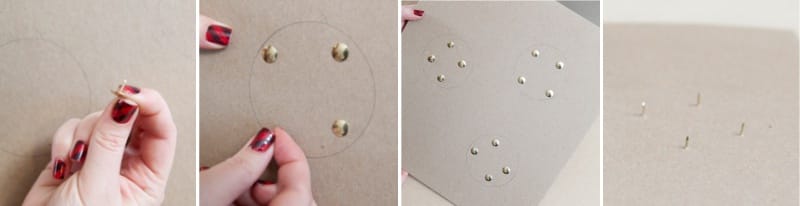
Tip: if the paint requires baking in the oven, then consider the position in which the painted bottle will dry. So, if you paint both the bottom and the neck, then drying the vase will be problematic, but you can make a construction from thick paper and buttons as shown in the photo below.
- The method of drying depends on the paint you choose. The manufacturer usually indicates the required baking temperature (if required) and time. Baked acrylic paints dry for about half an hour in an oven at a temperature of 170 degrees, and then it is advisable to leave the bottles to dry naturally for 1-2 days to make the coating as durable as possible. Spray paints that were used in this master class do not need to be baked, but they dry in 24 hours.
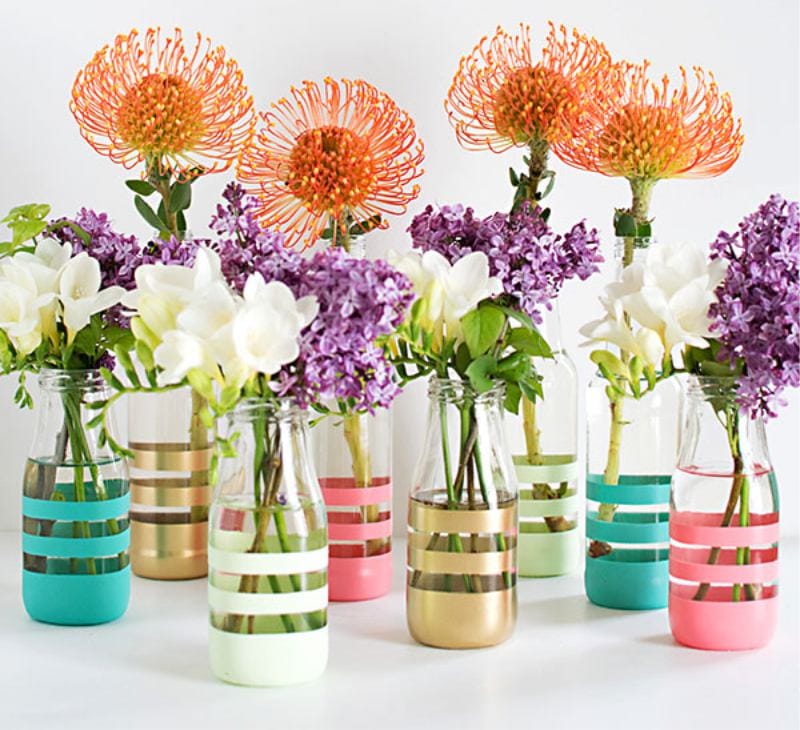
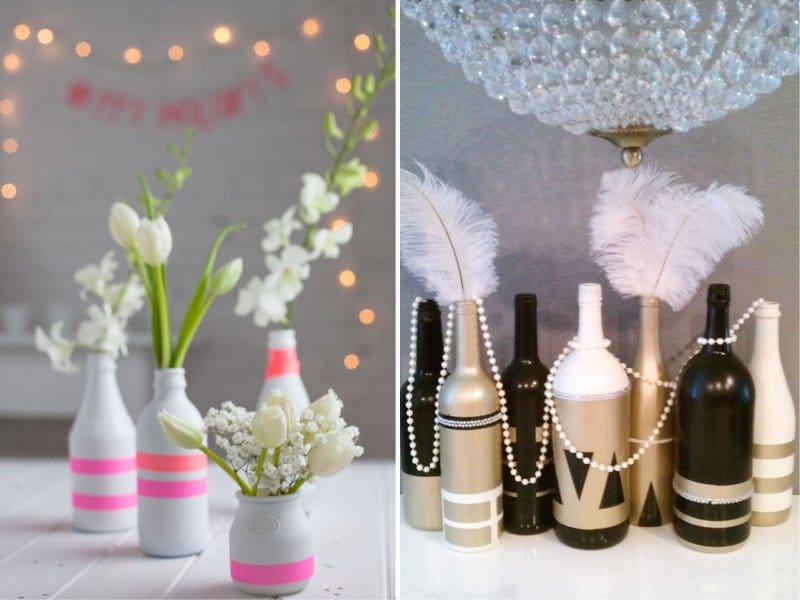
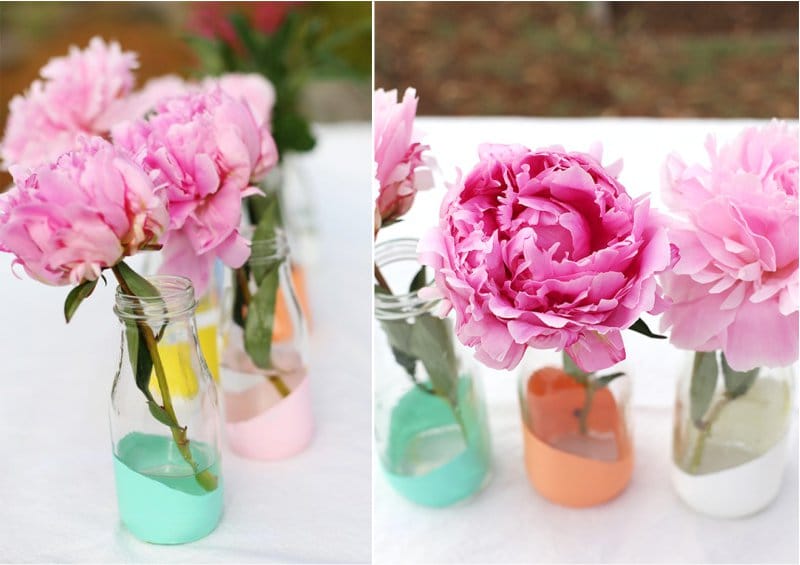
With the help of this master class, you can come up with a variety of designs, playing with the color, width and location of the tape or gum.
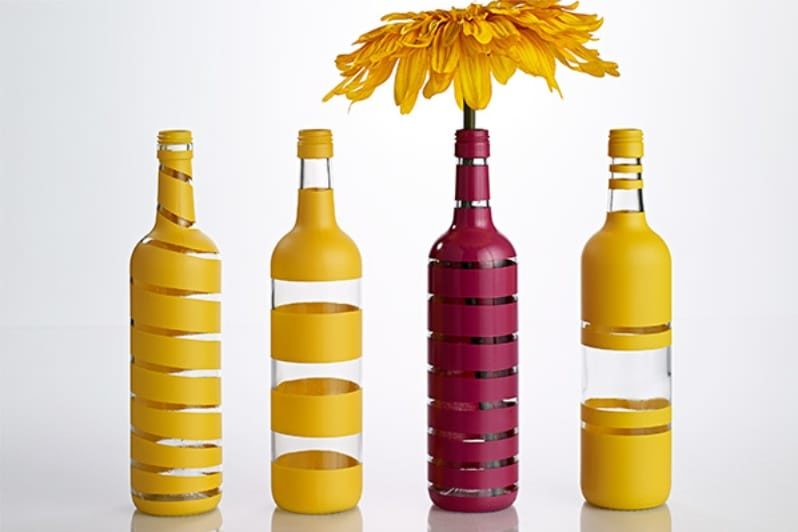
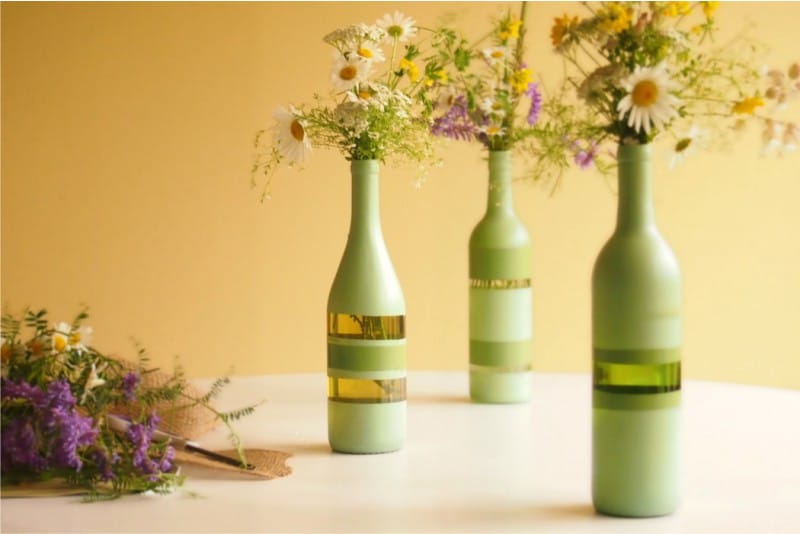
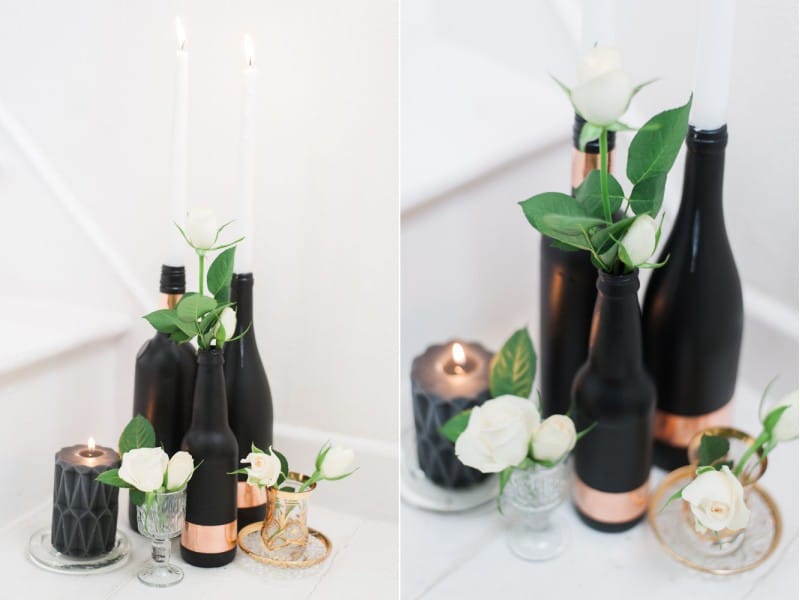
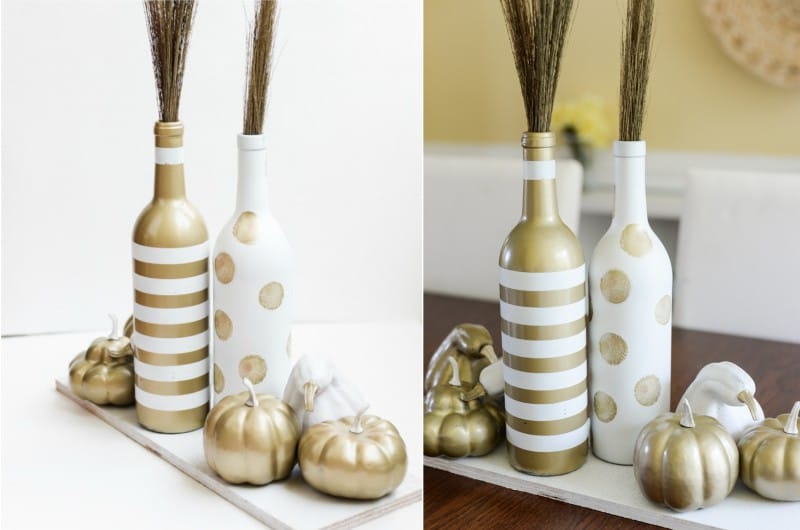

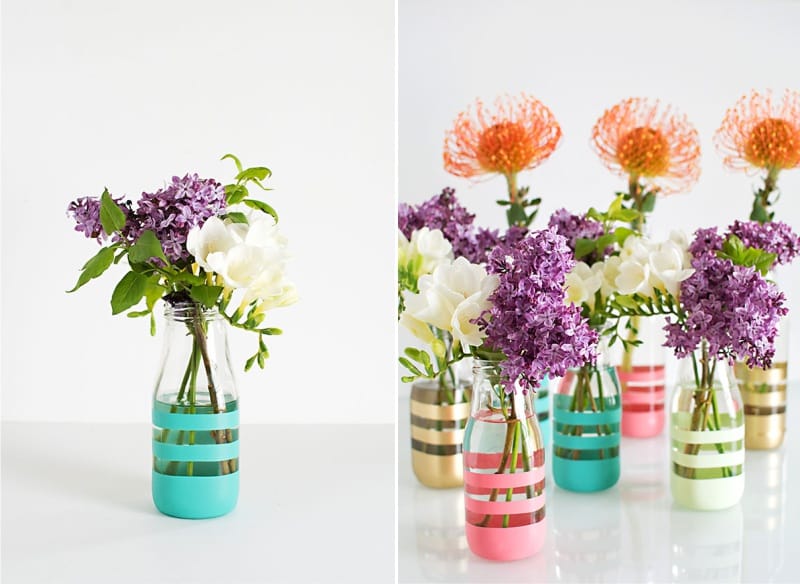
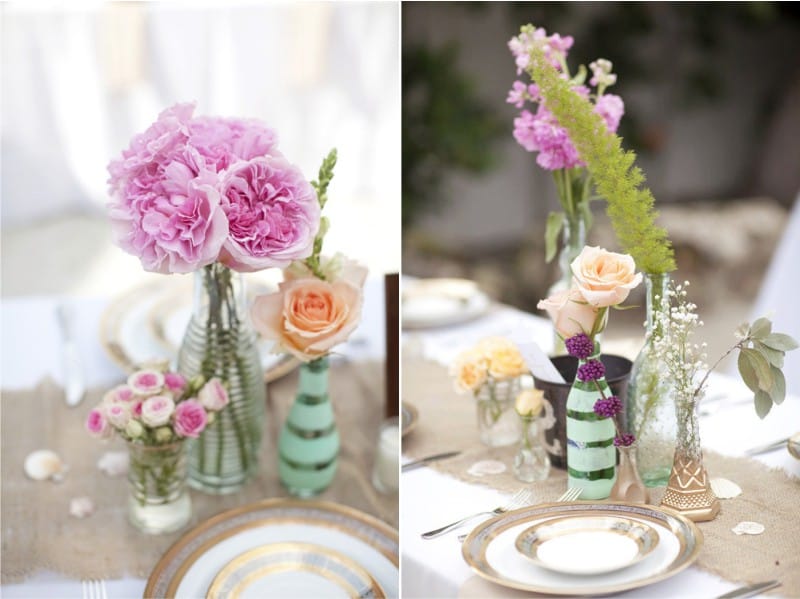
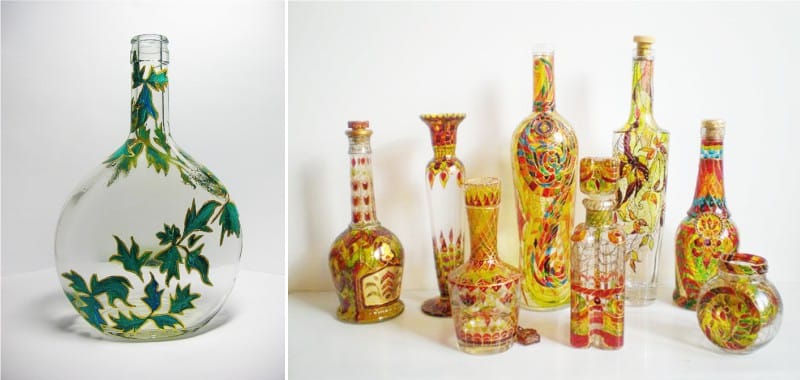
For example, you can use unusual shades - the bottles painted in soft pastel colors or gold or silver paint look very impressive. Take a look at the following selection of photos - these are the colors that are best for decorating glass bottles to decorate a wedding or a party.
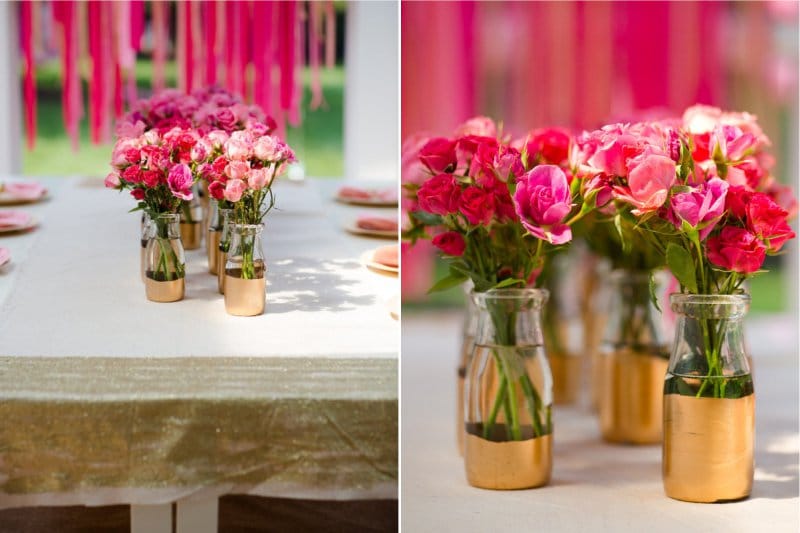
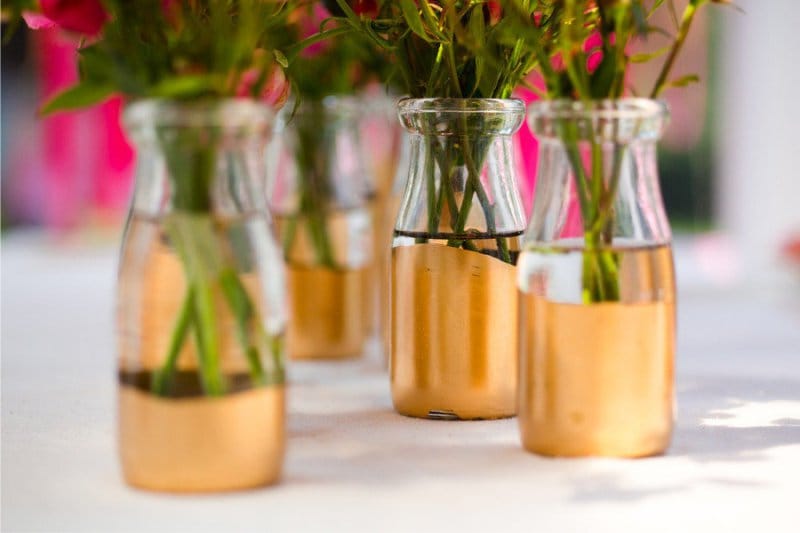
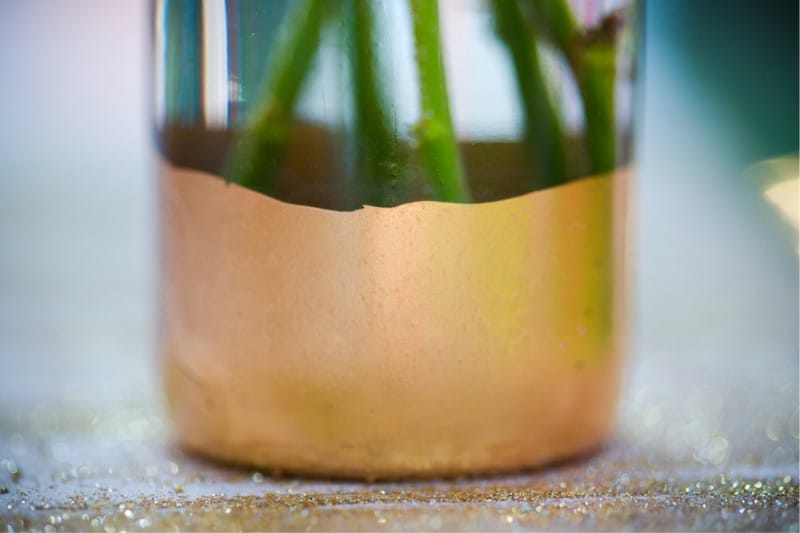
And here is another original idea - you can only paint the bottom of the bottle by pulling on the gum or gluing the tape on the diagonal.
Master class number 2: painting the bottle contours
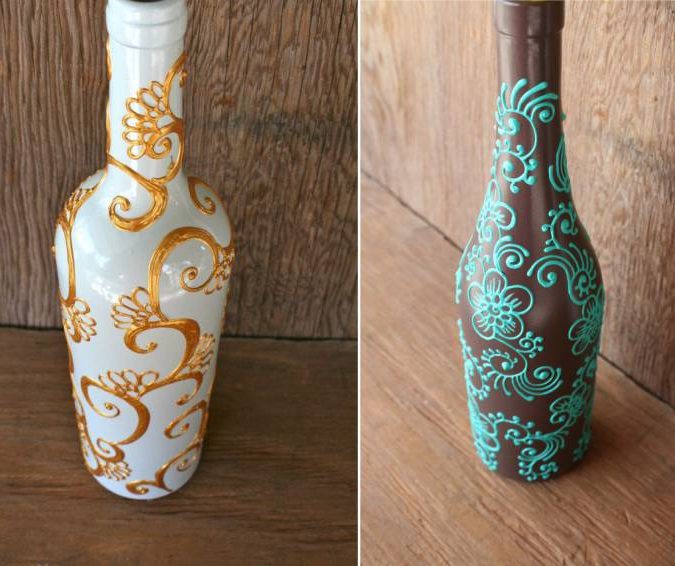
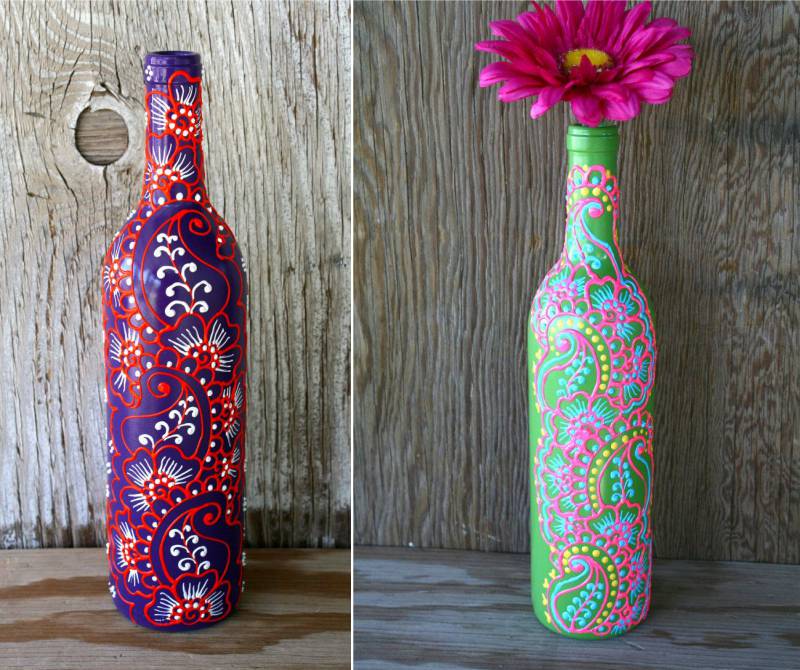
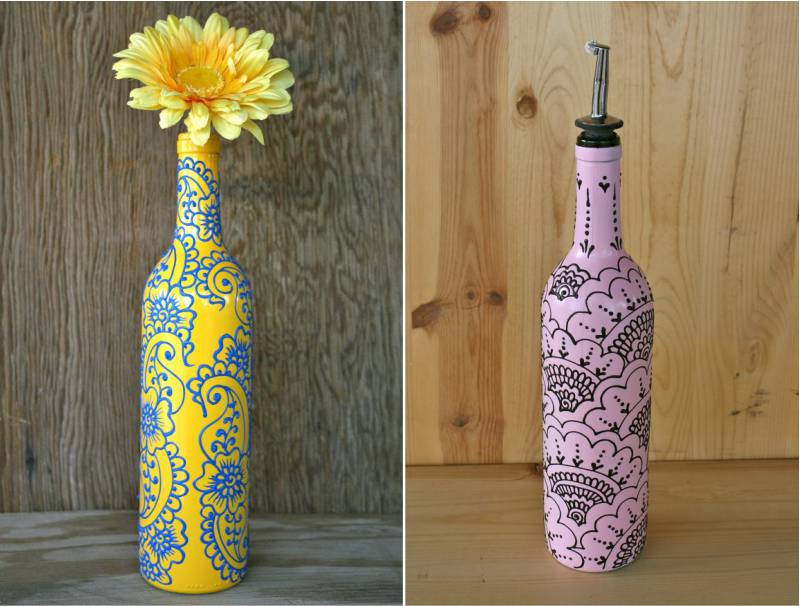
And now we will proceed to a more complex and long-lasting, but very beautiful way to decorate bottles with our own hands - painting with contour volumetric paints.With their help, you can draw patterns and ornaments in ethnic style, put a complex and simple drawing or write beautiful inscriptions, monograms, initials (photo below).


Also, contour paints can be drawn in the technique of dot painting as in the photo below.

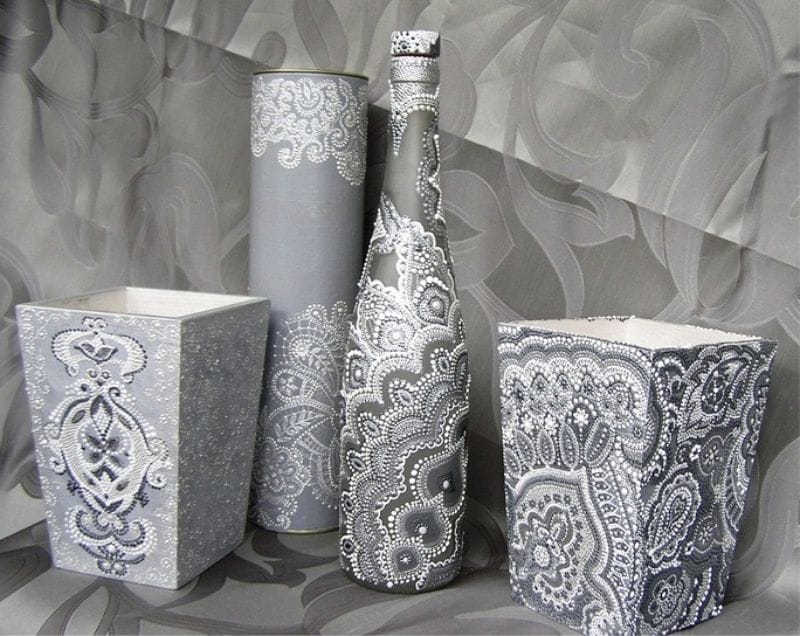
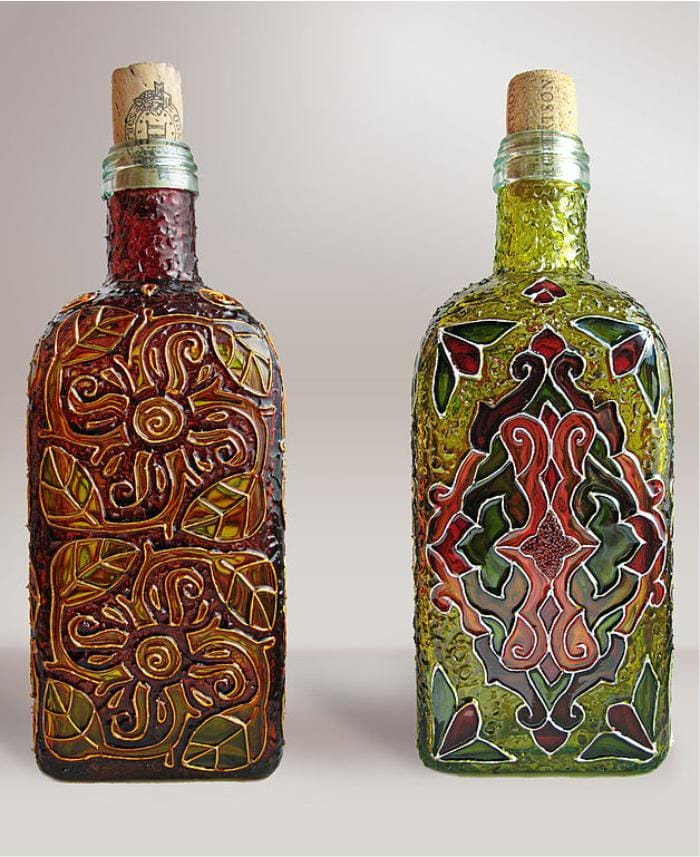
And in combination with stained paints contour painting will turn into stained glass.
Materials: any alcohol-containing degreaser, cotton pads and sticks, needle and outline paint. If desired, the painting can be supplemented with sparkles, as well as with acrylic and stained glass paints, as in this master class.

Tip: if you do not have contour paints or drawing them seems to be difficult for you, then you can paint with the help of available tools: toothpicks, needles, a cotton swab or a thin brush.
Equipment:
- First we need to come up with an idea and prepare an auxiliary sketch. You can find it on the Internet and print it in a suitable size or draw it yourself. You can also use a homemade or ready-made template or stencil.
- If you are confident in your drawing skills "from the sheet", you can skip this item. If you are a beginner, it is better to transfer the desired image on the glass, that is, to outline the main details and lines of the pattern / pattern. To do this, you need to draw or print a picture, cut it out (roughly), then paint the back side tightly with a soft simple pencil, and then attach the picture with the shaded inside to the glass and circle all or only the main parts of the drawing with the same pencil. On the bottle should remain barely noticeable, but useful in the work of the line. If the image is not too complicated, it is enough to outline the main details right on the bottle.
- Now you need to degrease the glass and wait until it dries.
- If you wish, you can cover the entire bottle with colored acrylic paint and wait until it is completely dry.
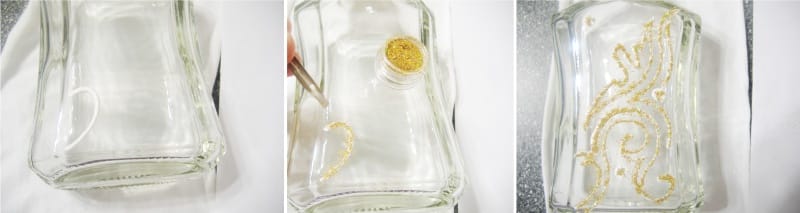
- We proceed to the painting: we draw around all the contours, from time to time cleaning the tip of the tube with a needle and, if necessary, correcting the flaws with a cotton swab dipped in water. Figure correctly start with large parts.
- If you draw a contour in the stained glass technique, the contours must be closed, and the stained paint must be in contact with them. Also, make sure that all parts are completely painted over without paint over, otherwise the coating will be short-lived. Filling of contours with stained glass paints is possible only after 2 hours, but you can speed up their drying with a hair dryer;
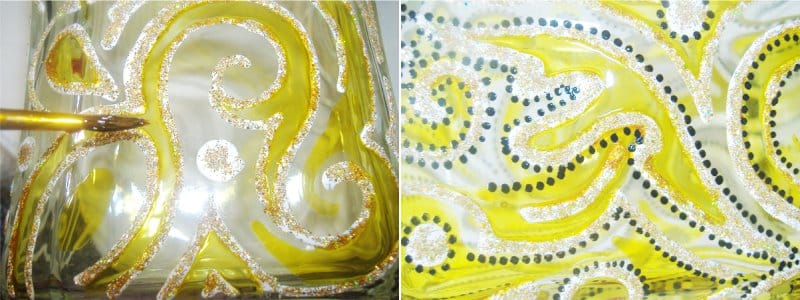
- In the technique of dot painting by contour, the most important thing is to observe the same and minimum spacing in one line of the pattern and maintain the same diameter / volume of points (in one line).

Tip: first practice drawing an outline or putting dots on paper. Remember that you need to press on the tube with the same force.
- When the drawing is ready, you will only have to dry or wait for the paints to dry, following the manufacturer's recommendations. Most often, the painted glass is baked in the oven at a temperature of 170 degrees for about 30 minutes or left to dry naturally for a day.
We invite you to familiarize yourself with the following video tutorial, where you can see how to decorate a bottle with your own hands with the help of contours in the turned technique.
And here are other interesting ideas for painting bottles with outlines for your inspiration.
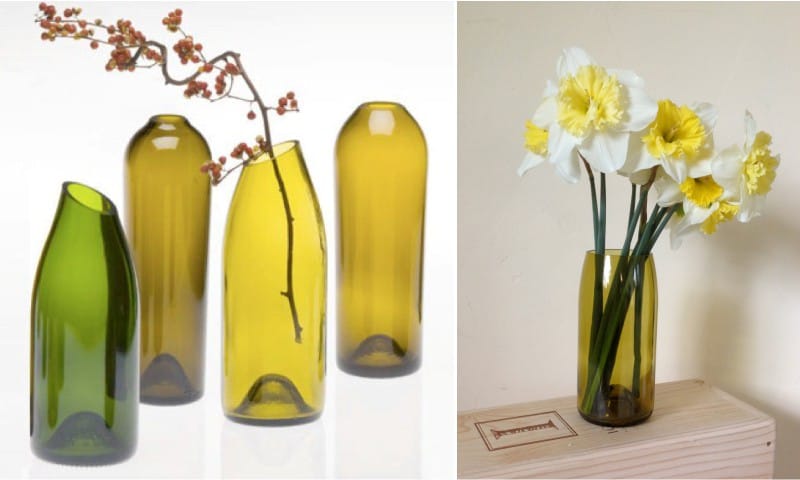
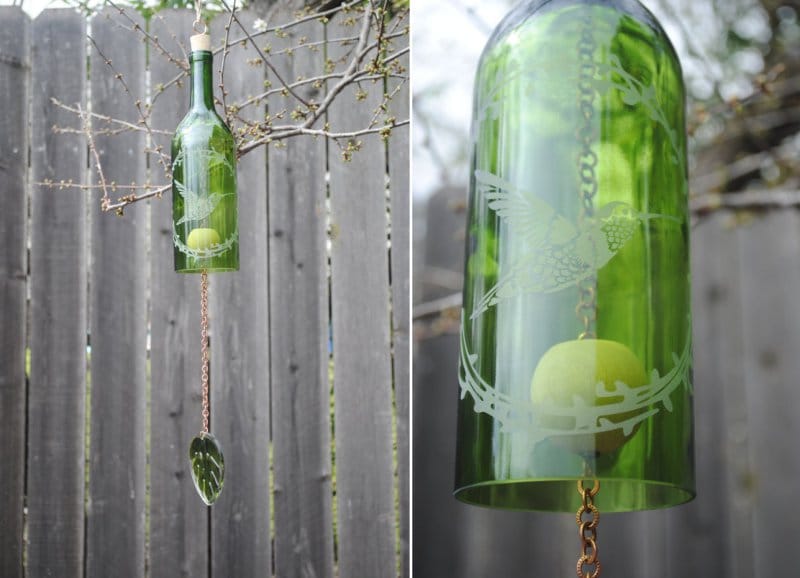
Master class number 3: how to cut the bottle and make it a vase, a candlestick and other decor items
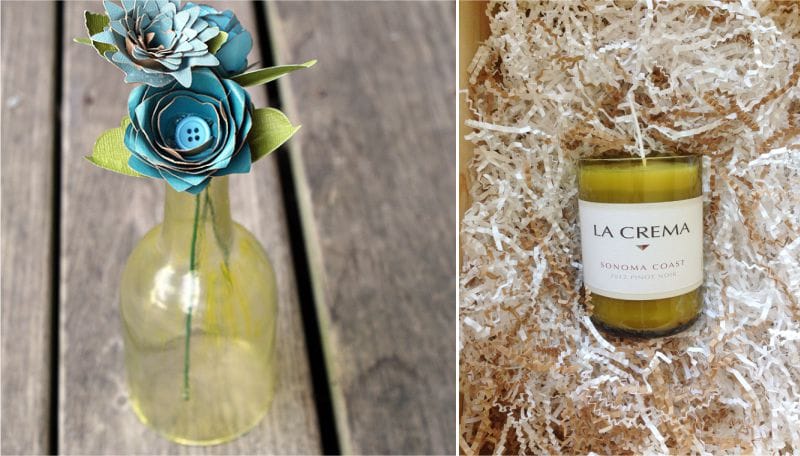
So, with the painting and decor figured out. Now let's talk about how to make a vase from a regular bottle, candlestick, stand for pencils, glass or any interior decoration as in the photo below.
You can cut a glass bottle with your own hands in different ways. In this master class, we use the simplest methods that can be easily repeated at home.
Method 1: How to trim a bottle with alcohol thread
This method is more suitable for cutting bottles of wine and bottles with thin glass.
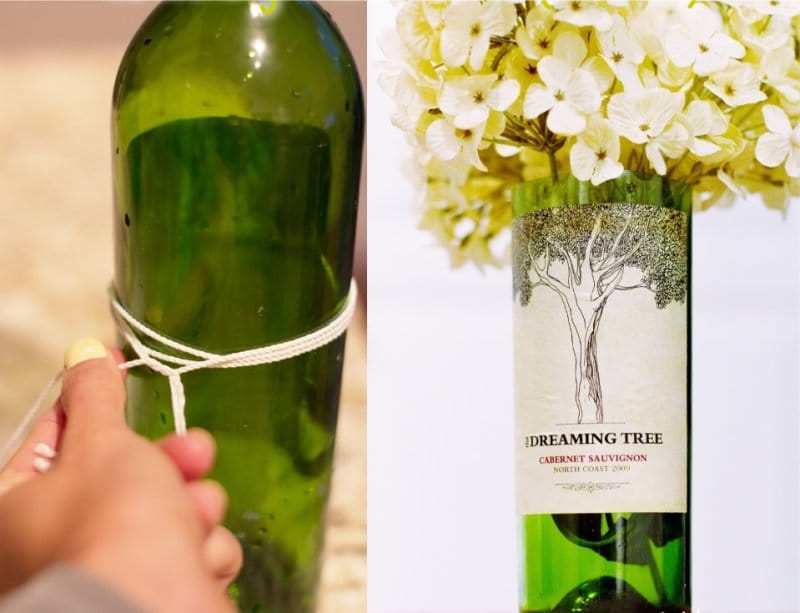
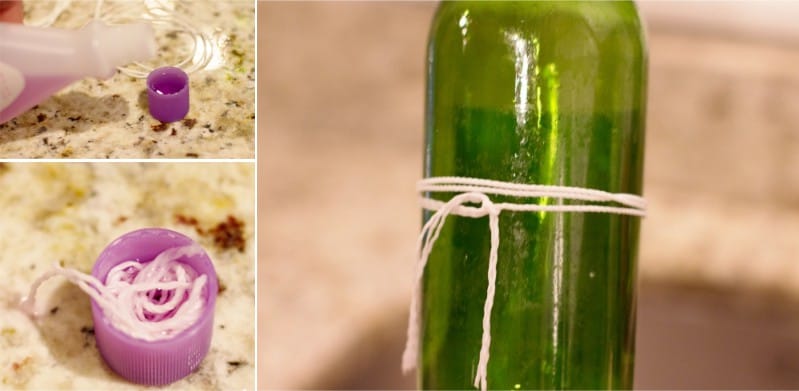
- First you need to wrap the bottle with a thick cotton thread and cut off the excess (top photo on the left).
- Now this thread should be moistened in any alcohol-containing solution - white spirit, ethyl alcohol or nail polish remover, as in this master class. After the thread is well soaked, it must be wrapped around the bottle in the right place again.
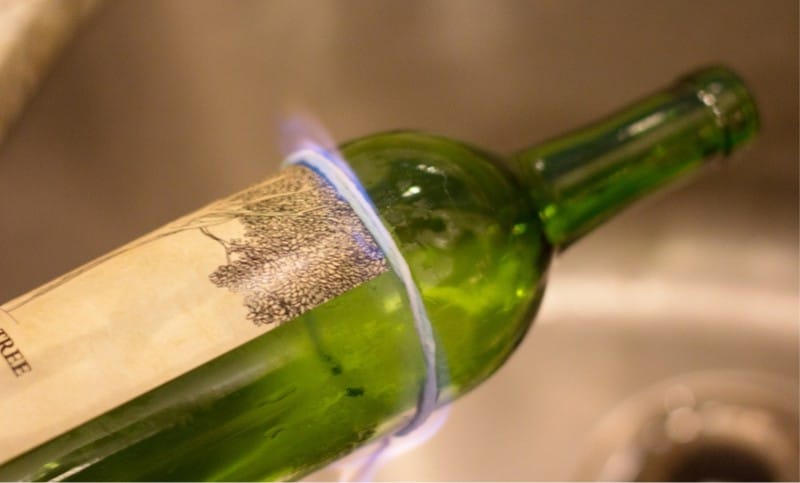
- Now you need to carefully set fire to the thread, quickly rotating the bottle until the flame goes out.
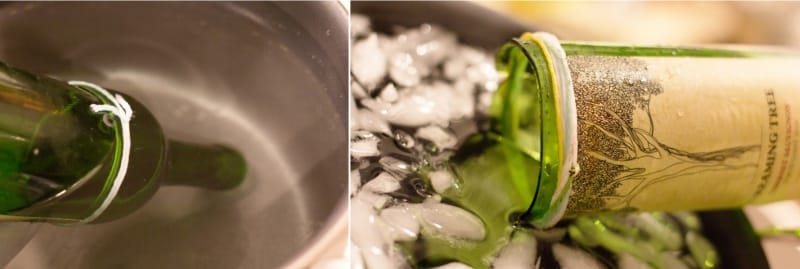
- Next, you need to lower the bottle into a prepared container with boiling water for 3 minutes, and then quickly lower it into cold water - from a sharp temperature drop, the glass should crack in the right place.
Tip: if you want to make a vase from a champagne bottle, then steps 2-4 will most likely need to be repeated.
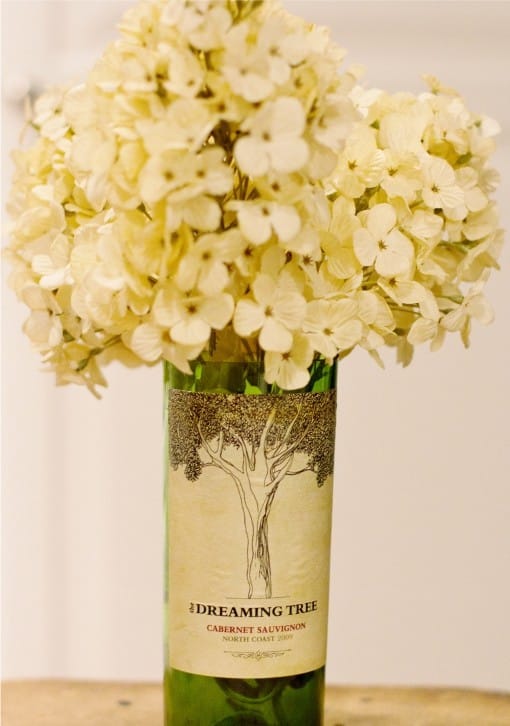
- Carefully break the bottle, and then treat the sharp edges with sandpaper - first coarse-grained, then fine-grained. Woo-ala, the vase from the bottle is ready!
Method 2. How to trim the bottle with a glass cutter
You can cut the bottle with a glass cutter. For this you need:
- Make a cut glass cutter. To make the edges even, you can sharply wrap the bottle with a rubber band or tape. Instead of a glass cutter, you can use a drill for glass;
- Then we burn the incision site, then lower the bottle into boiling water for three minutes, and then into a container with cold water;
- Carefully break the bottle;
- We process the edges with sandpaper.
With bottles of champagne and other bottles with thick walls will have to tinker, but the bottles of wine break open pretty quickly and simply.

 (Rate the material! Already voted:40 average rating: 4,60 from 5)
How to cut the bottle with your own hands using a glass cutter can be viewed in the following video:
- Hand painted vases: 3 workshops and 45 ideas of decor
- DIY paper flowers - 4 workshops for beginners
- Do-it-yourself-painted painting of plates - 5 master classes
- Do-it-yourself glass painting for beginners and experienced decorators
- Painting glasses and ceramic mugs - 3 master classes and ideas for inspiration
- 12 super ideas for home and kitchen
Everything is very beautiful and interesting. I didn’t know about bottle trimming - I’d take a note.