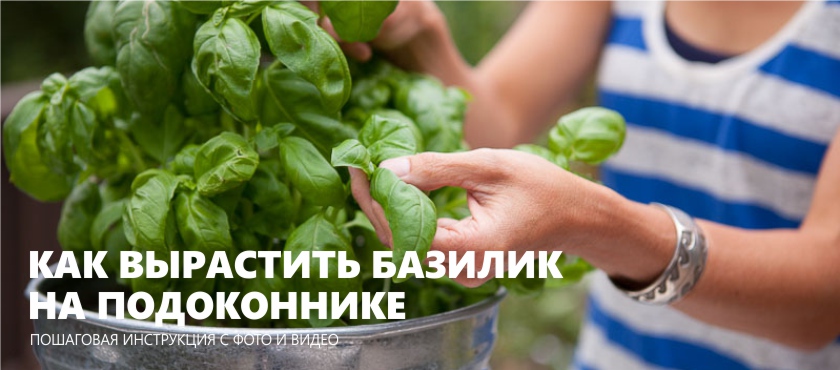
Basil is ideal for growing at home, as it is not whimsical, it grows in winter and summer, it looks nice and smells very good. If you are new to home gardening, we recommend starting with planting this particular grass! In this article you will find everything about growing basil on a window sill, how to care for it and pinch it in order to get as much harvest as possible.
How to plant basil seeds
You can grow basil in a pot from cuttings or from a young sprout from a garden bed, but basil grown from seeds gives the best and longest (almost a year!) At home.
To plant basil on the windowsill you will need:
- Seeds;
- Basil varieties fit any, but keep in mind that purple and Greek small-leaved varieties grow longer and more difficult. Small-leaved and undersized varieties of basil grow especially quickly and easily.
- Soil (for more information on soil selection and preparation, read Step # 2);
- Expanded clay or pebbles for drainage;
- A pot with a volume of 1-2 liters or a large container not less than 15 cm deep in which the shoots of basil can grow at a distance of 10 cm from each other. Capacity for growing basil must have drainage holes;
- Food film or plastic bag;
- Spatula.
Step 1. Seed preparation
This stage is optional, but desirable if you want to slightly accelerate the emergence of the first shoots. Soak the seeds in warm water for 1-2 days, changing the water every 12 hours (or more), then hold them in a slightly pink solution of potassium permanganate for 2 hours and finally dry the seeds on a napkin or gauze. Catch seeds with a toothpick.
Step 2. Soil preparation
Loose ground is an important condition for success. Suitable soil can be created from:
- Mixes of universal soil for indoor plants with garden soil (in a ratio of 1: 1);
- Mixes of biohumus and soil for indoor plants (in a ratio of 1: 4);
- Mixes of vermicompost with coconut (in a ratio of 1: 2).
Do not forget to plant purchased soil before planting seeds: pour it on a baking sheet and calcine in the oven at a temperature of 100-120 degrees for about an hour, and then feed it with some kind of mineral fertilizer. This procedure will prevent the occurrence of pests in the future.
Next, we put claydite or pebbles on the bottom of the tank in order to create a drainage layer 2-3 cm thick. Finally, pour the prepared soil on top, not reaching 3-4 cm to the edges, level the surface, and then pour plenty of soil.
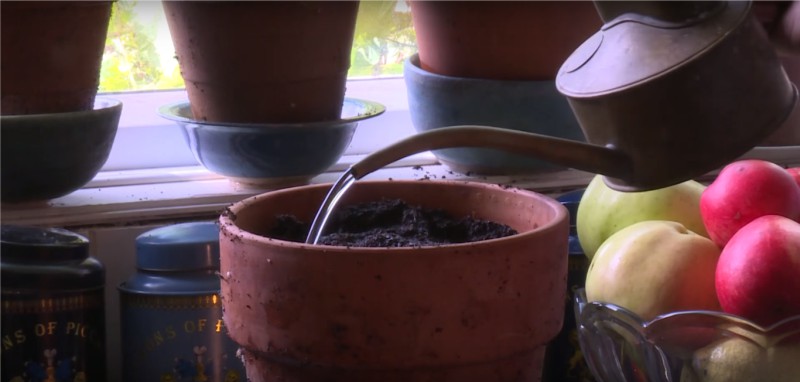
Watering the soil
Step 3. Sowing Seeds
Now you need to sow the seeds at a distance of about 2 cm from each other, sprinkle them with a layer of earth at 1-2 cm, and then cover the pot with cling film or a bag to create a greenhouse effect.

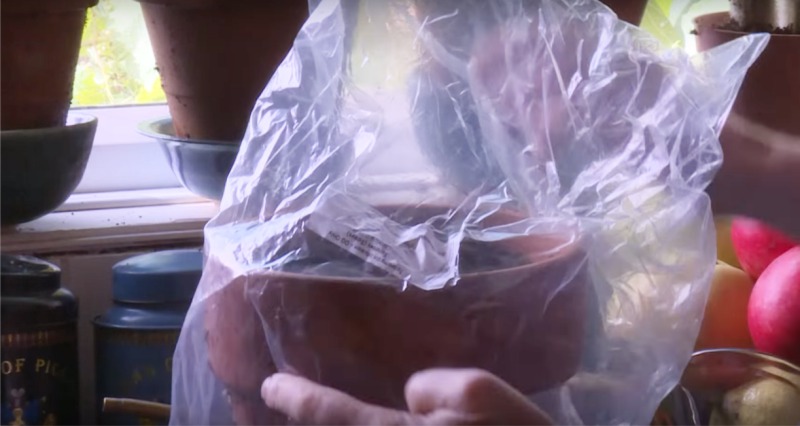
Then we transfer the pot to a warm place and wait for the first shoots to appear, periodically opening the film for airing the planting. Watering the seedlings during this period is not necessary, if desired, you can lightly spray them, then the greens will turn juicier.
- Depending on the variety and favorable conditions, the first sprouts of basil will appear in 7-12 days.
When the seedlings finally appear, remove the film and boldly thin the shoots so that a gap of 10 cm is formed between the remaining sprouts. Then transfer the pot to the sunny windowsill.
- When the seedlings grow to 5-7 cm, another 2-3 cm of soil can be added to the pot to strengthen the young shoots.
From the moment of removal of the film, the plant should be started to take care of - regularly water, loosen the ground, control the temperature and lighting. Below is a memo with the main rules of care.
Basil Care Rules
Watering: Water in the summer and, if desired, sprinkle basil in the morning every day, the soil should always be moist but not overflowed. In winter, watering should be moderate - 2 times a week will be enough.
Temperature: Watch and the temperature of the air, it should be quite high - 20-25 degrees. Keep in mind that basil does not tolerate drafts, and when air temperature below 20 degrees begins to lose flavor.
Shine: In the warm season (from March to August), basil needs 6 hours of natural sunlight. In winter, without additional lighting is not enough. How and how to create it, read on in Step # 4.
Top dressing of the soil: If the soil is not fertile enough, then it can be fertilized once a month: with biohumus, Agrolife (1 tsp. On the surface of the earth) or other organic fertilizers.
Step 4. Creating a favorable light.
If you grow basil in autumn or winter (from September to February), then your mini-garden must be artificially illuminated for 12 hours a day.
- Fitolamps or LED lamps with a warm white light of 2700K, installed at a distance of 15-20 cm from plants, are suitable for this.
Step 5. Proper harvesting
The key to getting fluffy and branched with a large number of basil leaves is frequent and early cutting, which is also called podchispivaniem.
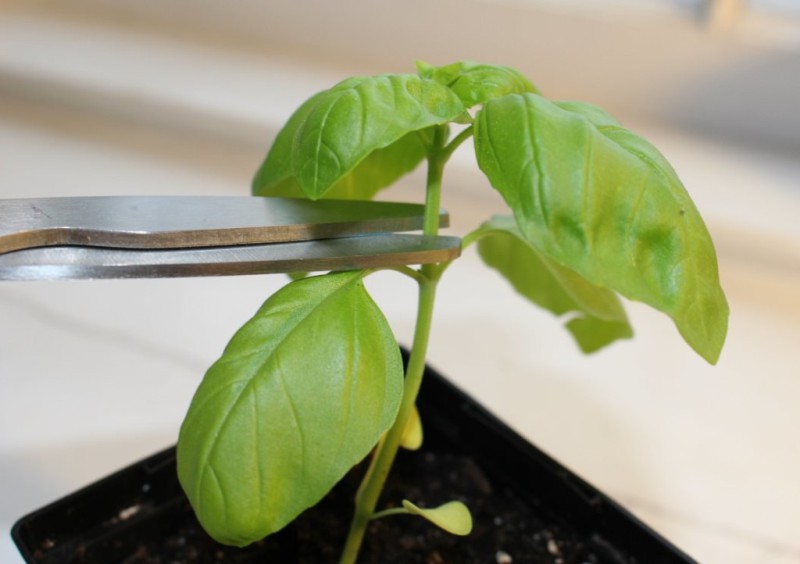
After 1-1.5 months, when basil will overgrow with 4-6 true leaves, you need to harvest the first crop, nipping off the tops of 2 leaves.
Further, when the basil will get 3 sets of true leaves, you need to pinch its top, cutting off the stem just above the small leaves that are just starting to grow from the sinuses. The place of the cut and those very small, barely noticeable leaves can be seen in the photo below. This procedure should be done every few weeks.
Pinching Basil
- When you need only a few leaves here and there to add to a dish or drink, choose older side leaves and pinch them where they meet the main stem (shown in the photo).
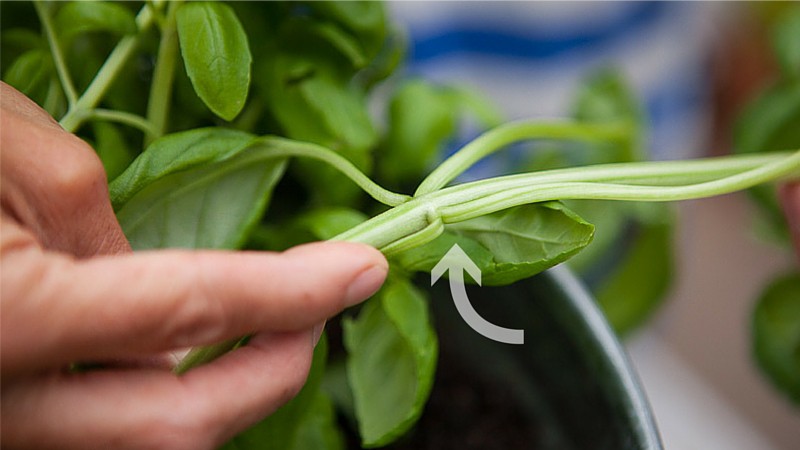
Side shoots of basil
- Remember that plants should always have at least 4 leaves below. If you cut the lower shoots, basil will begin to grow in height, not in breadth and become less fruitful.
- If you notice a blooming bud, immediately cut it and two leaves under it. If this is not done, the greens will begin to deteriorate.
We offer to see a visual video lesson about growing basil on a windowsill.
3 alternative ways to grow basil in pots
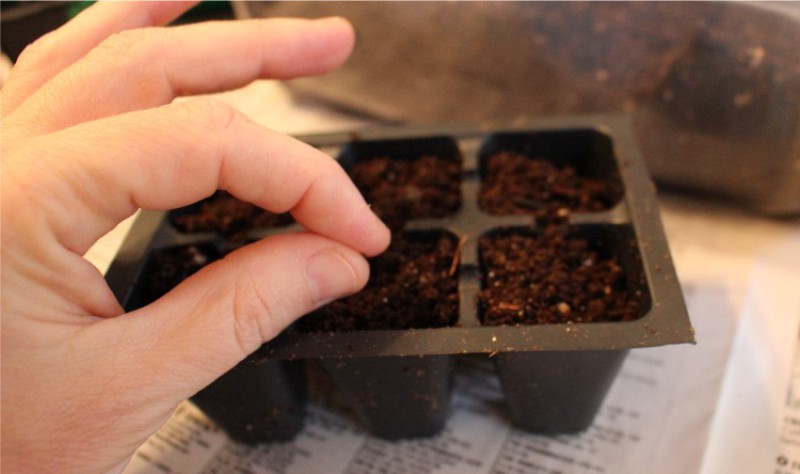
- All the same way, but with the germination of seeds in a temporary container and followed by picking into a permanent
In our instructions, we told about sowing seeds immediately to a permanent pot, which is convenient because the plant does not need to be replanted after the first shoots. But if the first 1.5 months you don’t want to clutter up the window sill with a large pot, then you can first sow the seeds in a small container (eg, in sour cream cups) and only after reaching the growth of shoots 5-7 cm, transplant them in a big pot.
Visually, the process of picking basil, you can see in the next video tutorial.
- Transplanting basil from open ground to pot
If you grow basil in the garden, then you can simply transplant a young plant in a pot. This basil will quickly yield, but not for long, as it will soon bloom.
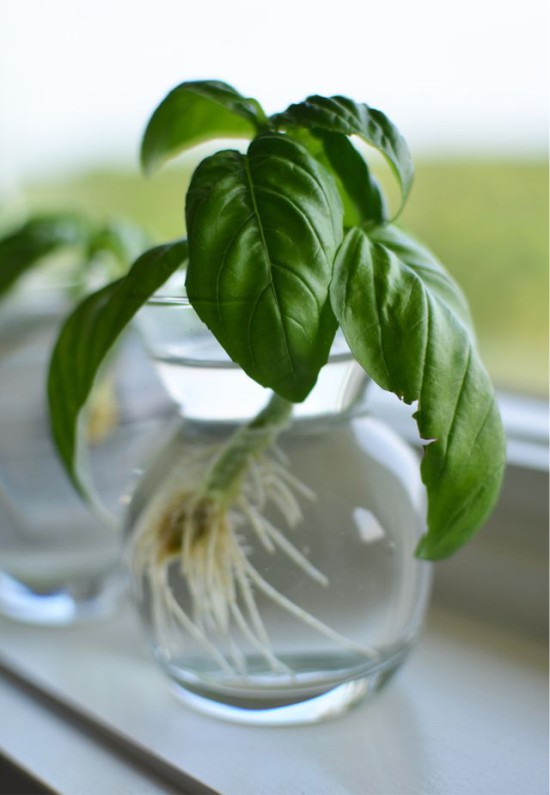
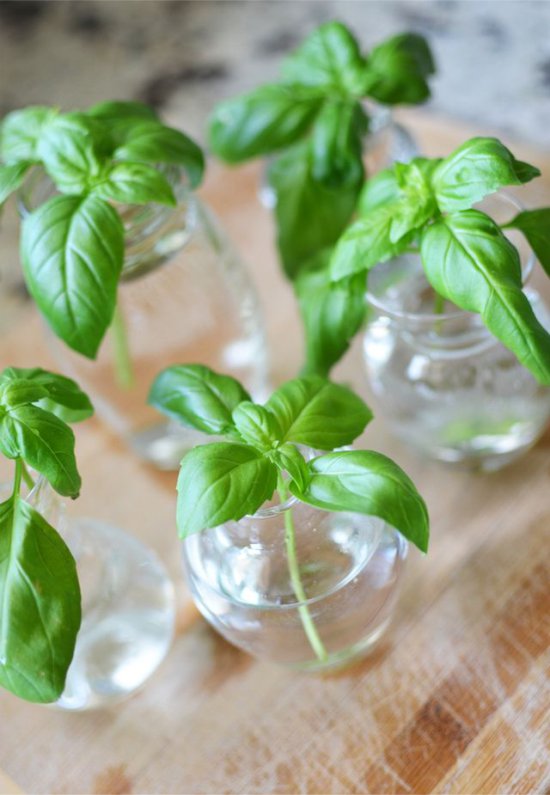
- Growing basil from cuttings
Another way to accelerate and simplify the cultivation of basil - by planting cuttings.To do this, cut the tops or side shoots from an adult plant (you can even buy basil), sprout them in water for 1-2 weeks (changing it every day), and then plant them in a pot. The first harvest such a seedling will give in 2-3 weeks, but will stand only 3-4 months.

 (Rate the material! Already voted:41 average rating: 4,78 from 5)
- How to grow green onions at home
- How to grow dill and parsley on the windowsill
- Indoor flowers and plants for the kitchen - choose unpretentious, useful and beautiful
- How to get rid of midges in flowers
- 8 questions and answers about storing honey