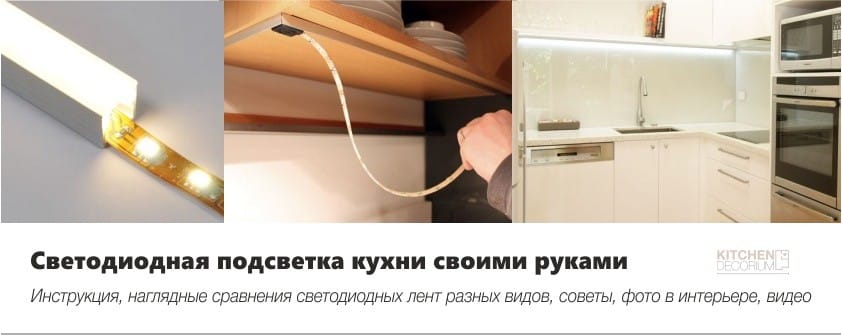
Proper lighting is one of the components of the spectacular design of any room. It is especially important in the kitchen, where the correct distribution of luminous flux makes cooking in a pleasant and comfortable process. All that is needed for this is the design and calculation of lighting. One of the most interesting options in modern interiors, which you can do with your own hands, is the LED strip light.
Light-emitting diodes are special semiconductors that emit light during the passage of electrical energy. LEDs can have different chemical composition, which is why the brightness of the light they generate is different. There is one more nuance - the installation of the LED backlight is never carried out directly, since this way the tape can overheat and break. A prerequisite for connecting LEDs is the presence of a stabilizer.
Advantages of LED lighting
LED backlighting is a series of obvious advantages:
- Resistance to mechanical external damage;
- Durability - kitchen lighting tape is able to work for 14 years or more, even when working more than 15 hours a day;
- Various colors - the lights on the kitchen under the cabinets can be made in white, red and orange, green and blue, magenta and yellow. You can also choose LEDs that work in the infrared and ultraviolet spectrum;
- Excellent brightness, and the device does not take time to warm up;

- Availability in the price (due to distribution and popularization);
- The ability to use a tape with a different angle of radiation;
- Security;
- Environmental friendliness;
- Undemanding to room temperature.
Ways and places for interior lighting in the kitchen
The number of crystals directly affects the number of colors in the ribbon. In general, LED strips can provide 15 million shades - if they combine crystals of different brightness.
Make LED backlight is possible for the following purposes:
- Combined lighting for zoning, highlighting cabinets, niches;
- Highlighting of paintings or other decorative elements of the interior;
- Highlighting the kitchen apron, especially impressive lighting, if the apron is made of glass;


- Lighting inside drawers and cabinets;

- Isolation of stained glass or clear glass shelves;

- By installing the lighting at the bottom of the cabinets, that is, under the cabinets, you can create the effect of "floating furniture";


- Lighting several levels of the ceiling;

- The lighting of the bar counter with LED lighting creates the atmosphere and style of a real bar.

Installation of warm-spectrum LEDs is made for classic interiors, and in a high-tech style, cold light will be more appropriate.


Choosing the right LED strip - classification and comparison
Most often, the installation of LED backlight is made of SMD-LEDs. They are classified by a number of attributes:
- The number of crystals - from 1 to 4;
- Type of glow - full color or monochrome;
- The dimensions are in the range of 1.06x0.8 to 5.0x5.0 mm.
Before you buy LED tape, you need to decide what type of lighting you want to do. Here are the following recommendations:
- SMD 50x50 ribbon with three-crystal LEDs is perfect for illuminating the working and dining area and will be able to provide uniform bright light.
- For decorative lighting suitable single-chip tape SMD 35x28.

The LED tape (LED) represents several small LEDs located within one plane. It can also have several varieties, depending on the density of the LEDs:
- 30 pieces / meter;
- 60 pieces / meter;
- 120 pieces / meter;
- 240 pieces / meter.

The power consumption and the brightness level of the generated lighting depends on the number of LEDs.
Tapes are divided into groups and according to the degree of moisture protection:

- IP20 - not suitable for the kitchen, because it does not withstand high humidity;
- IP65 - the average level of moisture protection, can be used in the kitchen;
- IP68 - full moisture resistance - such a ribbon can highlight even a swimming pool.
How to choose a power supply
Power supplies are of different power, and hence the size. We need to determine the best option for the transformer’s power to be sufficient with a margin, but at the same time so that it is not too large.

It is possible to calculate the optimal power supply capacity for a five-meter SMD 5050 tape with a power of 12 W according to the following principle:
12 W multiplied by 5 m (length of the tape), a total of 60 watts. But since we need a margin, we take into account the coefficient equal to 1.25 - it turns out 1.25 × 60 = 75, therefore, we need to buy a transformer for 75 W.
How to highlight the LED countertop, dining area
For a working area, a device with an average degree of moisture protection is suitable - it has a special protective layer that protects against vapors and dirt, water and other liquids. This means that if you need wet cleaning, you can wipe cabinets with lamps.
Installing the tape to the table involves attaching a special profile of aluminum. It is necessary to conceal the wires and make the lighting aesthetic. You can also make the backlight and self-adhesive tapes. By the way, by installing accessories, you can create a backlight that will change the brightness and / or color.
Tip! The warm white color of the LED strip is optimally suited for the desktop, since it will not change the natural colors of the food.
Additional lighting can be made from the LED strips in the work area. It also needs constructions with high moisture protection. Tapes are installed here with double-sided tape. You can use multiple tapes, which will create an expressive decorative effect.
What we need for installation
Independent installation of LED backlight will require the use of the following tools and components:
- Actually set: tape reel (12W), electric cable with a cross section of 0.74 mm square;
- Transformer - 12W power supply and dimmer with a control panel (if any);
- Solder with rosin;
- Soldering iron;
- Scissors;
- Double sided tape;
- Insulating tape (or heat shrinkable tubing with a hair dryer);
- Corner PVC and or aluminum profile for mounting LED - if necessary;
- Drill - if necessary;
- Electrical mounting brackets if necessary.


We make installation
So, all the tools and materials are ready, you can proceed to the installation of diode lights with your own hands.
Installation is performed in the following sequence:
- In the coil, the tape is most often 5 m long. Most likely, you need less, so we cut off the excess. The required length is measured by a tape measure and cut off in a strictly defined place, after which the extreme contacts must be carefully exposed from the silicone coating to about 1.5 cm.

- 2 cables are soldered to the contacts (preferably) or connected with connectors (not recommended).

- Then perform isolation (tape or tube). To isolate the wires with a shrink tube, you need to cut a small piece of 2 cm in length, put the wires in place, and fix them with a building hairdryer. What to choose - a tape or a tube - is up to you, but it's better with a tube, since it is safer and looks better.

- At the corner or profile attach the tape from the outside, and from the opposite part of the tape is fixed after removing the protective film.
- A transformer must be mounted near the backlight. This place needs to be thought out in advance. Cleaned wires of the cut off tape are soldered to it from the low voltage side. On the opposite side are attached plug with an electric cable. The LED tape is attached to a pre-cleaned and degreased surface.
Tip! To glue the tape exactly better not to press it immediately, but at first just gently glue the entire tape, and then, if necessary, trim.


- The wire connection is provided in parallel circuit and output to the place of installation of the power supply.

- The installation of a plastic wire box, where the wire is attached with electrical wiring clips, is by all means carried out.
- And then the dimmer is connected, that is, the switch and the final installation of the power supply. Dimmer and amplifiers will be required if you plan to change the brightness of the backlight during operation. These devices are mounted together with the power supply.

Well, that's all, the installation of LED strip in the kitchen is ready.

 (Rate the material! Already voted:132 average rating: 4,63 from 5)
We offer a look at the video, it will become even clearer:
- The choice of lighting for kitchen cabinets and not only
- Choosing the perfect chandelier for your kitchen
- DIY lamp for the kitchen - 3 ways and design ideas based on them
- Sconces in the kitchen - playing with the light according to the rules
- Wiring in the kitchen with their own hands
An interesting article, especially liked about the effect of floating furniture, although this does not apply to the applied (necessary) lighting. I liked the step by step presentation and an example of calculating the required power supply unit. I would like the author in the following articles to reveal the topic of illumination using RGB LEDs, as well as clarify the subtleties of the choice of serial or parallel connection of tapes, what does it depend on except for the length of the tape, and also why the length is limited to five meters.
Thanks for the opinion, we will listen to it! Watch the rubric
"1.25 × 60 = 75, therefore, we need to buy a transformer for 75 W."
The author, stop suffering nonsense. Consequently, the LEDs BURN out ahead of time. Putting the LEDs should be close to or almost end-to-end in power. Change the block is nonsense, change the LEDs harder and more expensive. Neither of which 10 years of speech and can not be in this case - 5 years red limit. You are absolutely not competent in the voltage. To drive such masters, it is better to do everything with your own hands, for the hundredth time I am convinced. No offense, but you should not feel sorry for the power supply, they do not break, it is better not to save on them that's all
Dear karter, if you do not think a damn in electrics, then you do not need to write such nonsense. "Not competent at voltage" - this is very cool ...
The socket in the apartment can give, for example, 5 kW, but for some reason a 40 W soldering iron stuck in the socket does not tear it to pieces. The generator in the car can give 1 kW, but the 55-watt bulbs feel awesome. Also with diodes, if you put the unit even at 500 volts, nothing will burn and explode.
Because we are talking about power, not about the voltage!
The calculation of the power supply in the article is absolutely correct. You can save a little and put blocks 1 in 1 op power in places such as the toilet, utility room, etc., where the lighting is used relatively briefly. But it is - saving on matches .... In other places it is good to have at least 20% of the power reserve.
You are probably confusing power with voltage ...
It is very intelligibly told. But if he didn’t work with a soldering iron, then it’s better to ask the master. Pre-cook everything. And after mastering the cut pieces. Already attach it to the product.