An exclusive and stylish kitchen interior almost always includes a bar counter. It can be located not only in the kitchen, but also serve as a separator between the kitchen and the dining room, kitchen and living room, and can become a home mini-bar. The process of creating such a structure is not very costly, but requires preliminary preparation and design.
If you can harmoniously fit the bar into the interior of the kitchen, then it will become its central element. However, it is worth remembering that the bar stool is not as comfortable as traditional dining, and therefore for family dinners there must still be a separate table. However, modern designs can solve this problem, and our article will help answer your question: how to make a bar counter with your own hands? In the “studios” this design will be an excellent zoning element, separating the rest area from the place where food is consumed, and also allows you to accommodate a friendly group of guests.
Materials for bar counters
To perform a bar counter at home, you must first select the materials. Do not forget that in most kitchens made rack in a mini format, in this case, the grand building is not expected.
The bar counter with your own hands can be made of the following materials:
- Plastic is a cheap and lightweight material, with a variety of color solutions, convenient in processing, but not too durable;
- Chipboard with a laminated coating is more expensive and more difficult to work, but more durable than plastic, comes in a wide range of colors, with surfaces that mimic multicolored marble and noble wood;
- Drywall allows you to create designs of all shapes and styles - from classic to loft; material is easily painted in any color suitable to the interior of the house;
- Valuable wood - this design will look noble, solid and expensive, but to create it will require basic carpentry skills.
Bar design types
When creating a bar counter at home, the following typical solutions can be used:
- Stationary bar counter.

It can be done in mini format. The maximum height of the table top in this case is no more than 1.2 meters from the floor. Here you can use a traditional bar stool - high, with a footrest, with backs and armrests.
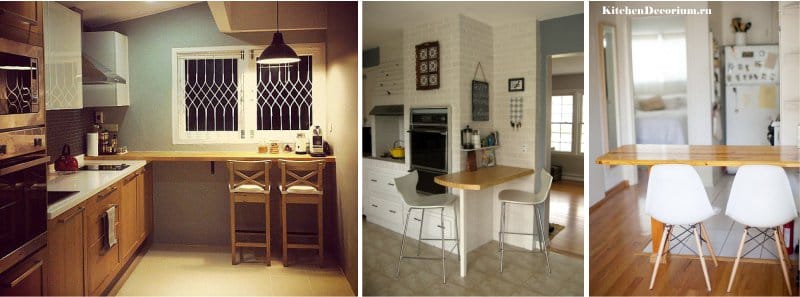
- Combining the rack with a dining table will be the best option for a small kitchen. The height of the working surface here is about 900 mm. As an addition - a standard chair.
- Two-tier design when the high bar is adjacent to a typical dining table. This is an excellent option for zoning at home - the low part remains in the kitchen, and the high part is taken out into the living room.
We make the tabletop - the whole process
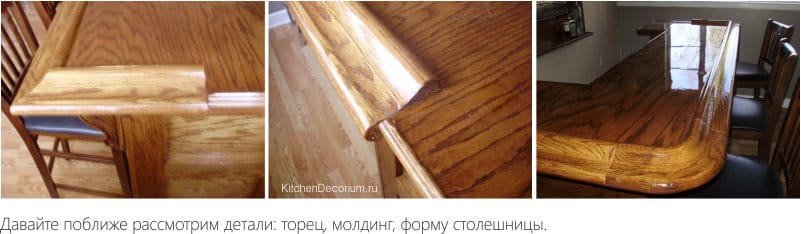
Bar counter do-it-yourself kitchen is created in several stages.And the basic element here is the tabletop - it is she who creates the necessary interior accents. Therefore, the slab used as it must be attractive, durable and resistant to wear. To make the worktop yourself, you will need a chipboard, veneer or other lumber. From it and cut the desired shape (jigsaw). In the places of the cut edge carefully cleaned and pasted with a special tape from the end.
Tip! The original color of the tabletop is easy to change, using a self-adhesive film.
If you do not want to engage in the manufacture of countertops yourself, then buy a finished product made of chipboard or acrylic stone.
The base of the "bar" - the main rules of construction
Making a bar counter for the kitchen (standard or mini) requires the construction of an appropriate base. Here are the following options:
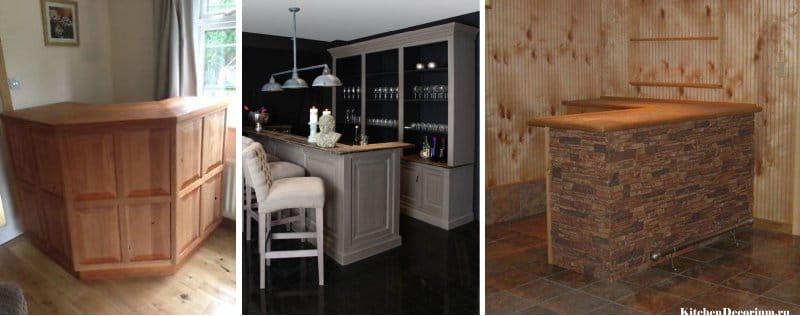
- Brick base - laid out of brick on cement mortar so that the shape of a rectangle is maintained. It is better to use a red facing brick that does not require additional decoration. Other types of material will need to be plastered. "Bar" can be located on the island type and will be the central element of the room. Such constructions are stable and massive, and as a table top, products made of thick wood or marble are used here.
- You can perform a skeleton basic design. For this purpose, a metal corner with a width of up to 50 mm or a wooden bar section of 40x40 mm is used. The structural elements are interconnected (welded or twisted), and then trimmed, painted and sheathed. To give strength to the base, it is additionally fixed to the wall or nearby furniture. Since this type of construction is light, massive tabletops are not used here.
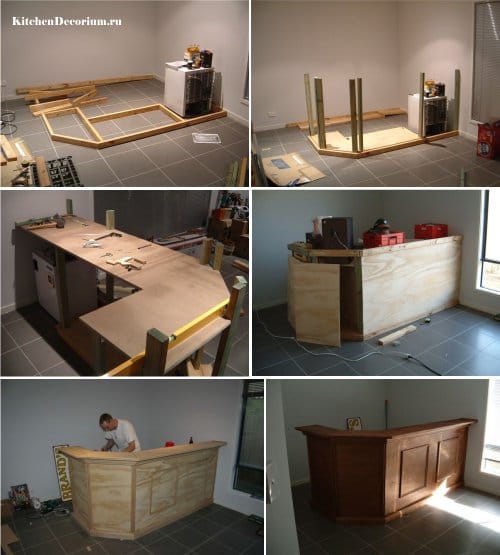
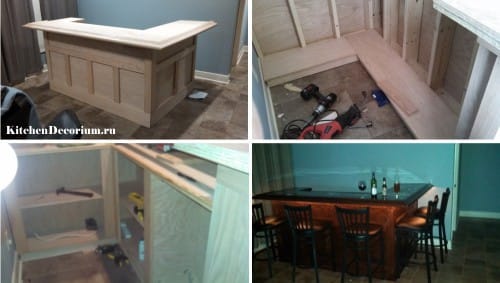
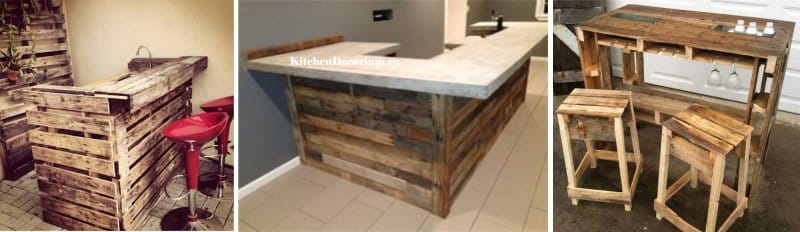
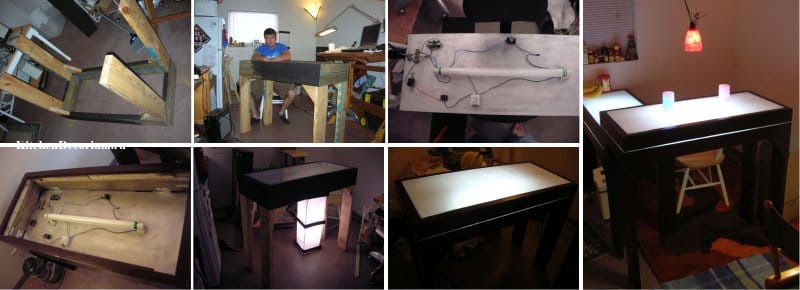
Below we present you step by step photo instructions for creating a bar counter with your own hands from veneer on a frame made of wooden bars. You can use: chipboard (but this material is not the most reliable), plywood, fiberboard, MDF and drywall.
We will need:
- Wooden sticks or edged boards 100-120 cm in length (in this case, edged boards 5 cm thick, 15 cm wide, 105 cm long will be used);
- Sheets of plywood, veneer, sheets of hardboard (in this case - oak veneer);
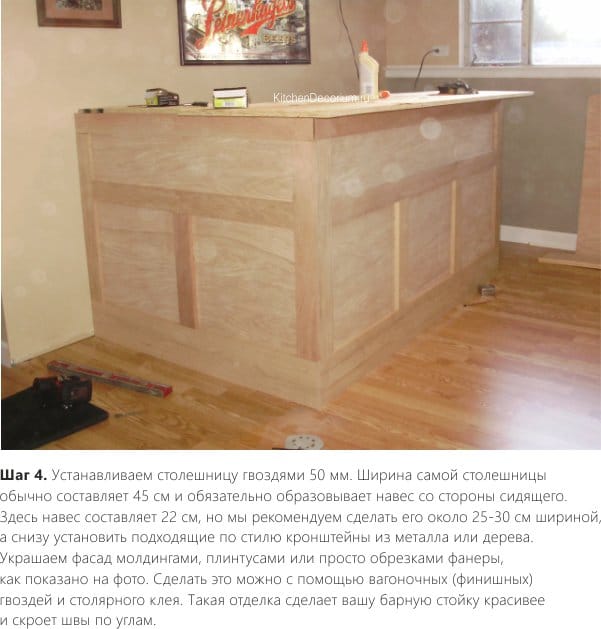
- Carving nails, as well as self-tapping screws 3.8 cm and 50 mm;
- Glue for carpentry;
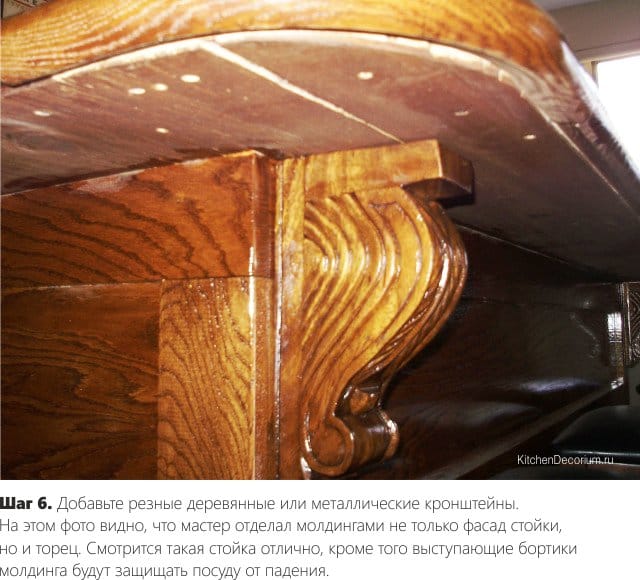
- Moldings, decorative plinths or plywood trimming, as well as 2 - 5 brackets if desired;
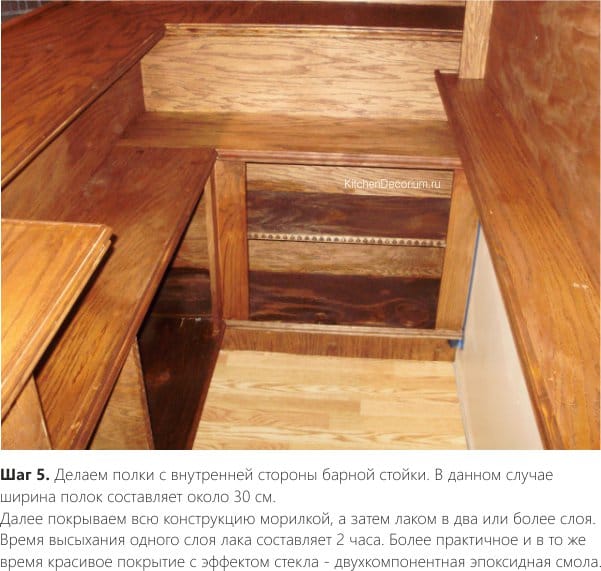
- Wood stain, and also a varnish on a tree or two-component epoxy.


Tip! To create a bar counter of any design, including the mini format, you need according to a pre-made drawing. It is better to use a three-dimensional model, but the diagram on graph paper is also suitable. This approach will allow you to create a harmonious design that fits the size of the room and the existing interior. You can also immediately select a chair and a suitable set of equipment for the rack.
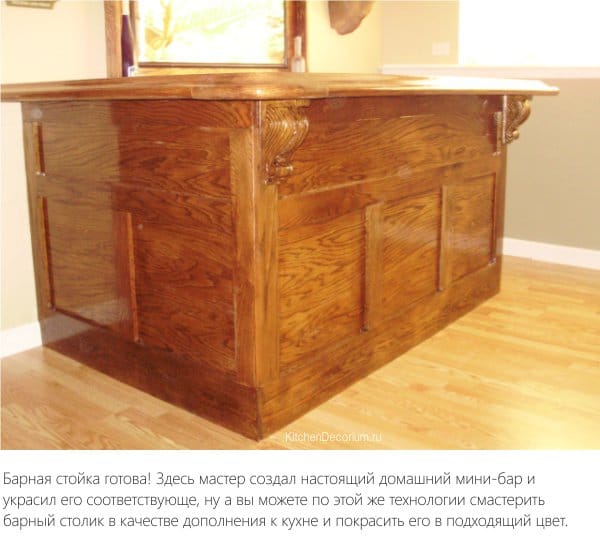
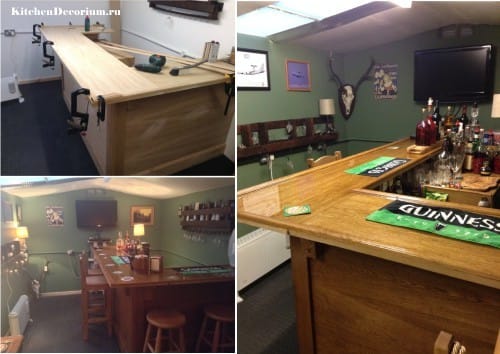
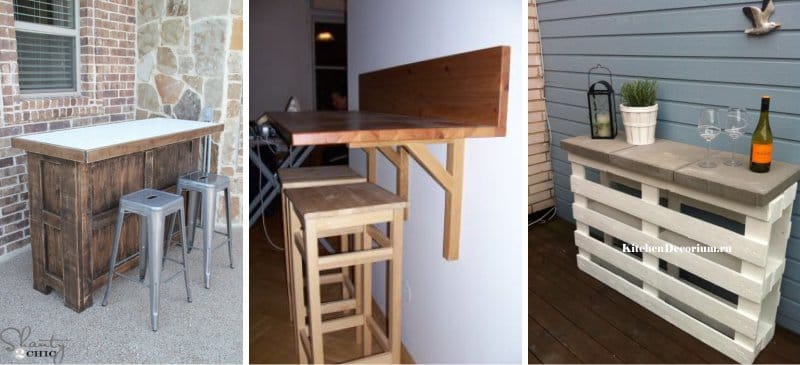
But the bar counters, made their own hands on the same principle, but in a different design.
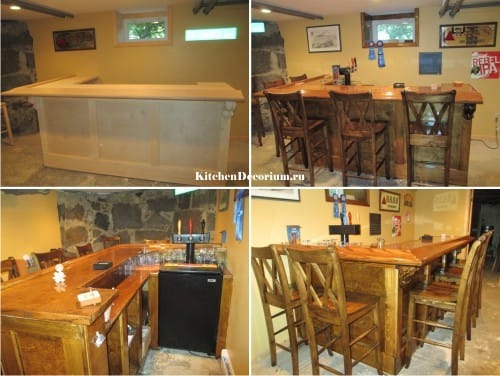
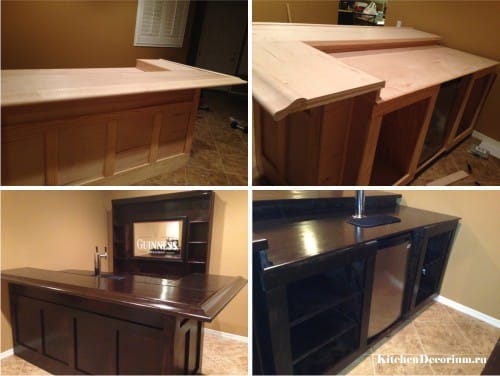
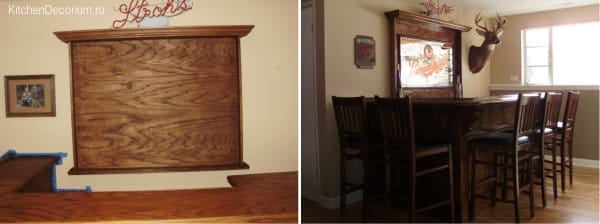
And here are other ideas for do-it-yourselfers.
Bar counter lighting and suitable equipment
To the bar table better fit into the interior of the kitchen you need to think about its lighting. With proper lighting, even a mini-bar will become a relaxation and comfort zone.
It is best to illuminate the bar with halogen lamps, placing them in a special beam above the table top. However, for this purpose, suitable and mini-ceiling or chandeliers, suspended directly from the ceiling.
The photo shows various ways of lighting the bar.


Tip! When creating a lighting scheme for bar counters, you should also use dimmers that provide the ability to change the light intensity. In this way, you can easily create a unique cuisine atmosphere, reminiscent of a traditional bar.
To make the installation of lighting fixtures not difficult, the rack should be mounted close to the existing junction boxes and ready-made outlets.If this is not possible, then it is recommended to use extension cords or to conduct a new electric circuit specifically for the bar counter.
And when the work on creating a bar counter for the kitchen is completed, it should be supplemented with necessary equipment and furniture - and this is not only a chair (high or standard), but also a sink for dishes, special cup and glass holders, decorative themed linens and, of course same, homemade liquor collection.

 (Rate the material! Already voted:17 average rating: 4,65 from 5)
We offer to watch a video where the guys tell how to make a bar counter out of oak:
- Everything about the kitchen with a bar
- Bar counter dimensions
- Accessories for the bar
- Corner kitchen with breakfast bar
- The choice of kitchen countertops - the advantages and disadvantages of popular materials