
There can be a great variety of reasons to do our own hands to update old chairs or to decorate new ones. This is the need to adapt furniture for the interior, the desire to correct design flaws, to restore chairs inherited from grandmothers or found for nothing at the flea market. In this material, we will talk about 4 ways to transform "four-legged friends" (including office and garden chairs) beyond recognition, and also present 70 cool photo ideas for rework.
See also: 3 easy ways to upgrade your kitchen
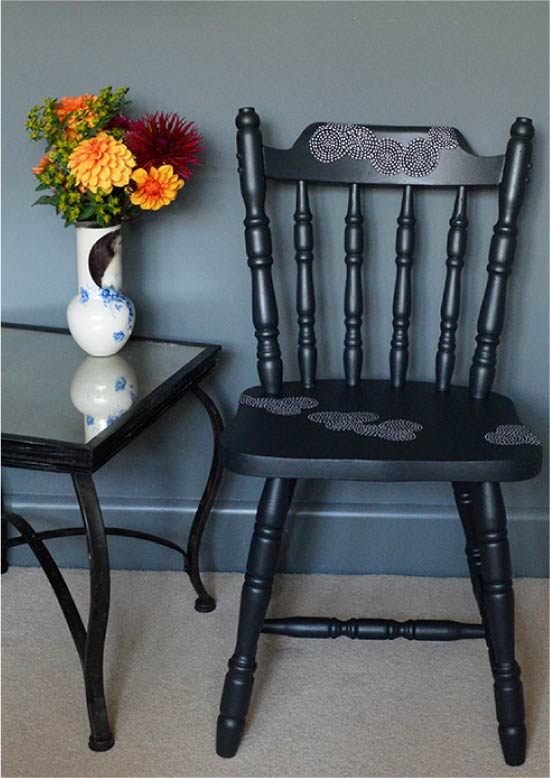
Method 1. Painting the chair
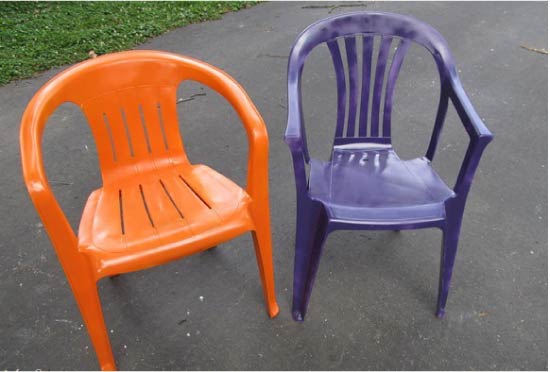
Even the most old-fashioned or simply ordinary chair, say, “Viennese” wooden, plastic, folding or office, can be transformed with the help of staining. The main thing here is to choose the right color. Here are a few inspiring examples where only one color saved furniture from moving to a landfill.
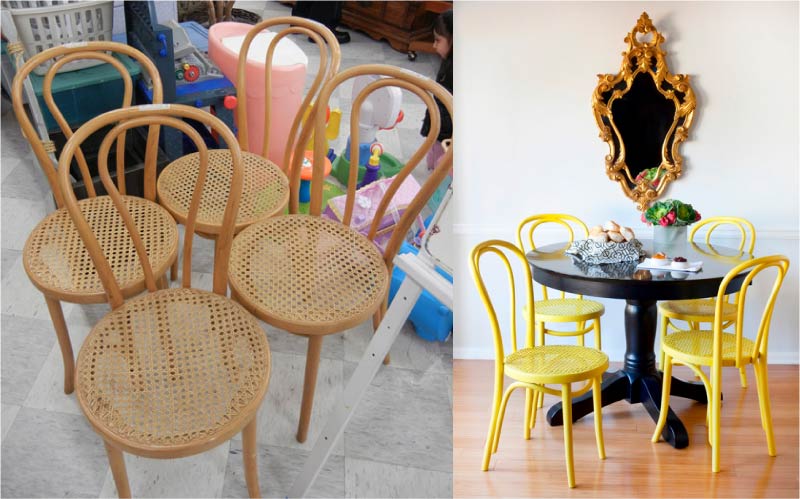
Viennese stools before and after dyeing
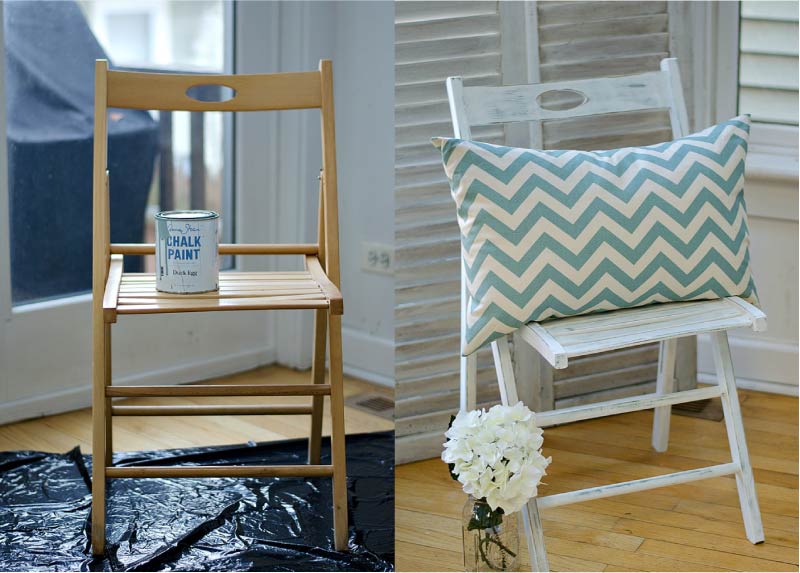
Folding chair before and after painting
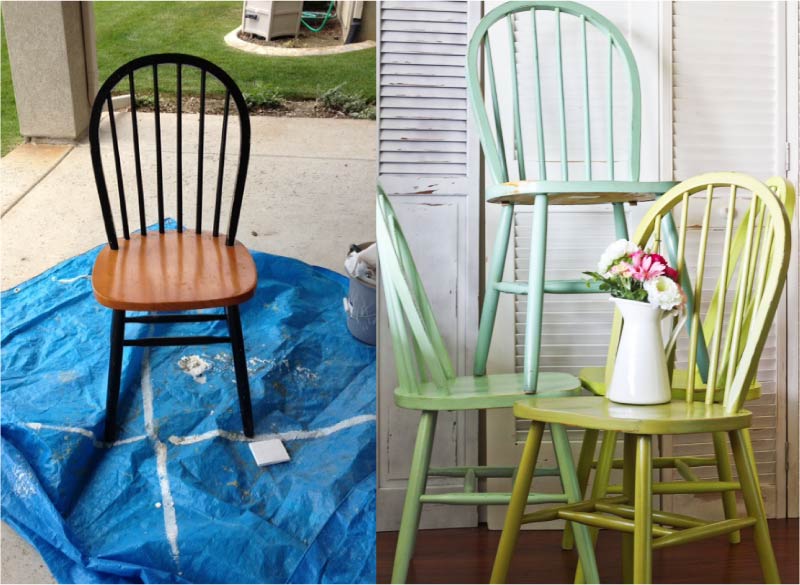
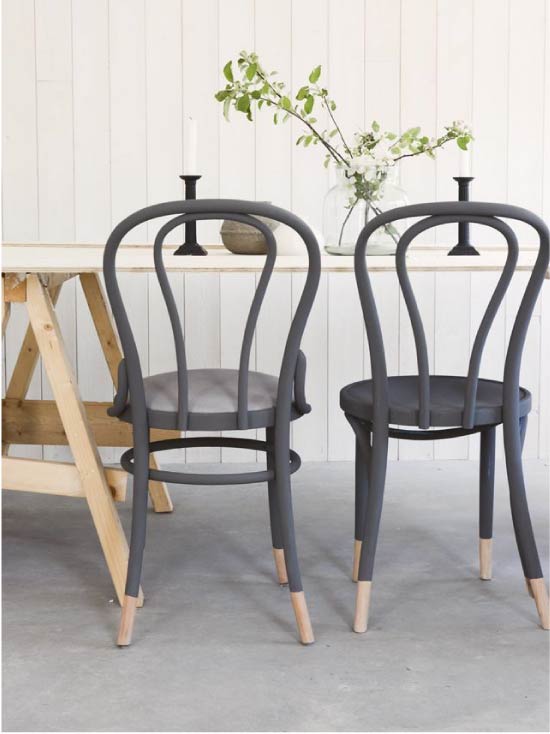
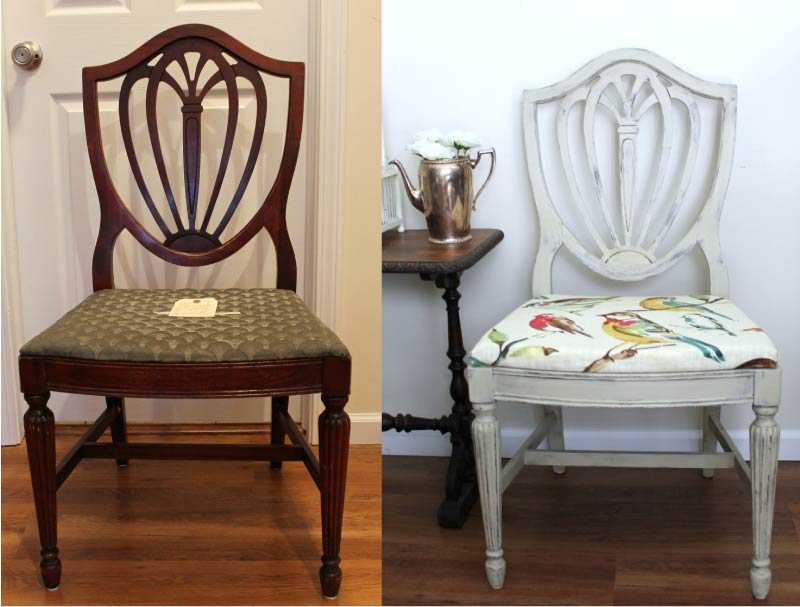
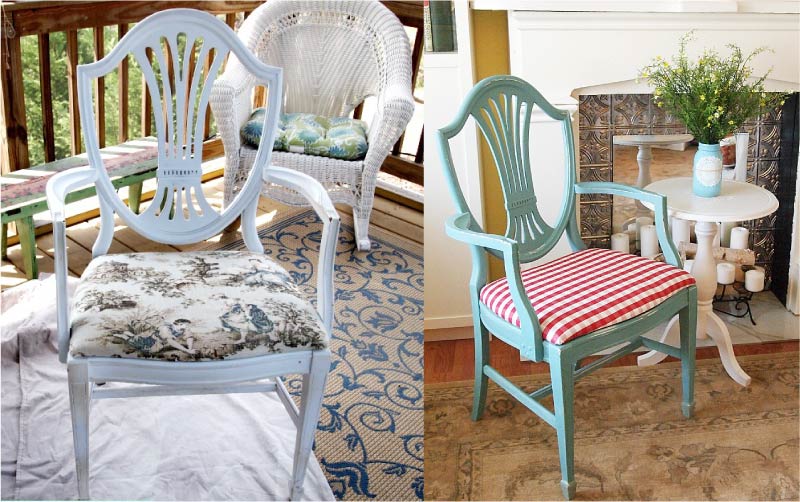
Chair before and after staining
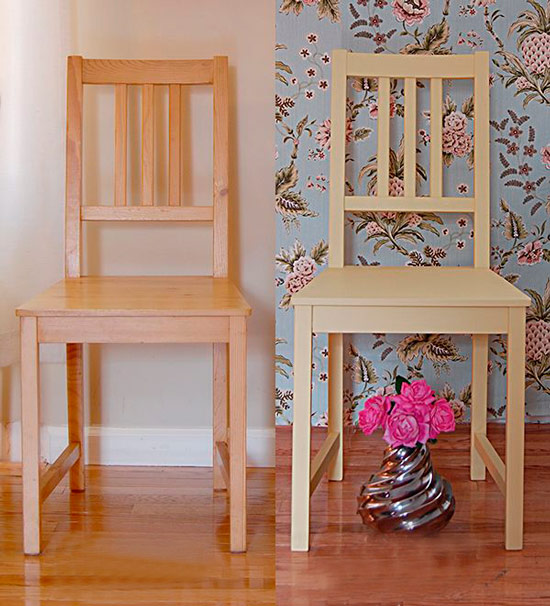
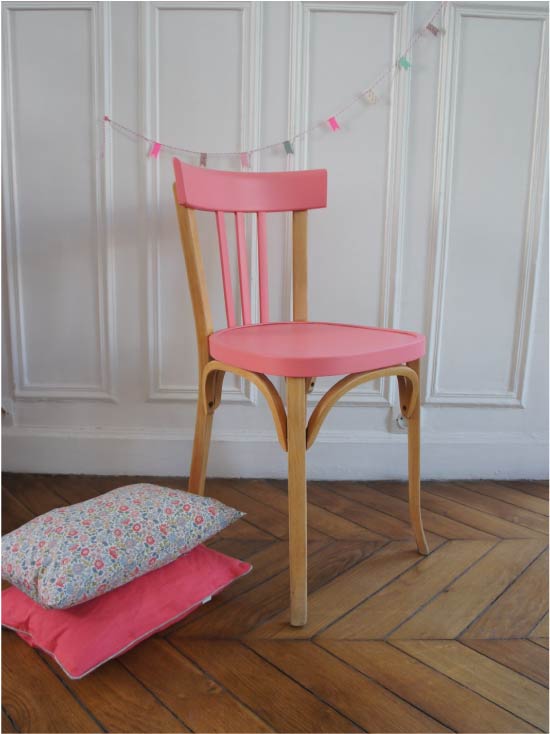
Chair before and after painting
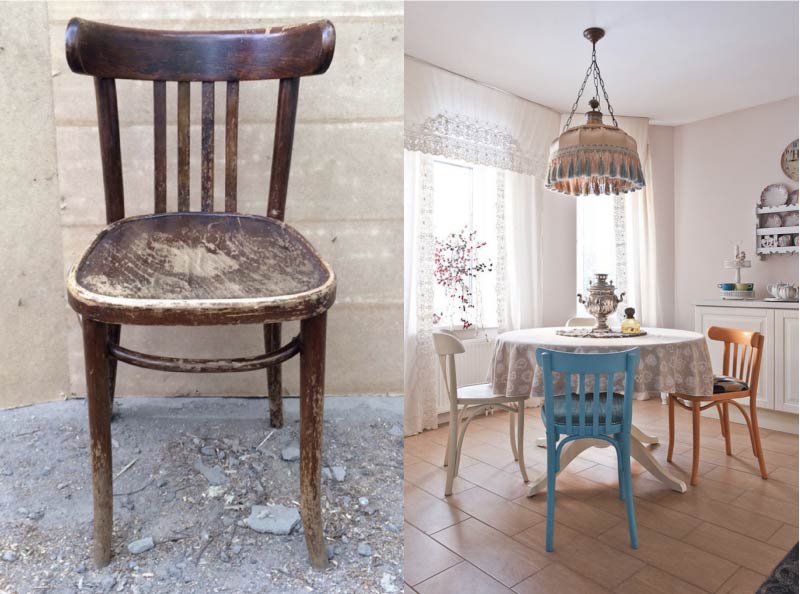
Old Viennese chair before and after renovation
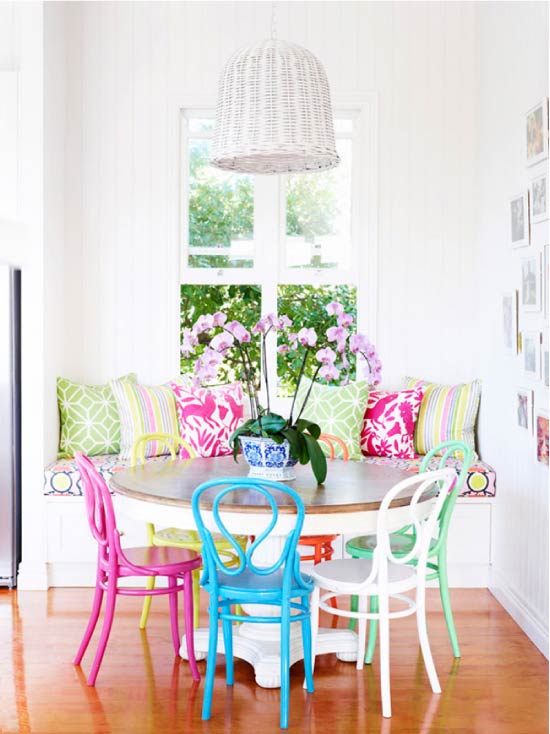
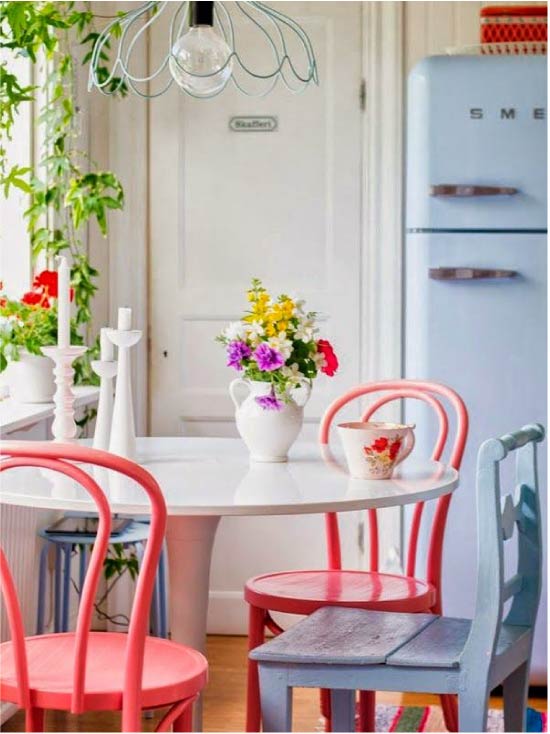
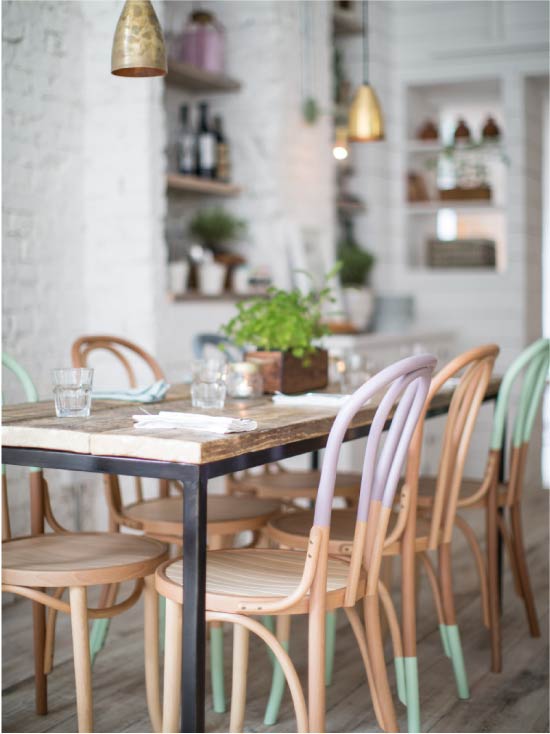
A few more examples of reworking the most common Viennese bentwood chairs, which are found in almost every house or cottage.
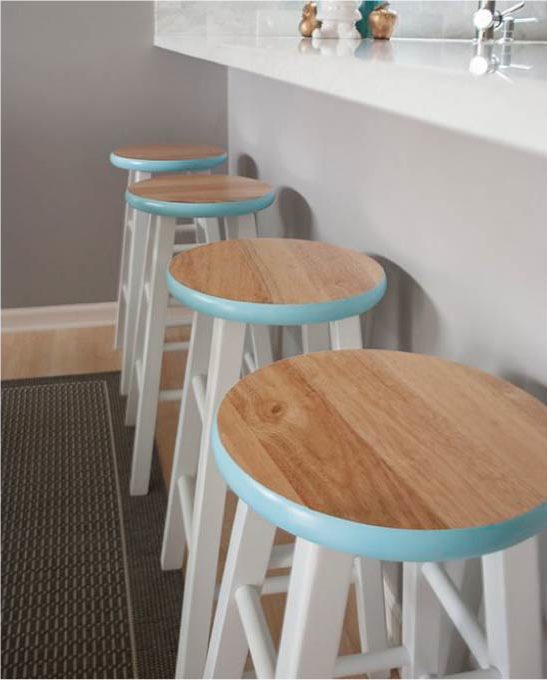
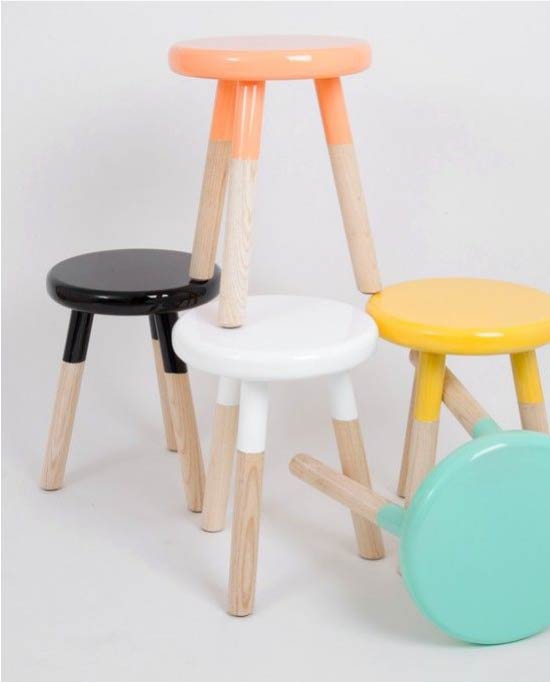
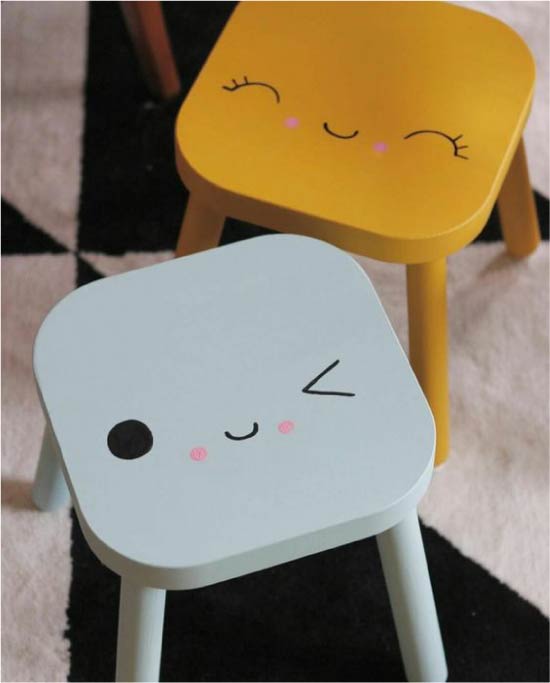
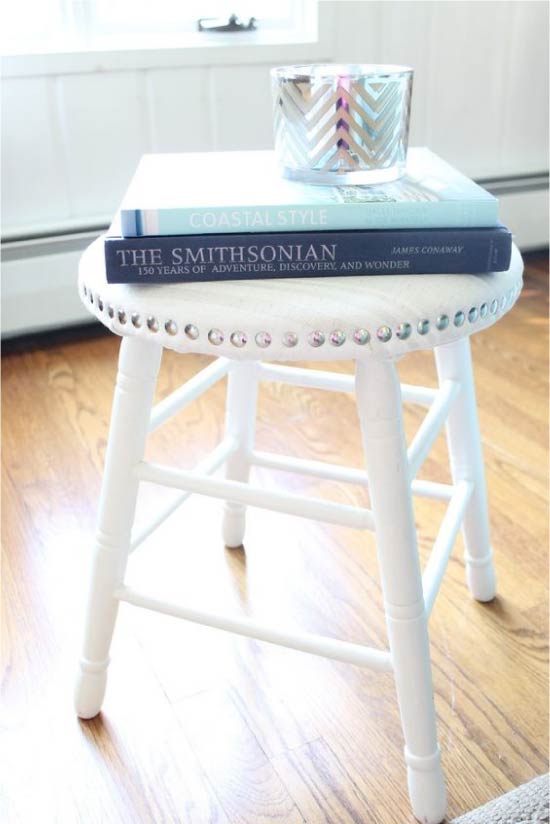
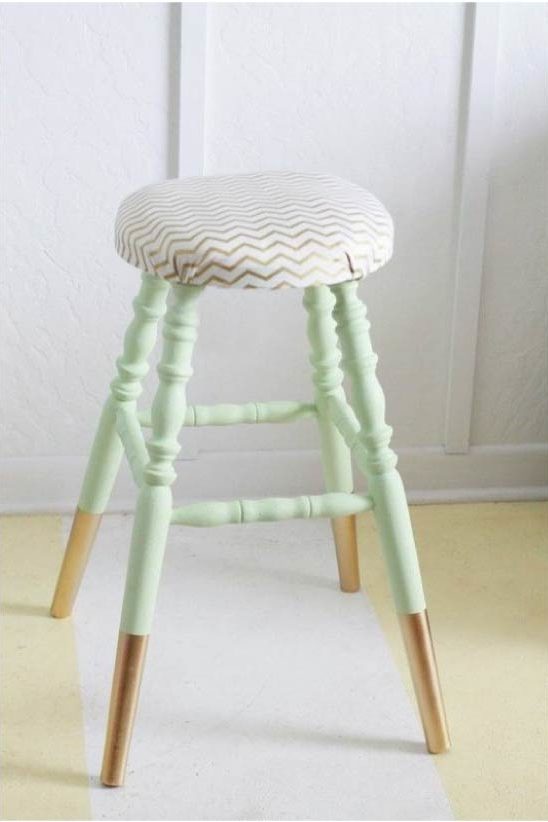
And here are some cool ideas for painting stools.

Inspired? Then let's move on to practice!
For staining the chair you will need:
- Acrylic paint, and preferably chalky in one or more colors;
- Synthetic flat brushes (separately for primer, paint and varnish);
- Protective gloves (better to buy at the pharmacy);
- Primer on wood / metal (depending on the material of the frame);
- Wax or matt varnish (polyurethane or acrylic);
- Sandpaper medium and fine grain.
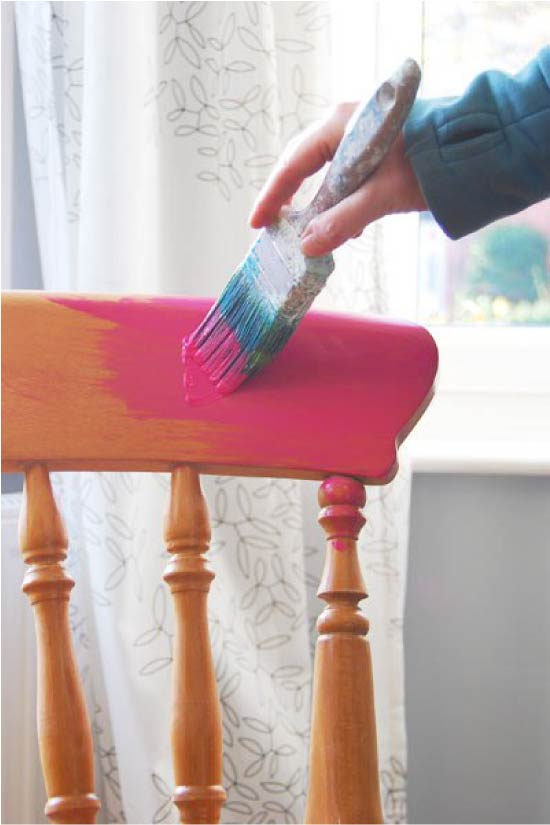
How to paint a chair with your own hands:
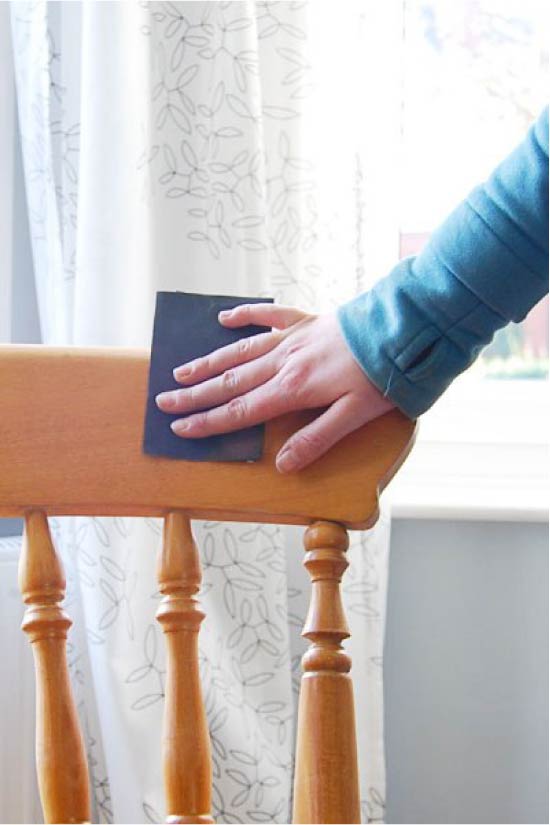
- Prepare the stool for painting: wash it away from coarse dirt and dust, then sand it off with medium grit sandpaper to remove the top layer of old varnish or paint. The surface should turn out slightly rough.
- If you want to update the metal chair, then it is not necessary to sand it (although it is safer to still polish the upper gloss), but before priming / painting the frame must be degreased with white spirit.
- Also, you can avoid the tedious stage of sanding if you use chalky paint, but you can not do without a primer.
- If your stool is covered with varnish, you can remove it with a special tool for washing the varnish.
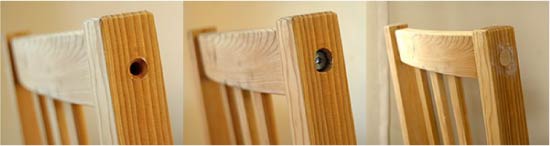
- If the chair is damaged, such as scratches, chips, or cracks, putty them with furniture putty.
- Wipe the chair from dust, wait for it to dry, and apply a two-coat primer to the entire frame, allowing each layer to dry for about a day. Between the layers of the primer is desirable to grind fine-grained sandpaper (suitable number 220).
- Take a new brush and paint the chair in 2-3 layers, letting each layer completely dry. Make sure that the paint does not form stains.
- If you want to paint the chair with the effect of wear, then first on some places (for example, on the edges of the seat, back and armrests) you need to put a dark paint, say, dark gray or dark blue, and then wax them. Next, you should paint the chair with basic paint in 2-3 layers. And, finally, lightly working fine-grained skin to expose the dark "substrate".
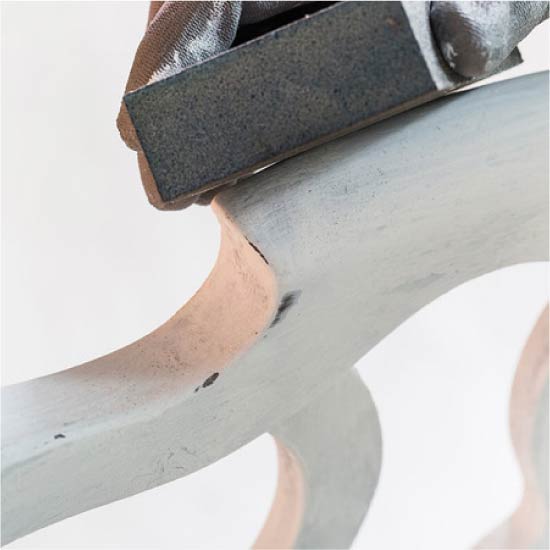
- Do you want to achieve the effect of the perfect factory painting? Then be patient: each layer of primer and paint (with the exception of the finishing layers) will have to be sandpaper fine-grained sandpaper. So the coating will be as smooth and reliable as possible.
- To paint only the individual parts or parts of the chair, use masking tape.
- Treat the chair with wax or matte varnish. Voila, your “four-legged friend” has found a new life!
Useful tips:
- You do not know what color to paint the chair? You can not go wrong if you paint it with white paint, because this color is the most universal, it goes well with any bright upholstery;
- Before painting on the back of the chair, you can glue the stucco decoration with wood glue;
- Achieve the effect of a very old and dirty chair Provence style, it is possible by means of dark brown wax;
- Chalk paints are a relatively new type of paint that has not yet become widely available. However, we recommend using it because, due to its density, enhanced adhesive properties and super-fast drying (in 30 minutes), it saves a lot of time and effort. In Russia, chalk paints can be purchased from designer Daria Geiler, and in Kazakhstan - in Vernensky Manufactory. Also you can always order paints from foreign manufacturers - Annie Sloan and Rustoleum.
It is better to figure out how to paint the old chair with your own hands this video workshop will help you.
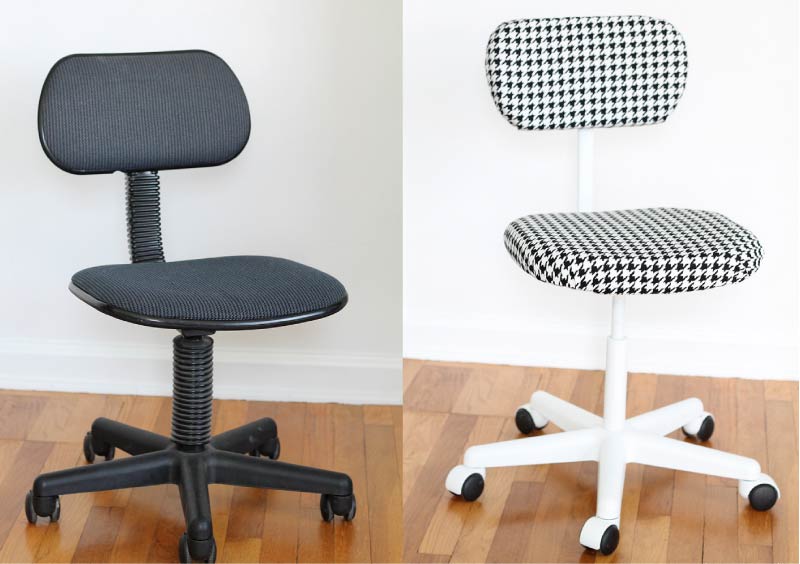
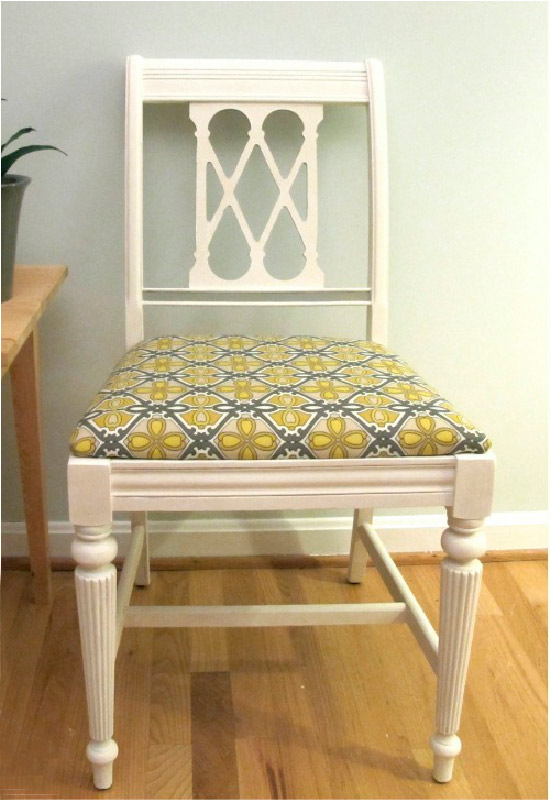
Method 2. Padding seats
Most often, if the chair has a soft seat, then painting the frame is not enough to update it completely - you need to change the upholstery. Here are some photo examples of how hauling a seat can turn an old chair into a stylish decor item.

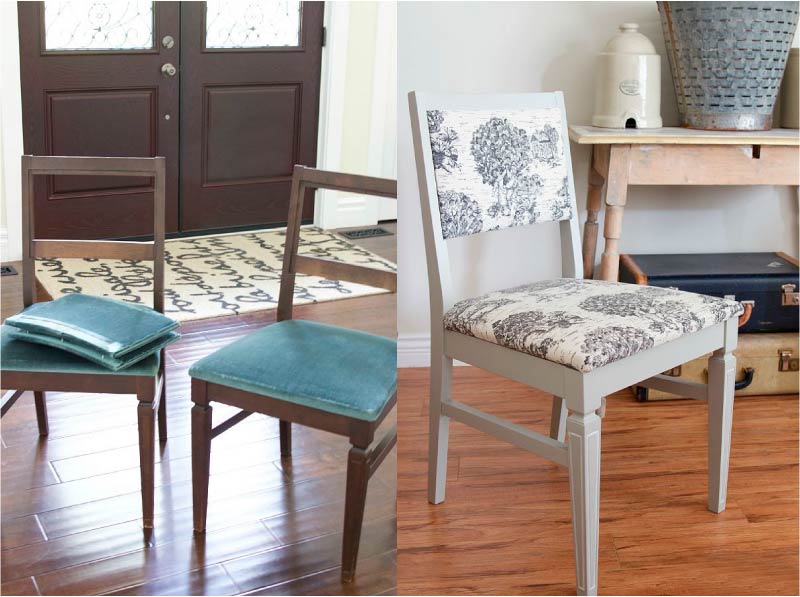
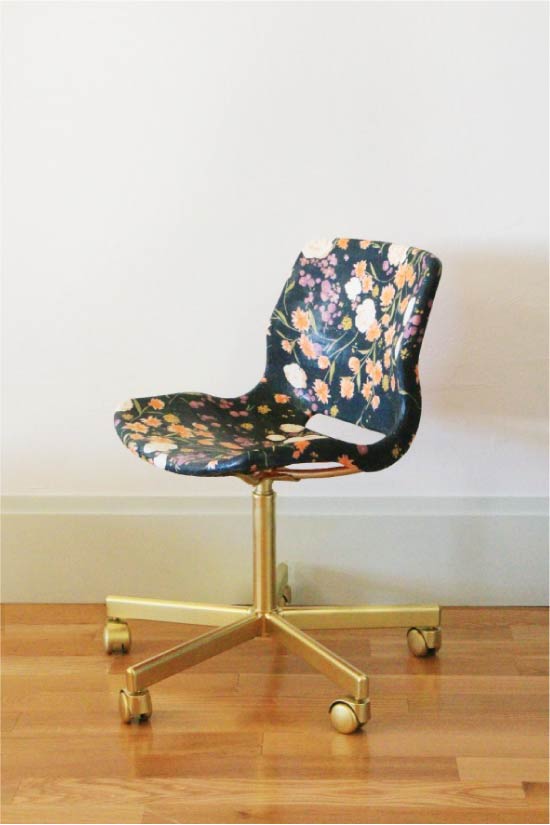
Office chair before and after painting, replacement of upholstery, backrest and seat
By the way, if your chair or stool does not have a cushioned seat, then you can do it yourself: first, cut out the base from MDF exactly in the shape of the seat, then follow our workshop to embed it and, finally, screw on the screws to the frame of the chair.
To make a soft stool for the stool, it is enough to glue the foam rubber directly onto the base, and then cover it with a cloth, hammering the stapler brackets onto the inside of the seat.

Stool with homemade upholstery
For work you will need:
- Anti-stapler (or its alternative);
- Furniture stapler and brackets with a height not exceeding the thickness of the seat base;
- The cloth;
- Foam rubber about 4 cm thick;
- Batting or synthetic winterizer;
- Scissors;
- Knife serreytor for bread (with teeth);
- Screwdriver.
How to update your upholstery with your own hands:
- First we need to remove the seat from the chair frame with a nail puller or screwdriver.
- We remove the old upholstery with an anti-stapler and remove the filler if it is dilapidated (if it is in good condition, then it can be reused). Next, wipe the seat base from dust and dirt.
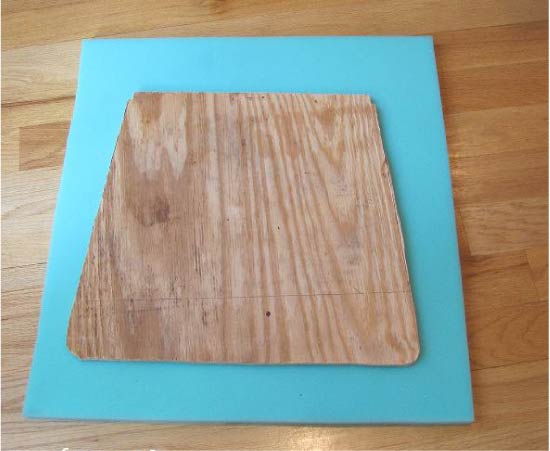
- If the wooden base of the seat seems too old and unreliable, use it as a template to cut a new seat out of plywood.
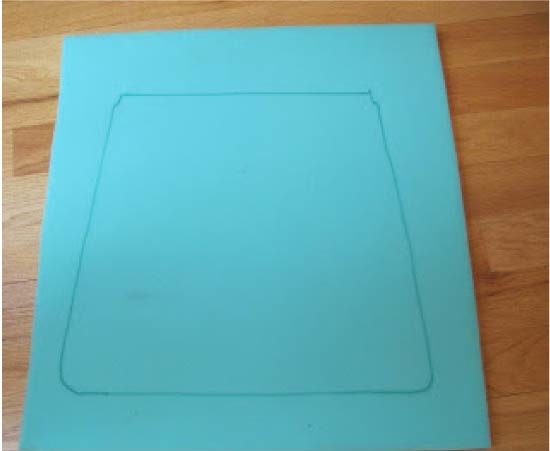
- Put the seat on the foam rubber, circle its contour and cut it out.
 1
1

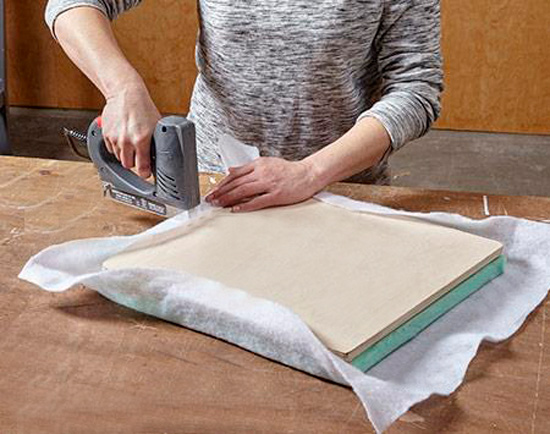
- We cut the fabric and wadding in such a size so that they can wrap all sides of the seat (along with foam rubber), leaving 10-15 free spaces left. These surpluses are needed to make it easier to stretch the material.
- So, we got four blanks: base, foam rubber, batting / sintepon and fabric. Now we need to put it all in a sandwich. First of all, we lay out the batting, put foam rubber on it, and foam rubber - the base of the seat with the wrong side up. Next, just bend the edges of the batting on the seat and slightly pulling the material, fix it with a stapler.Corners batting can be cut off, and you can just bend and fasten the same way.
How to restore a chair seat
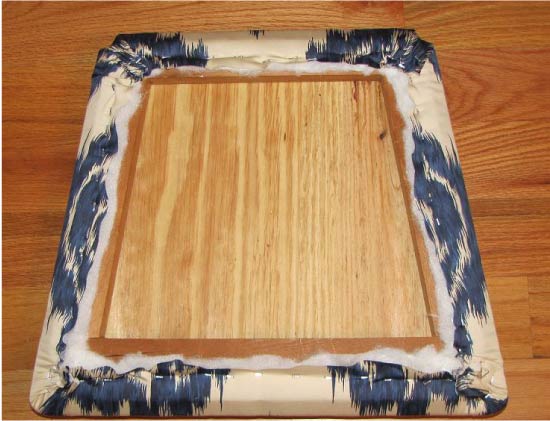
- After all the batting is attached to the seat, trim its excess.

- If desired, foam rubber can be pre-glued to the base or around the perimeter to quilt with a stapler, departing 5 mm from the edge of the seat.
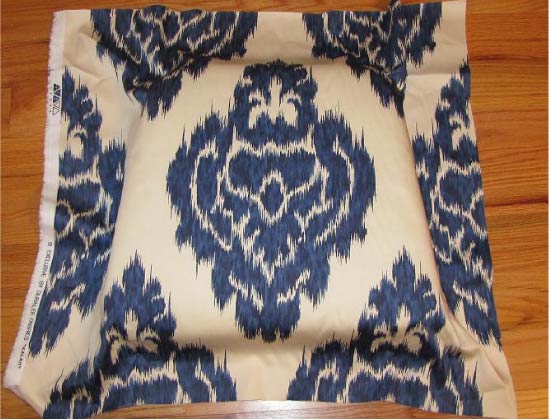
- The most crucial moment has come - the stage of the waist of the seat with a cloth. Spread the fabric inside out and place the seat on it. Next, bend the edges of the fabric along one side and fix with a stapler. Now gently pull the fabric on the opposite side of the seat and also fix the stapler.
 1
1
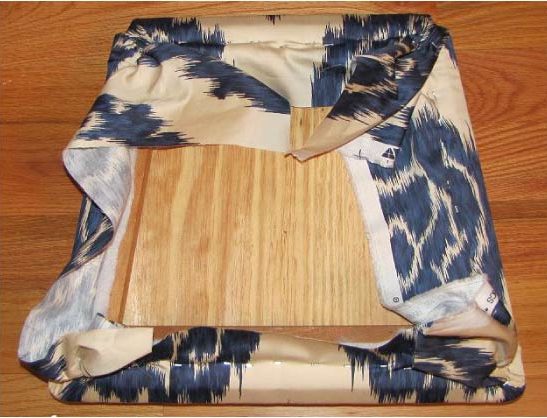
Repeat the procedure with the remaining two sides and proceed to the design of the corners - they need to be turned as shown in the photo below.
Chair after restoration
- We return the seat into place and fix it with “native” fasteners.

Useful tips:
- The soft seat of the chair can be further decorated with furniture studs around the perimeter.
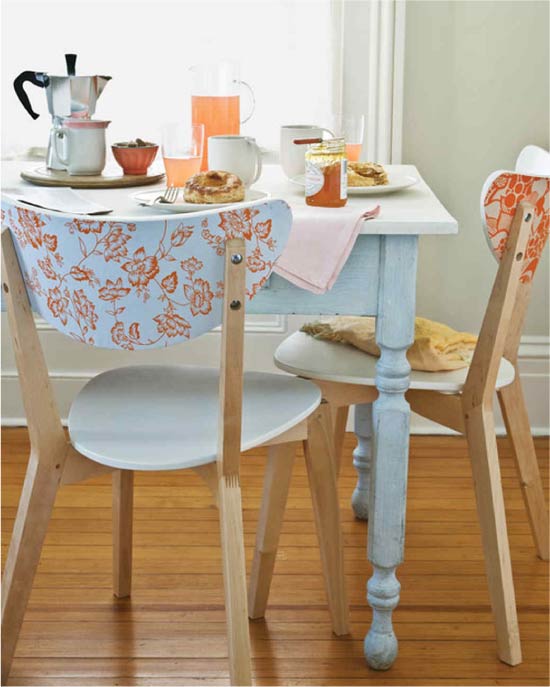
- Upholstery fabric should be selected in accordance with the style of the chair. For example, a traditional jacquard fabric will not work for a modern chair, and a classic chair with an elegant back is unlikely to “make friends” with a fabric with a new-fashioned geometric print.
- For the upholstery of the chair is ideally suited the same fabric from which your curtains are sewn. In the interior, such a coincidence will look very harmonious.
- The print on the fabric can overlap with carved crossbars as shown in the photo below.
A more visual master class upholstery of the old chair, see this video.
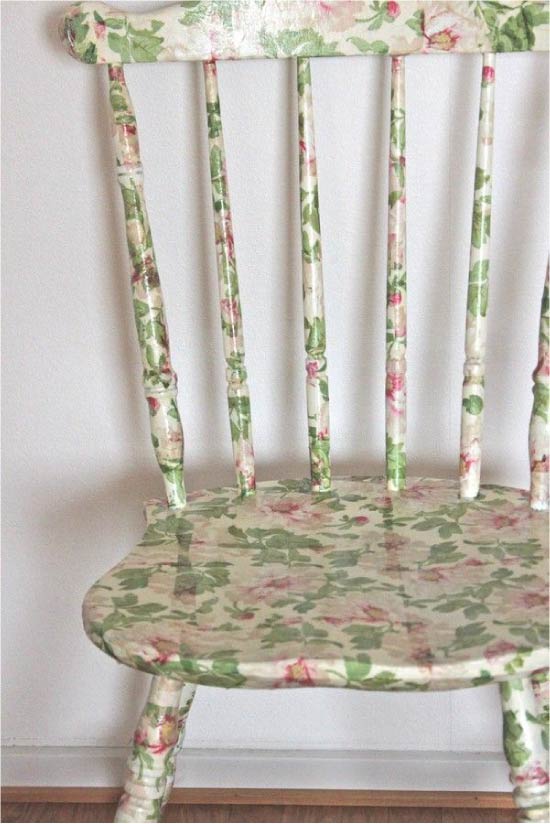
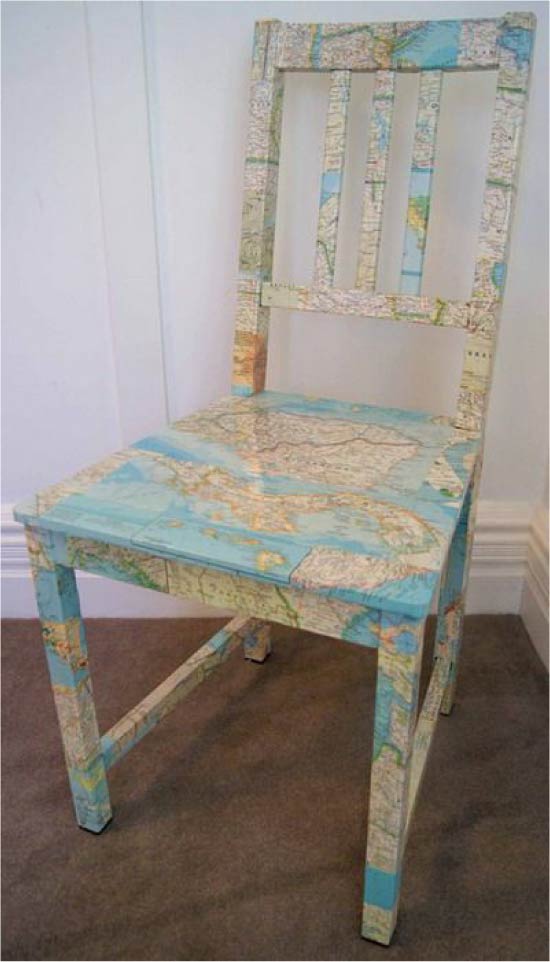
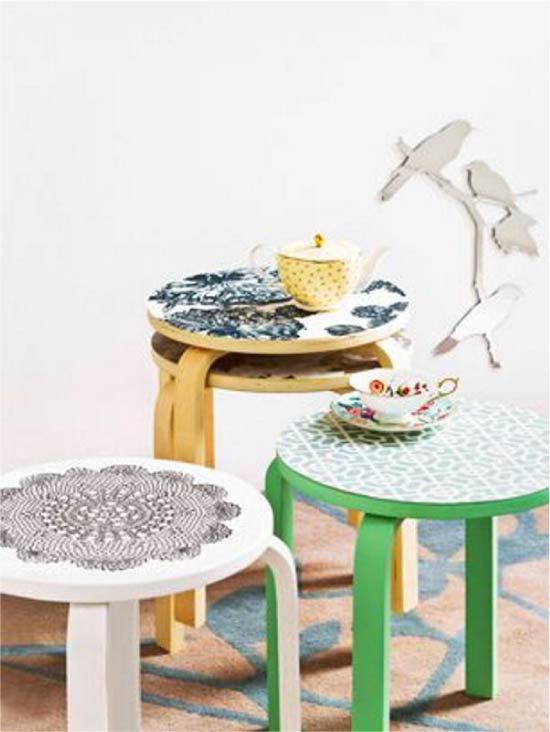
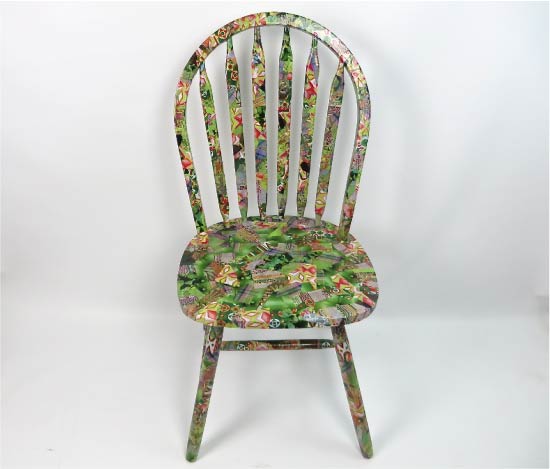
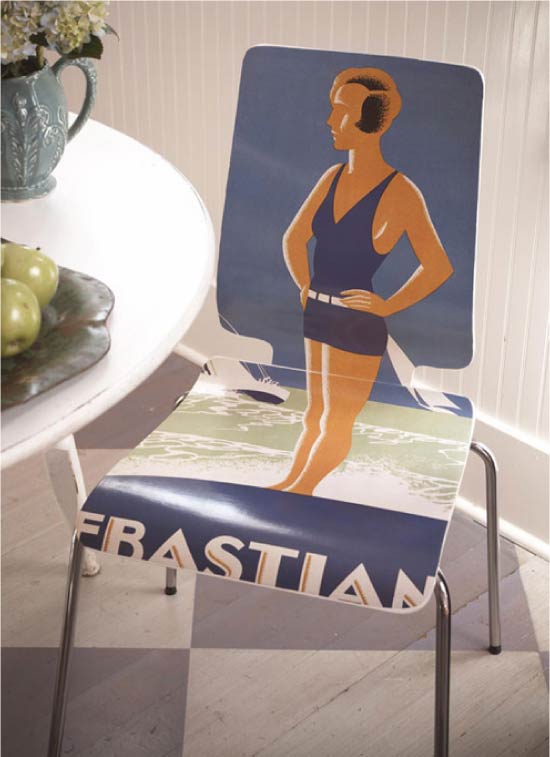
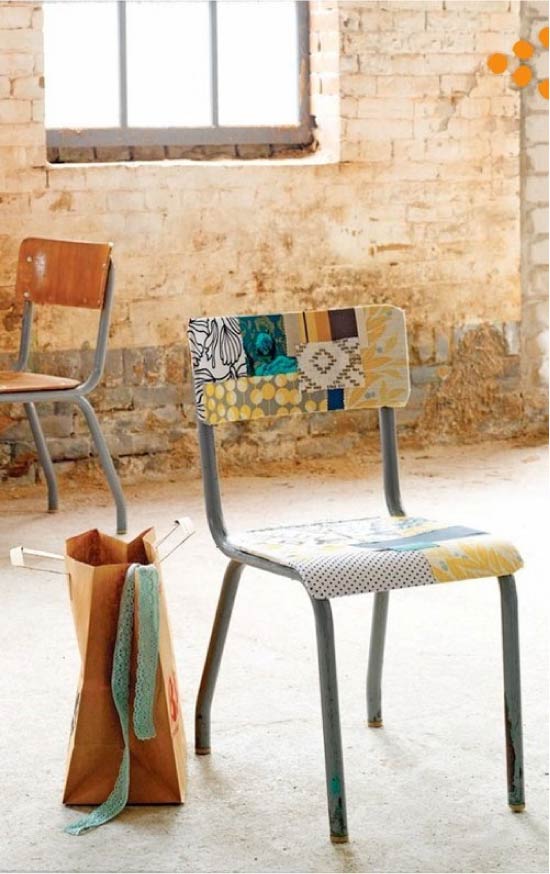
Method 3. Decoupage the chair with paper
Do you want to decorate the chair with a cool print or disguise small defects like scratches and stains with drawings? This can be done with the help of decoupage technique.
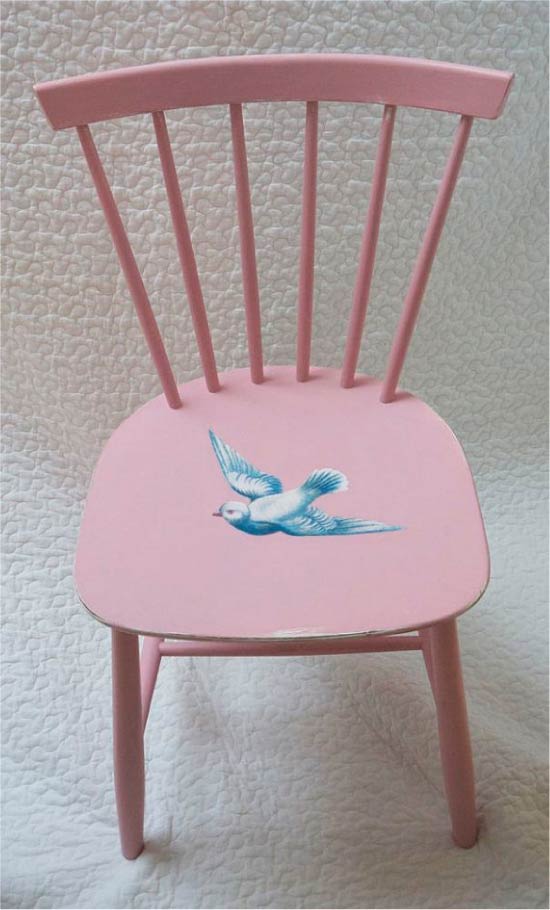
The idea of decoupage chair
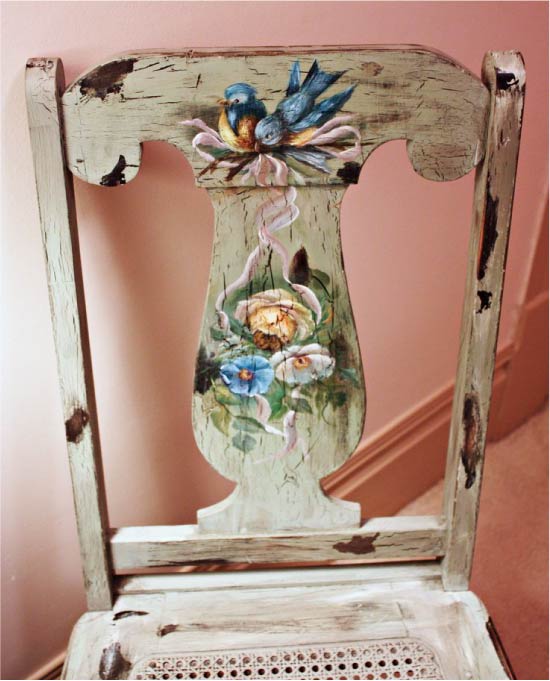
The idea of decoupage chair
The idea of decoupage chair
The idea of decoupage chair
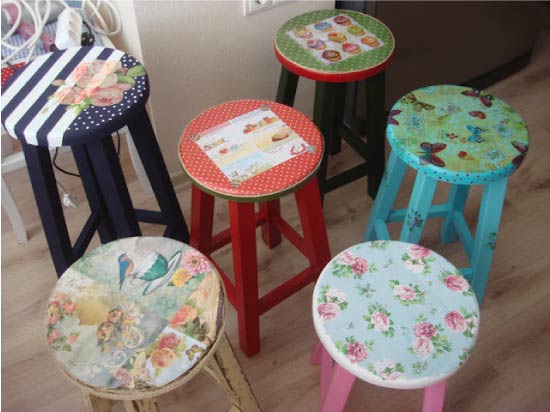
Decoupage stools
You will need:
- Any paper with a desired print, for example, it can be multi-layered napkins, pages from magazines and books, geographical maps, posters, wallpapers, etc .;
- PVA glue;
- Brushes 2 pcs (for applying glue and varnish);
- Scissors;
- Clear matt acrylic or polyurethane varnish;
- Water (if necessary);
- Roller for working with large formats.
How to upgrade chairs using decoupage technique:
Step 1. Clean the chair of dirt and stains, paint if necessary, following the first instructions in the article.
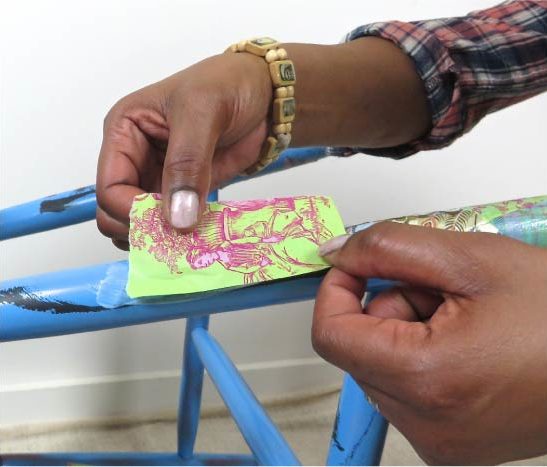
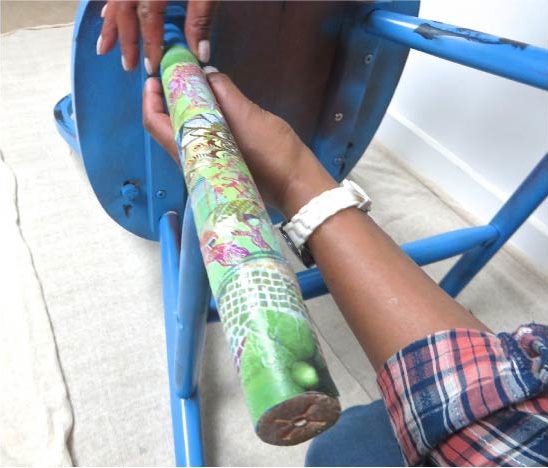
Step 2. Cut out from the selected polygraph the fragment that you need. The workpiece can be as large (for example, in the form of the seat and back), and very small.
- If you use napkins, you first need to separate the top layer with the pattern and only then cut it.
- If you want to glue the entire chair, including the legs, the paper needs to be randomly broken into small pieces of about 10 × 10 cm, as shown in the next photo slider.
 1
1
- To decoupage the backs and seats, they must be removed from the chair frame with a screwdriver and then used as a template for cutting the blank (see photo below).
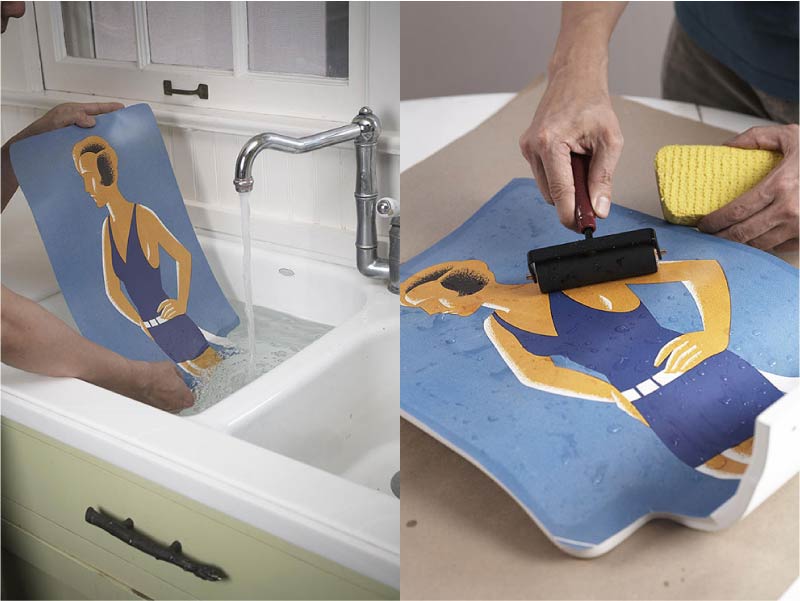
Step 3. Liberally grease the place that you want to decorate with PVA glue and attach your drawing on it, then brush it with the glue residue, firing all air bubbles and smoothing out the folds.
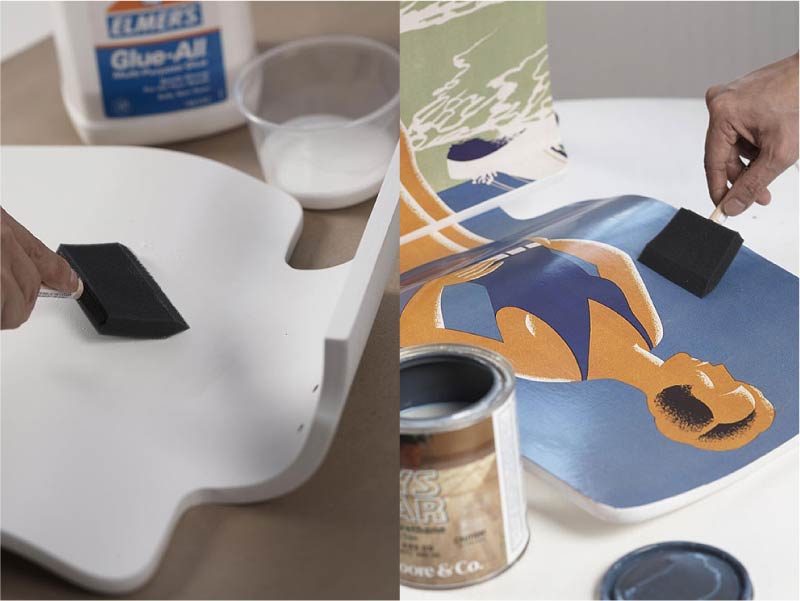
- If the cut print is small, then it is better to lubricate with the glue not the chair, but the back side of the blank itself.
- If the paper is very thick, then it needs to be slightly moistened in water - so it will become more plastic.
- The top layer of glue is optional, but often desirable (in any case, it should be thin).
Step 4. Repeat step 3 with other details of the chair and leave the glue to dry for about a day.
Step 5. Cover the decorated areas or the entire chair with clear lacquer in 4 layers, letting each layer completely dry. Done!
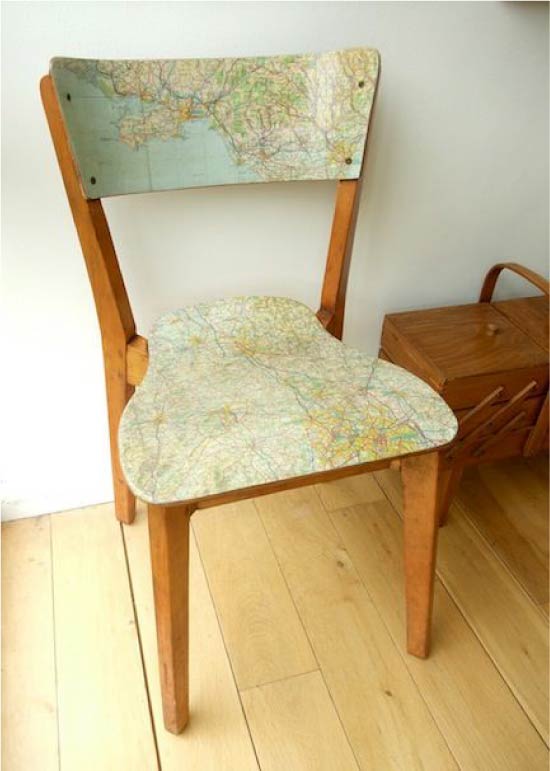
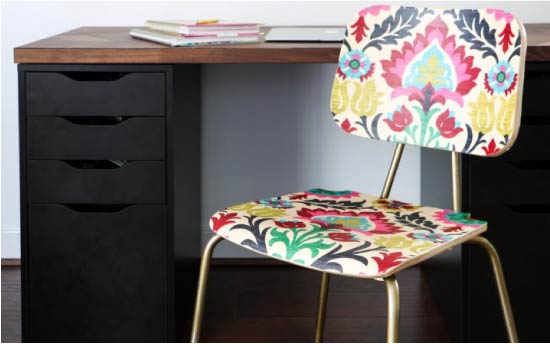
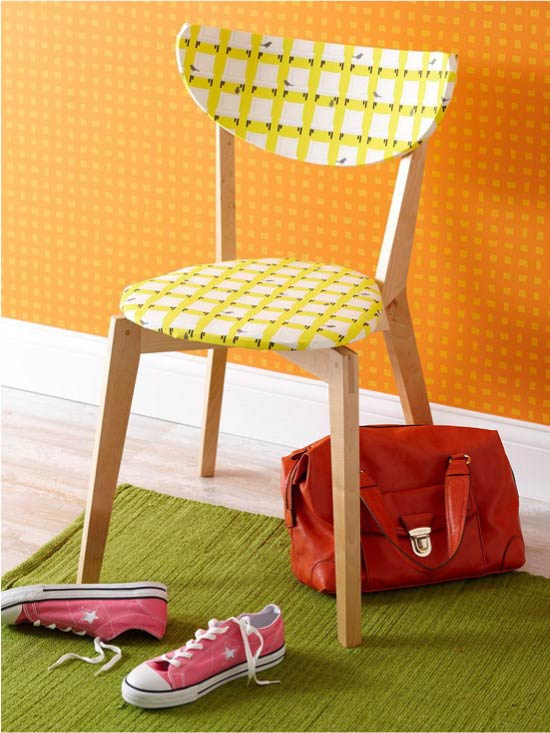
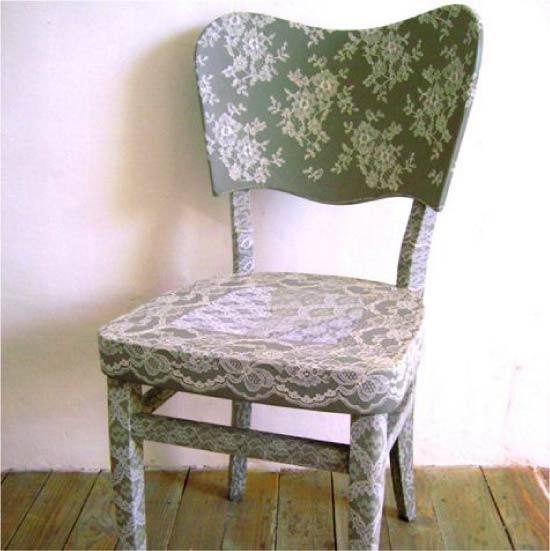
Method 4. Decoupage the chair with a cloth
It would seem, how else you can radically modify the chair with your own hands, except by painting. In fact, there is another cool way - decoupage with a cloth.
- A chair updated in this way will last for a surprisingly long time even under heavy loads.And if separate threads are knocked out of the fabric along the edges of the chair, you can simply cut them off and process them with a layer of PVA glue.
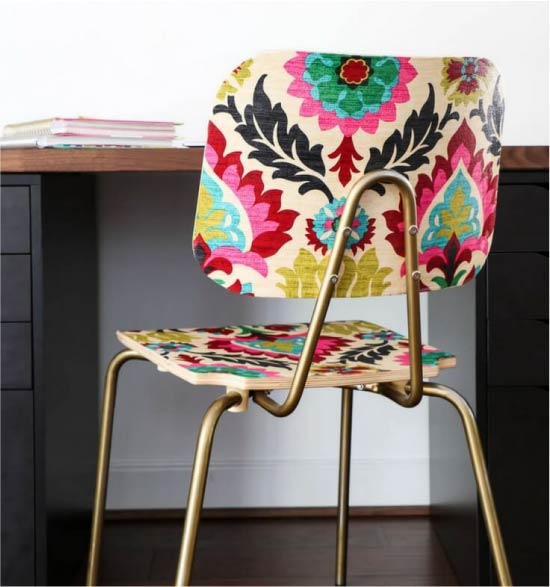
The idea of decoupage the old chair
You will need:
- The cloth;
- Wooden chair;
- PVA glue or special glue for decoupage;
- Sharp office or mock-up knife;
- Brush for applying glue.
How to upgrade a chair using decoupage technique:
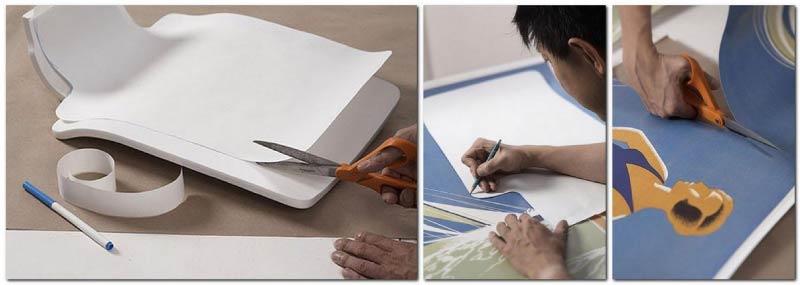
Step 1. Using a screwdriver, remove the backrest and seat from the chair. If you want to paint a chair, do it before you disassemble it.
Step 2. Spread the fabric on a flat surface, place the seat on it and circle it around the contour, departing about 2.5 cm from the edge, then cut out the blank.
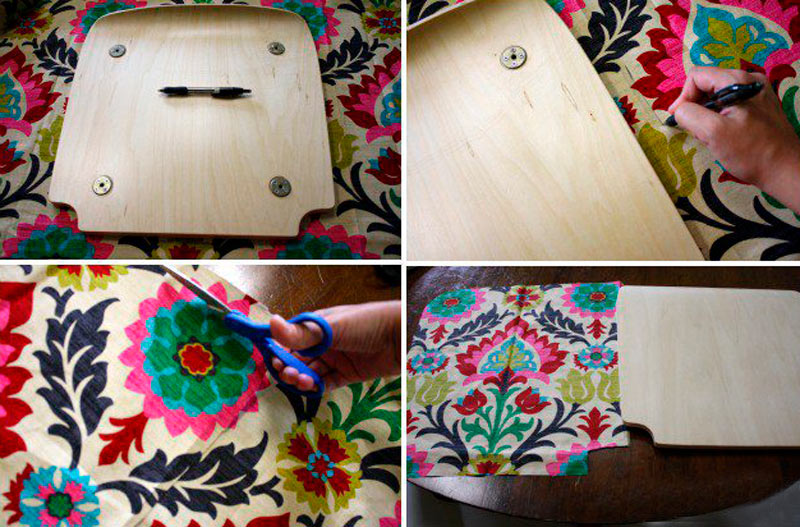
Step 3. Cover the outside of your seat with PVA glue, then lay a cloth on it and smooth it out. Once the fabric is aligned, cover it with white glue and leave to dry overnight.
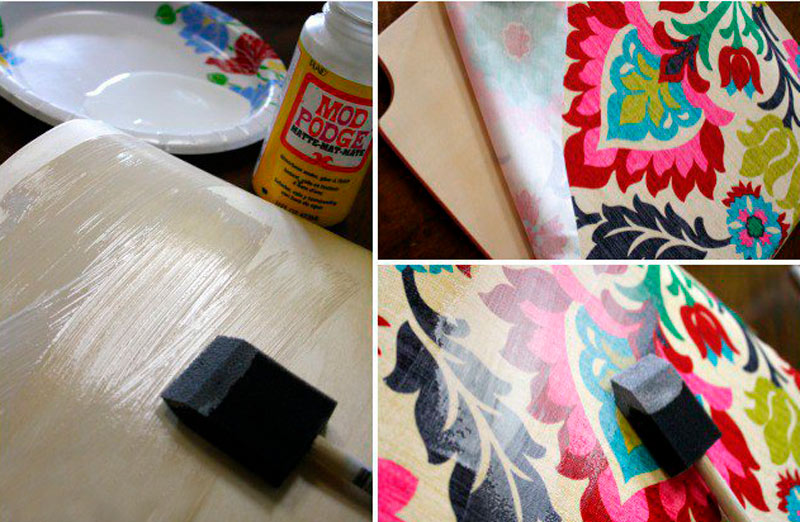
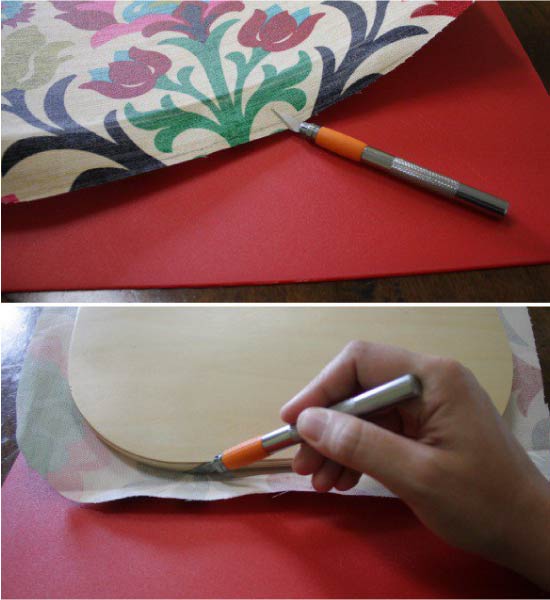
Step 4. When the fabric dries, make sure it becomes completely stiff. Next, trim off the excess fabric with a sharp knife exactly along the edges of the seat.
Step 5. Now clean the perimeter of the seat cushion with PVA glue to prevent wear at the edges.
Step 6. Repeat steps 2-5 with the back of the chair and other details that you want to decorate, and finally reassemble the chair. The main condition for the successful restoration of the chair - the pattern should exactly repeat the shape of the decorated surface.
Here are some more photo ideas for the decor of the chair with a cloth.
Decoupage office chair with a cloth with additional protection with polyurethane varnish

Decoupage Stool Ideas

 (Rate the material! Already voted:92 average rating: 4,52 from 5)
- Old new table - do-it-yourself restoration and renovation
- How to make a shelf with your own hands - 4 cool ways for beginners
- DIY dining table - 2 step by step instructions with photos
- Rules for choosing tables and chairs for the kitchen
- 12 super ideas for home and kitchen
I have always been interested in the topic of furniture renovation. Among the old
samples there are worthy contenders for the "new life". Here, in the photo, I learned
chairs from my grandmother’s kitchen, though nobody uses them now. Little bright
colors - and they will be as good as new. You can also sew pads on the seats to match
to the tablecloth and my kitchen will play a variety of colors! thanks for
interesting ideas.
Julia, and thank you! come again
Thank. Material with a bunch of examples, the best article so far from those that have found.
If the old furniture is still strong, and the appearance is worn out, then do not rush to throw it away. Thanks for the helpful stuff.