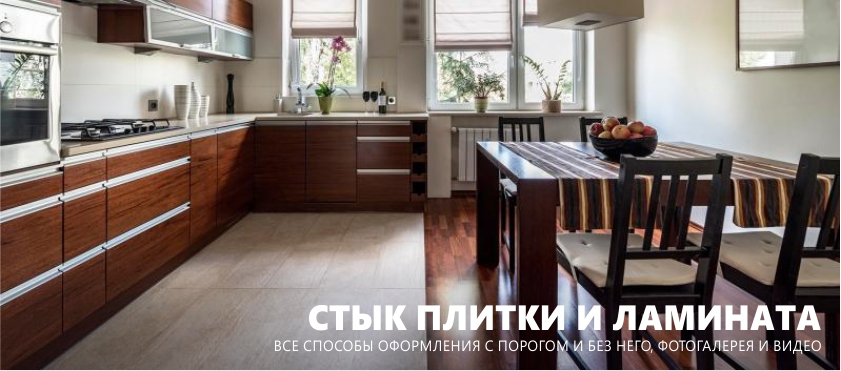
Tile and laminate combined for greater practicality of the room and its zoning. For example, in kitchens, kitchens-living rooms, in the hallways, as well as under the doors. Here are 5 main ways to design a joint (list by degree of popularity):
- With the help of a nut or docking profile;
- With the help of a sealant (silicone, acrylic, polyurethane);
- With the help of cork compensator;
- With the help of inter-tile tile grout;
- With the help of a liquid tube.
In this material, we reviewed each of these solutions in detail and presented 40 photo-examples.
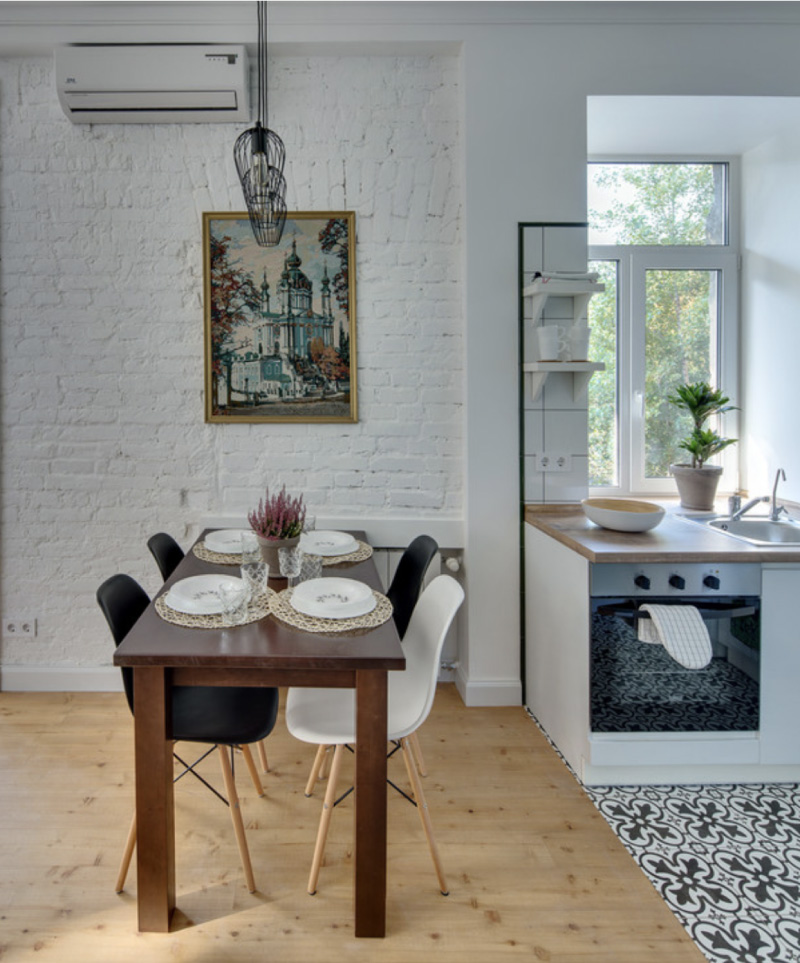
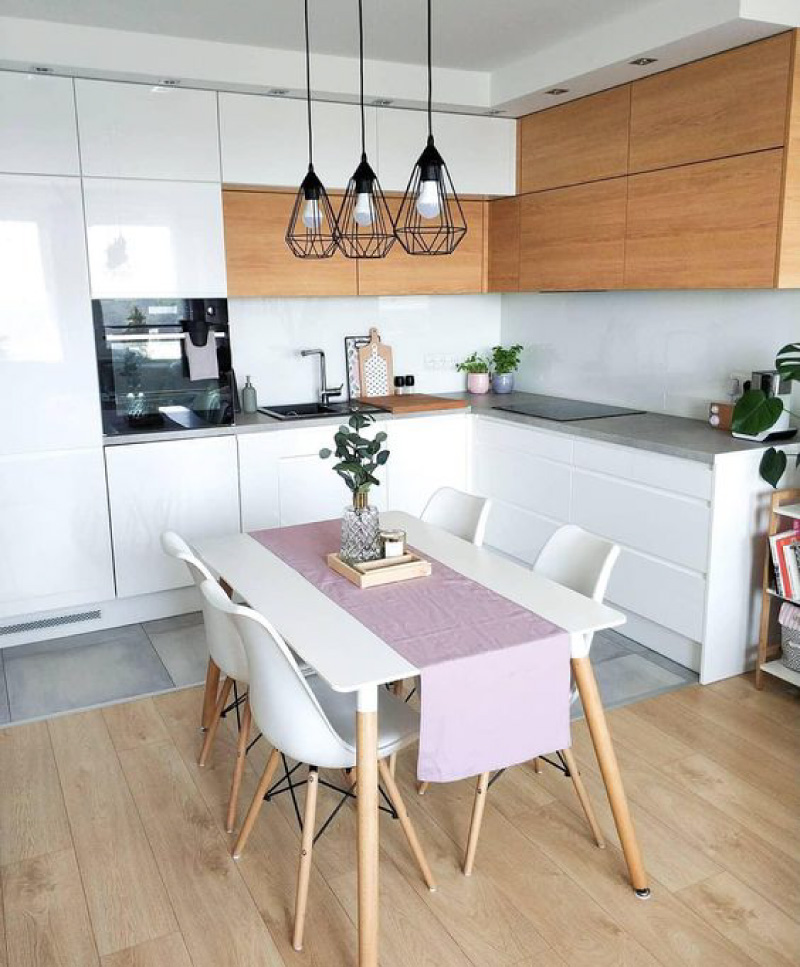
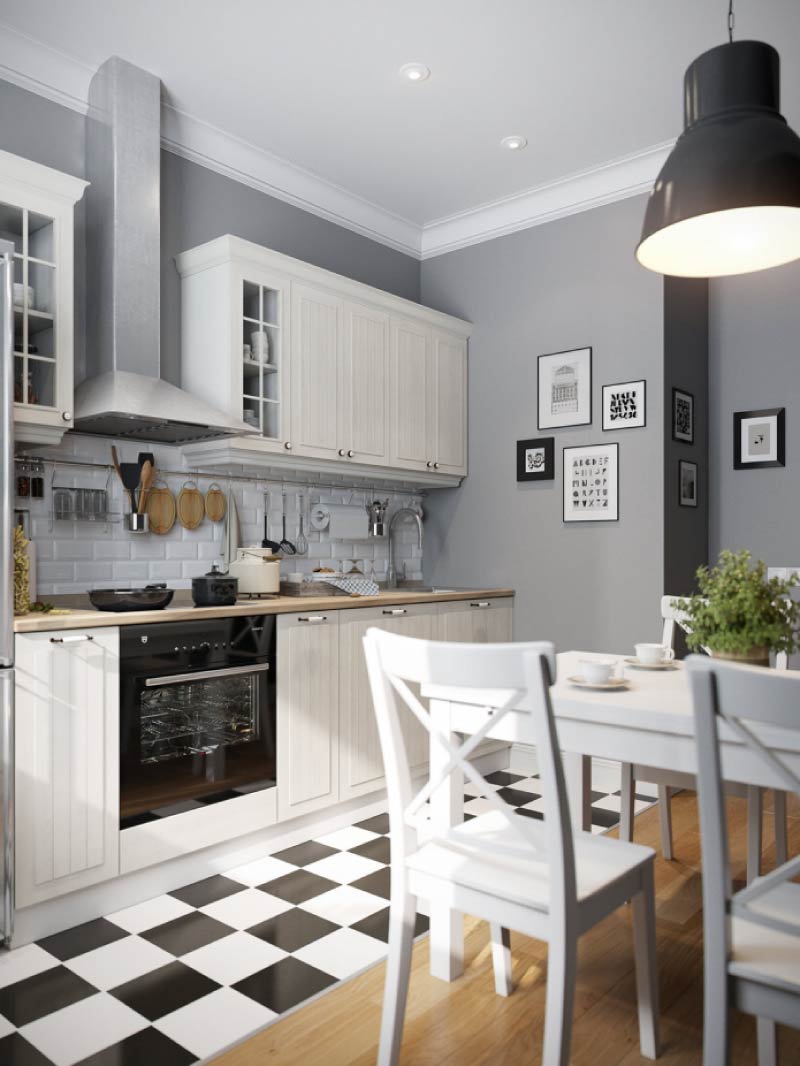
The junction of tiles and laminate without a threshold in the interior of the kitchen in Khrushchev
Butt without a threshold - how to do it and why it is sometimes better not to risk
Let's start with a more preferable, but also a more complex solution - the junction of tile and laminate without a nut.
How to make the joint of tile and laminate WITHOUT a threshold?
Dock tile and laminate without the nut is possible only if you comply with ALL these 5 conditions:
- Lay both coatings not in a floating way, but on glue. If the laminate is laid in a floating way (when the lamellae are laid on the substrate and are not glued to the base), then one cannot do without a threshold.
- To achieve the same height of the tile and laminate by adjusting the thickness of the adhesive and screed. The maximum error is 1-2 mm. This is the second reason why you need to plan tile and laminate joint without a threshold in advance.
- Make an expansion joint of sufficient width. In order for the laminate to expand and contract naturally, there must be a gap of at least 5 mm between the tile and laminate (on average, 1 mm of compensation gap is required per meter of laminate length). Otherwise, the laminate will swell, begin to creak, the cork may completely fly out of the joint.
- The joint should have a length of no more than 3 m, and the room should be no more than 25 square meters. m After all, the larger the area of the laminate, the greater the compensation gap it needs.
- Cut the laminate very carefully. This requires special equipment and a qualified master, especially if the shape of the joint is complex.
If you do not meet at least one of these requirements, then the threshold will still have to be set. Doubt whether it is worth bothering over the joint without a threshold, or is it better to go the easy way? The advantages of the first solution are obvious: a neat appearance, no gaps complicating the cleaning, nothing prevents you from walking.
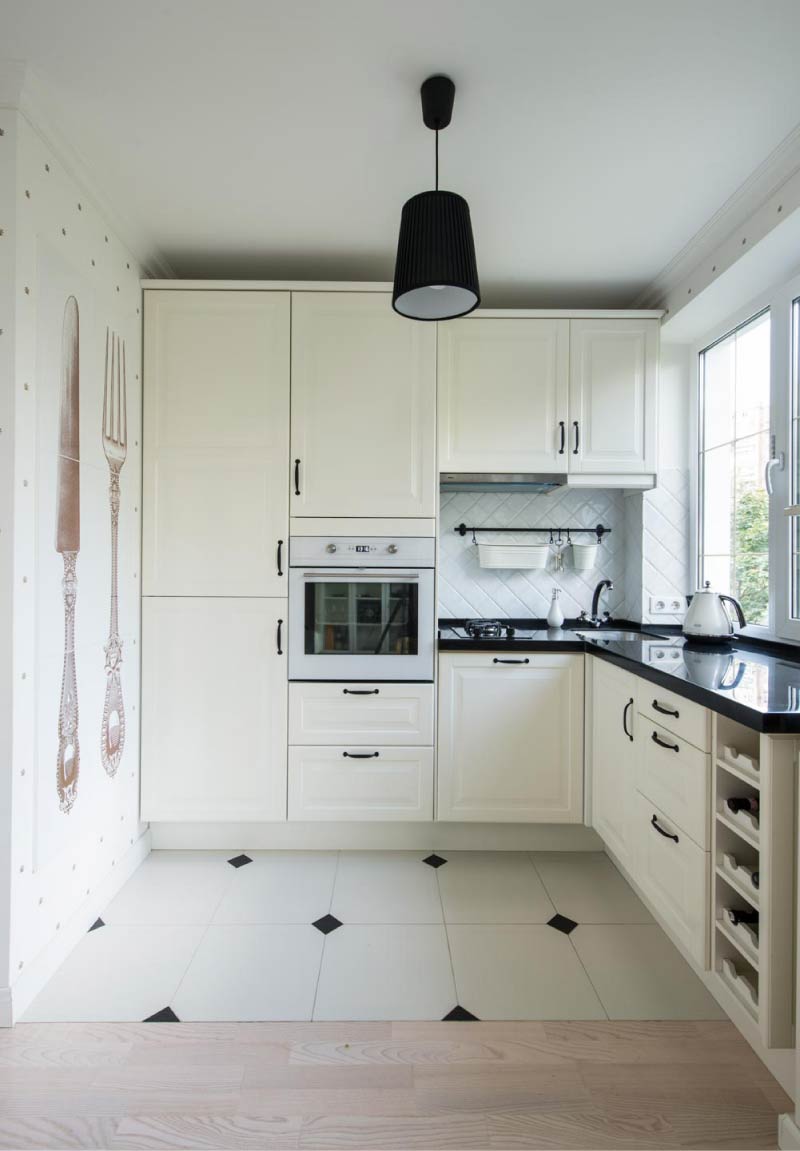
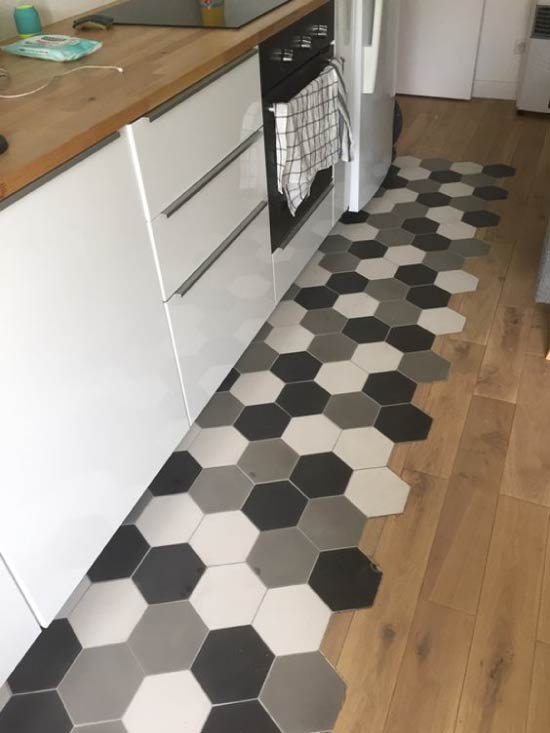
The joint of tile and laminate without a nut in the interior of the kitchen in Khrushchev
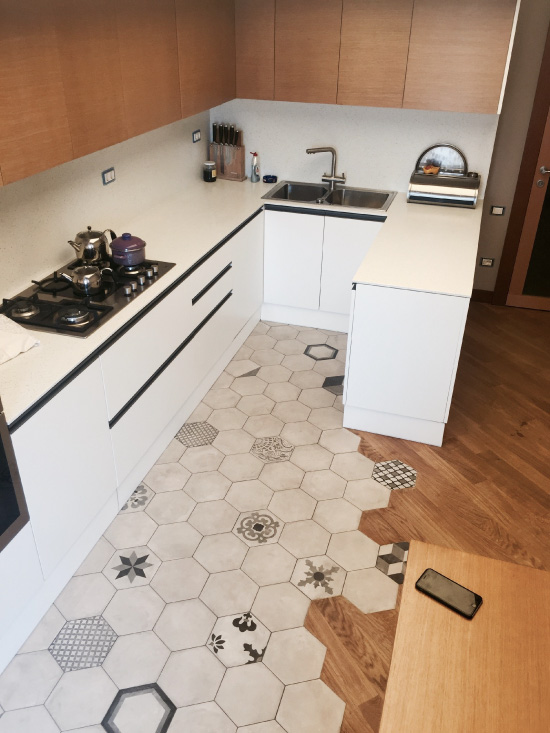
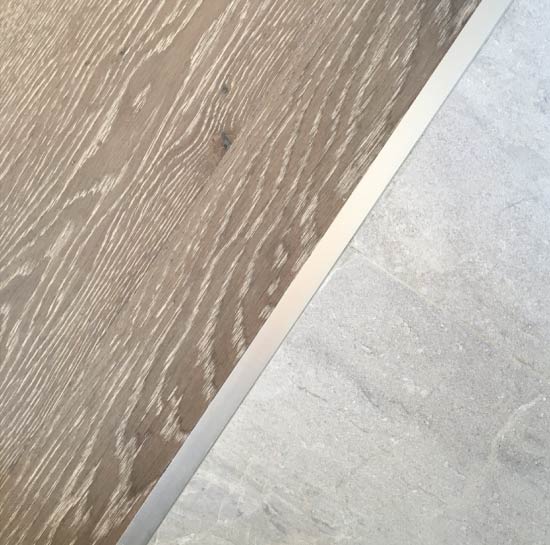
And the absence of the nut is shown if the joint has a complex configuration. For example, if it is too long, radius, wavy or figured (zigzag, with six or octahedral tiles). Here are a couple of photo examples of complex joints.
On the other hand, when making a decision, keep in mind that no matter how ideally the joint is made and no matter how high-quality the laminate is, there is still the risk of it swelling. In this sense, the nut is a more reliable solution.
So, how to start planning a joint:
- If you want to combine tile and laminate without a nut, then you need to choose specific materials and the way to design the joint in advance - before the screed stage. Then a little math: summarize the thickness of the tile and tile glue, and then - the thickness of the laminate and its substrate / glue. Finally, we calculate the difference between the heights of the two surfaces. The task of the builders is to level this difference due to the thickness of the substrate, screed and / or glue.
- However, if you have already laid the tile, but have not yet laid the laminate, the opportunity to make a single-level floor is still there. Since the tile has a standard thickness, it is laid first, then under it you can adjust the laminate.
Finally, we talk about 4 ways to design a joint of laminate and tile without a threshold.
Attention! Whichever method you choose from the following, when laying laminate for its thermal expansion, you should leave 5–10 mm indentation from the opposite wall (later it will be closed by the plinth).
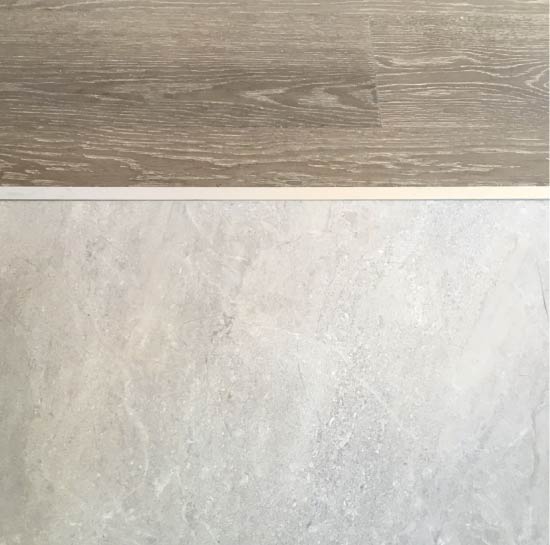
Method 1: Seal the joint with tiled grout
Pros: Simple, inexpensive and working way. Suitable for difficult joints.

Minuses: grout may crack during building shrinkage. Since the joint of tile and laminate is hard, then the compensation gap for the laminate should be left under the baseboard.
Installation: It is possible to fill the joint with grout both during the laying of the floor and after its completion. The action algorithm is as follows:
- On the coupler draw the markup of the line of the future joint;
- We lay tiles to the line, trim the unnecessary part and trim it with a grinder;
- We cut the laminate, put it in view of the compensation gap, and process the edge with silicone;
- Fill the resulting seam half or a little more with sealant and let it dry;
- On top of the sealant we put the grout in the joint and level it;
- For greater durability of the seam we cover it with transparent varnish.
Tip:
- Particularly well suited epoxy grout or polymer grout for ceramic granite;
- You can use the same grout that was used to grout tile joints.
Method 2. Seal the junction of tile and laminate with sealant (silicone, acrylic, polyurethane)
Pros: Due to its plasticity, sealants allow a bit of “walking”. For the same reason, the joint between dissimilar coatings does not deteriorate when the building shrinks.
1.5 mm seam filled with silicone sealant
Minuses: Sometimes silicone sealants harden over time. Only narrow seams about 5 mm wide can be sealed with sealer.
Tip:
- Acrylic sealant can be painted and varnished after drying (as opposed to silicone).
Installation: In this video, you can see the process of removing tiles and laminate in one plane and the process of making the joint with silicone sealant.
Method 3. Joint with cork compensator
The cork compensator is the most requested alternative to the sill. They can arrange a straight joint, and sometimes radius.
- Many designers prefer the cork compensator. And there are those who consider it the same remnant of the past, as well as aluminum profiles.

Pros: It looks good, the joints are very neat. Pressed cork is soft and elastic, therefore it can provide natural expansion to laminate / parquet. Because of its naturalness and plasticity, the cork compensator is particularly suitable for the junction between tile and parquet / floorboard / engineering board.
Minuses: a higher price, not suitable for curly joints, a limited choice of colors, theoretically, can begin to crumble due to shrinkage at home or even fly out of the seam (but, as practice shows, this is unlikely). Another significant drawback - the elasticity of the tube is not enough to compensate for the expansion of the laminate in spacious rooms (more than 25 sq. M).
Tips:
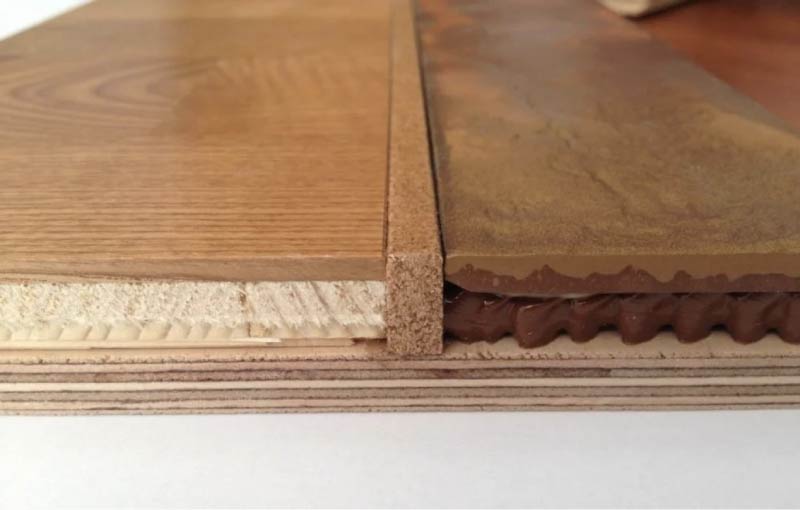
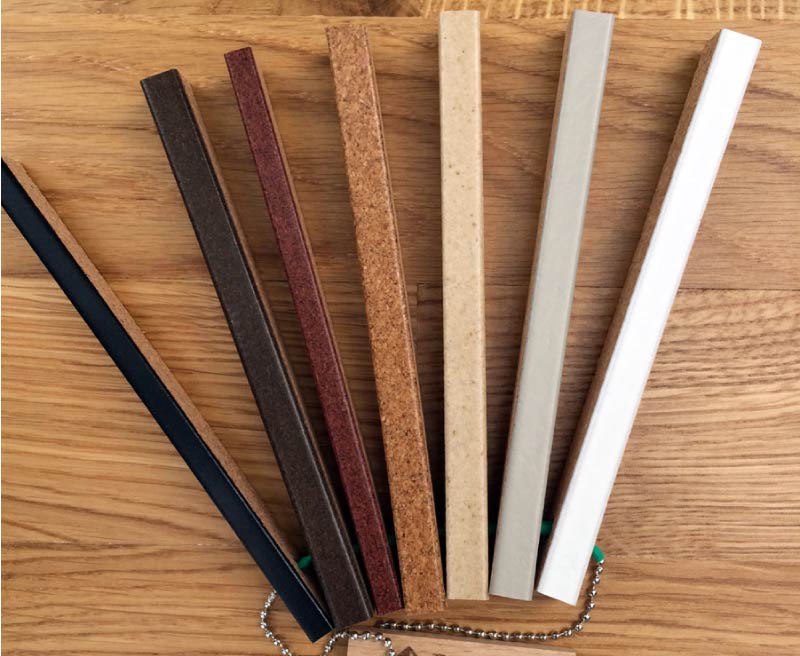
- When laying a laminate, you can buy a cork compensator in tune with it and already with varnish. If you are laying the parquet / floorboard, then you can buy a cork compensator without any treatment (pictured) and sand it and varnish it simultaneously with the flooring.
- Cork expansion joints with veneer are on sale - this is an excellent choice for wooden floors.
Installation: The compensator is glued on parquet glue. Works are carried out as follows:
- We first lay the tile. Grind the edge, align it, clean from dust and dirt with a vacuum cleaner.
- We apply a compensator and, if necessary, trim it.
- The edge of the laid tiles are treated with glue.
- We insert a compensator into the seam and firmly press it to the edge of the tile, for example, using a construction level.
- We fill the micro-gap between the tile and the compensator with a sealant (to match the compensator / floor covering), for this it can be slightly bent. Then again firmly press the compensator. Excess sealant wipe.
- We lay the laminate against the compensator.
Method 4. Joint with a liquid cork (cork sealant)
Cork sealant is an elastic mixture based on cork crumb and glue.
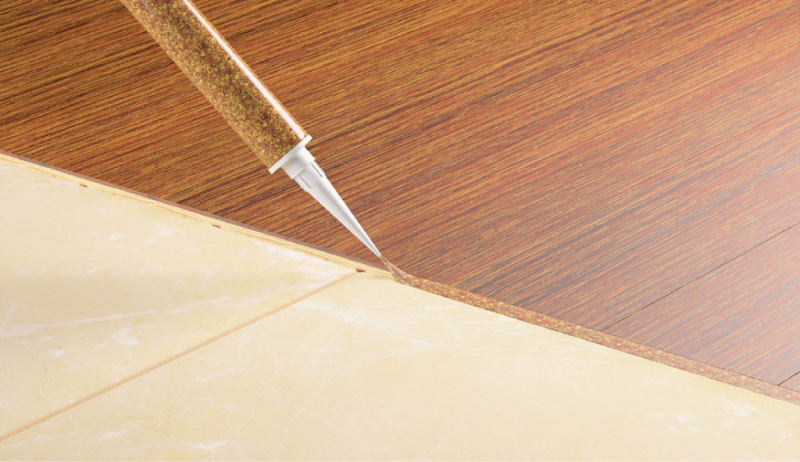
Pros: Can be used at joints of complex shapes.
Minuses: It looks less neat than sealants or cork compensator, especially in wide joints (more than 7 mm). With that, in narrow joints, the liquid tube is laid with difficulty.
The joint with the threshold - why it is good and how to choose the right profile
Installing a threshold threshold (docking profile) - this is the first thing that comes to mind when the question arises how to make the joint between tile and laminate. This solution is the simplest, it is universal and can look good with quality performance.
The main plus thresholds: they allow you to leave sufficiently wide compensation gaps for thermal expansion of the laminate, which means almost complete guarantee that the lamellae do not swell over time.
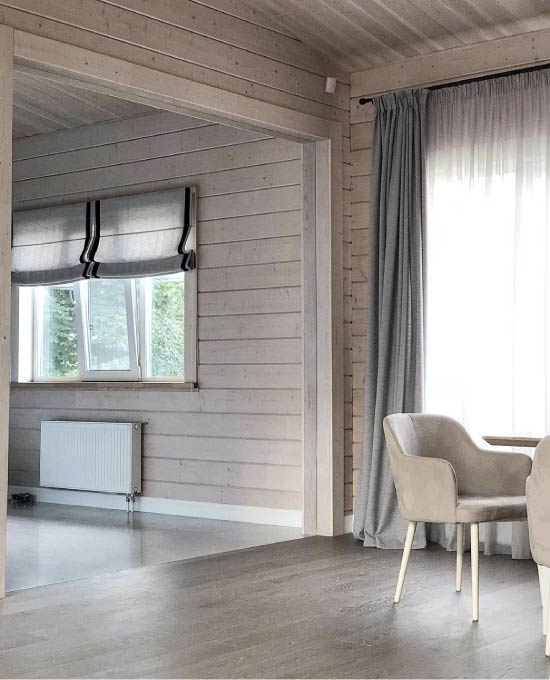
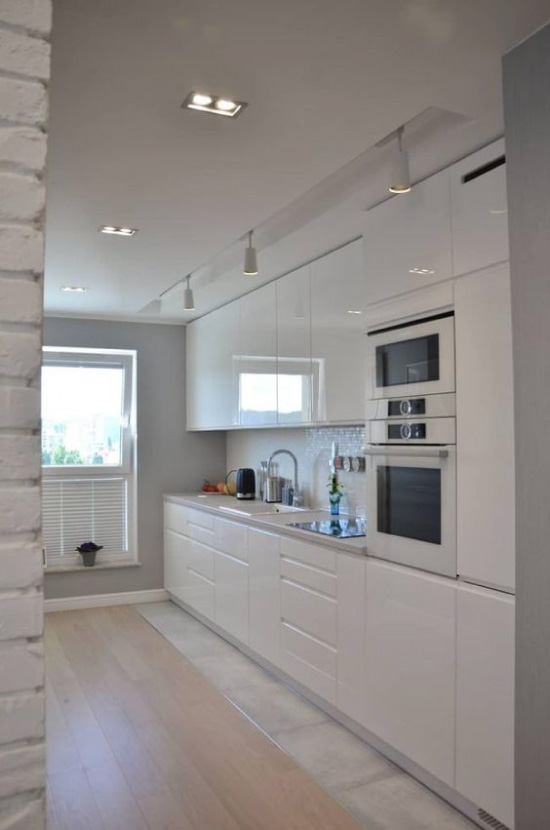
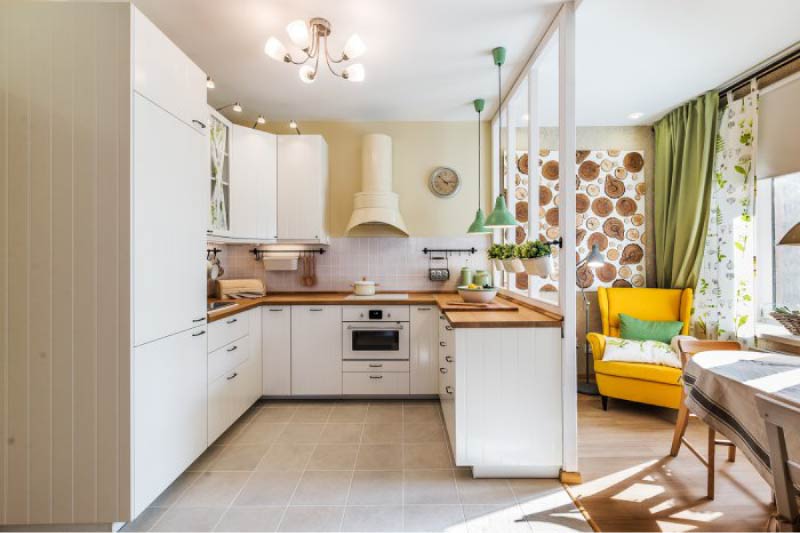
Here are some photos of nice interiors with combined floors and joints using thresholds.
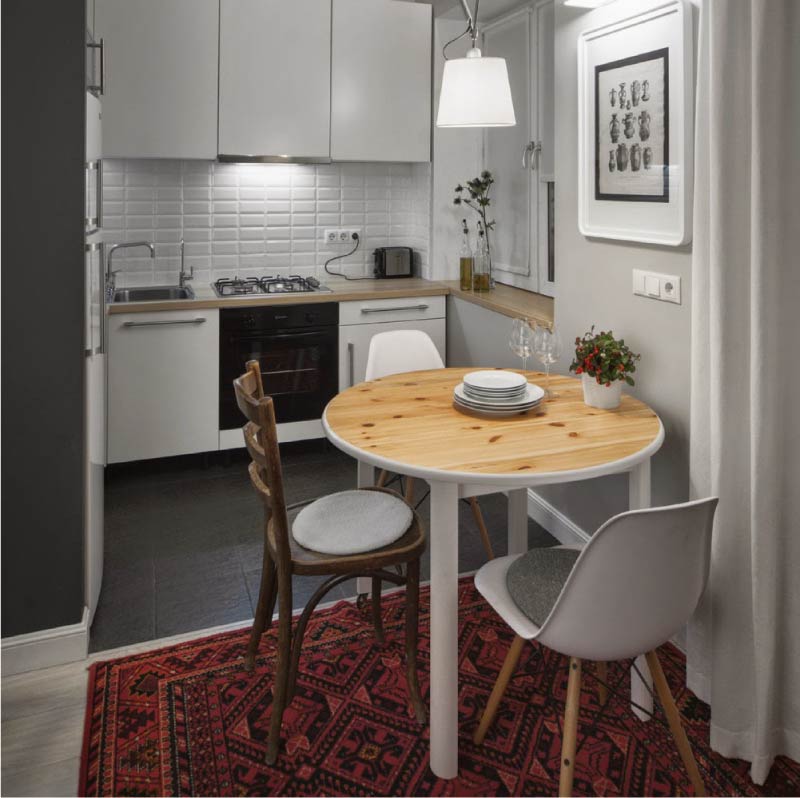
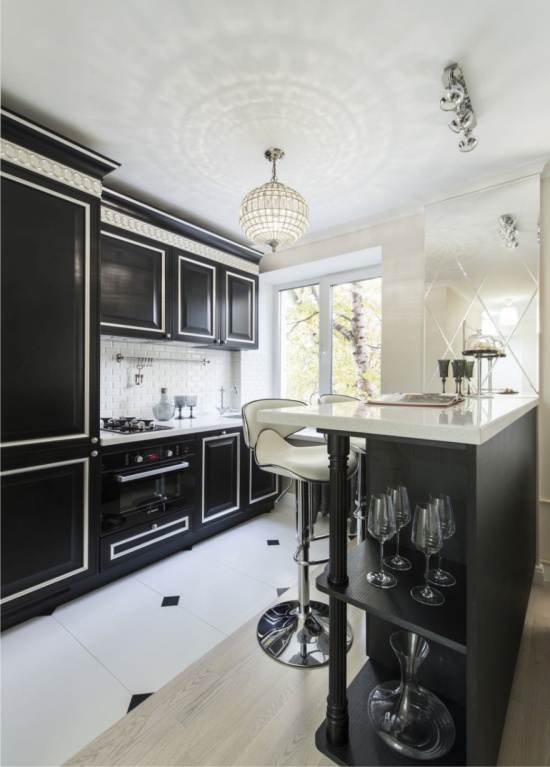
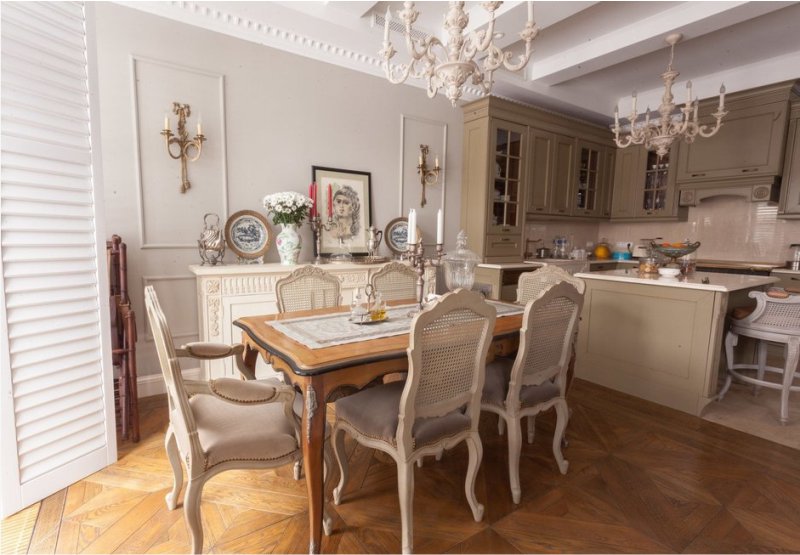
The junction between tile and laminate with a threshold in the interior of the kitchen in Khrushchev
The junction of tiles and laminate with a large differential under the wooden wide and high threshold
In some cases, the threshold is the only possible way to design the joint. Here are 7 cases when it is irreplaceable:
- If the joint is under the door. In this case, the threshold is quite appropriate, because most of the time it is simply not visible under the door.
- If one of the coatings (laminate) is installed in a floating way.
- If the room has an area of more than 25 square meters. m The larger the area, the wider the compensation gap should be for the natural expansion of the laminate, which means that there can be no question of any plastic filler.
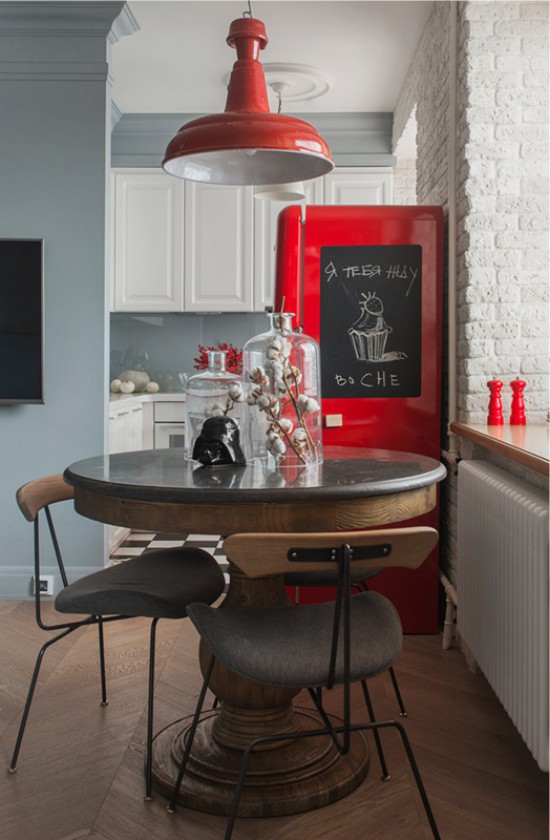
In spacious apartments and country houses, the junction of tiles and laminate / solid wood is impossible without thresholds
- If the difference between the coatings is from 5 mm to 1.2 cm. In this case, do not do without a split level threshold.
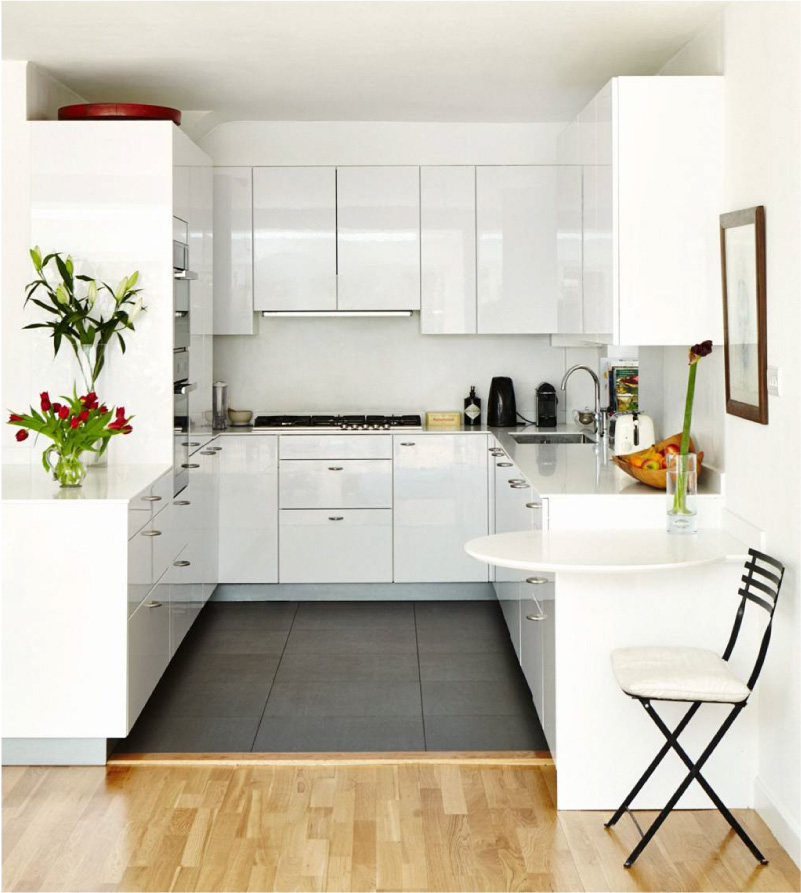
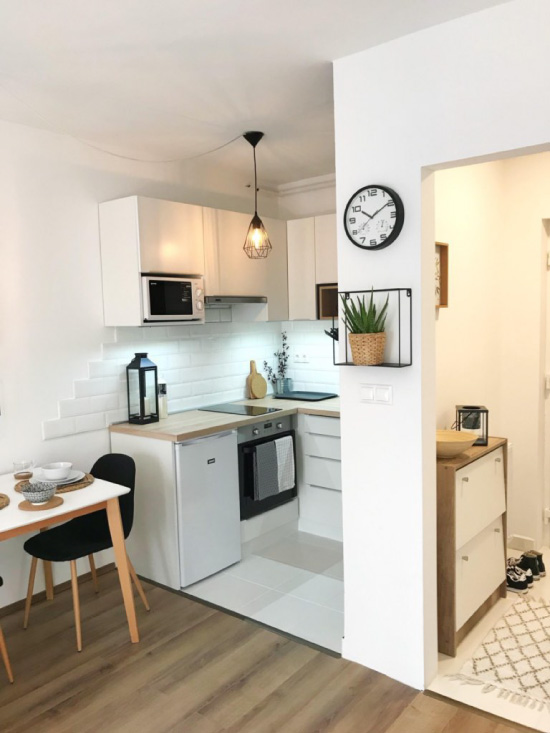
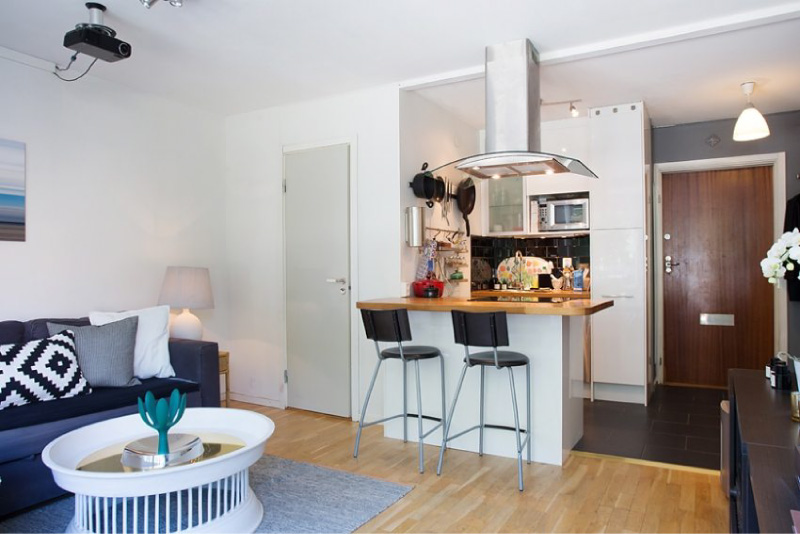
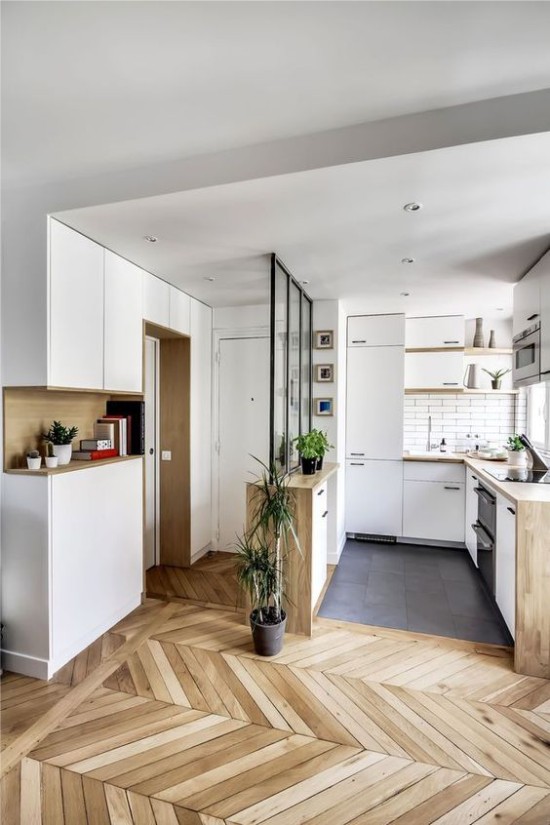
- If you want to emphasize the zoning of the room. To mark the border between zones it is especially good to use a threshold of a contrasting color, for example, as in this photo kitchen studios.
- If you need to hide inaccurate pruning. As well as chips or other defects on the edges of the coatings.
- If you need to protect the room from dust and dirt. Thresholds tend to retain crumbs, dust and dirt from the kitchen or hall area in the residential part of the room.
However, the joints with the threshold have the following disadvantages:
- Since the nut is higher than the floor, it can interfere with walking.
- For the same reason, it wears out faster, eventually begins to look untidy and spoil the overall look of the floor. Periodically, the nut must be changed.
- Thresholds complicate the cleaning, because dust and chips are clogged in the gap.
- It is not always possible to choose a threshold to match the laminate or tile, and in general it is very noticeable. Profiles that are sold in the construction markets and in the network of supermarkets, always look rude and cheap.
- If the joint is very long (more than 2.7 m), then it is difficult or even impossible to select a profile for it. The choice of elongated thresholds (3.2 m) is very limited.
- It is often impossible technically or highly undesirable from an aesthetic point of view to set a threshold at the joints of a complex shape (winding, curvilinear, with eight- or six-sided tiles).
How to choose a sill or docking profile? Here are some tips for choosing and installing:
An important rule - for free air circulation under the door should be a gap of at least 2 cm *.
* Manual on the design of autonomous engineering systems of single-family and blocked residential buildings (section Ventilation, paragraph 4.84)
Whatever threshold you choose, it is desirable that it be narrow - no more than 1.5 cm in width and low (no more than 2 mm in height). It is also preferable to powders with hidden mounting (without holes for screws) and without longitudinal scratches (they are easier to maintain). And, of course, the profile should be as close as possible in tone and pattern to tile or laminate.
 This aluminum anodized poroshek has a width of 1.5 cm. For rooms of less than 25 square meters. m it can be even thinner - 1 cm wide
An example of the simplest and most inexpensive aluminum powder:
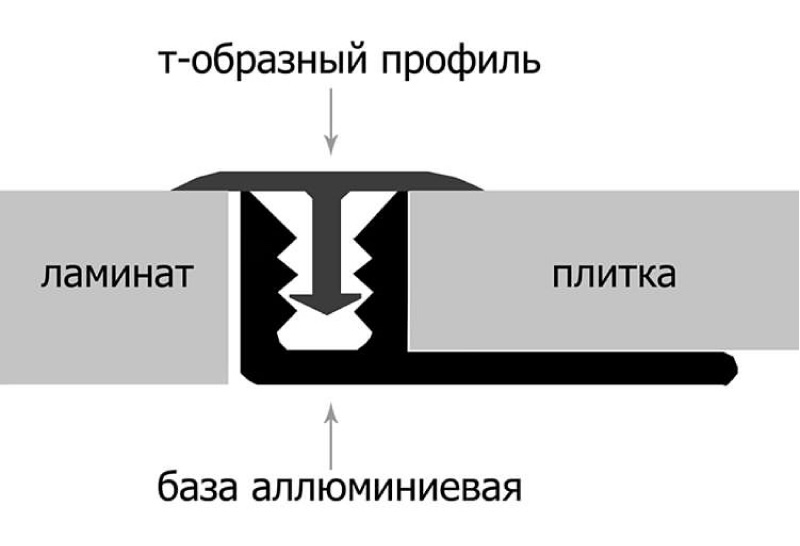
- If you have planned the joint between tile and laminate in advance, then it is best to install the profile simultaneously with the laying of the tile. This should be a docking profile, the fastening of which is installed under the tile (T-shaped as in the photo below, Z-shaped and end L-shaped) or under the tile and laminate (H-shaped profile). The convenience of such a profile is that its T-shaped upper decorative part can be removed if necessary (for example, due to wear). It also looks great and fits snugly to the floor.
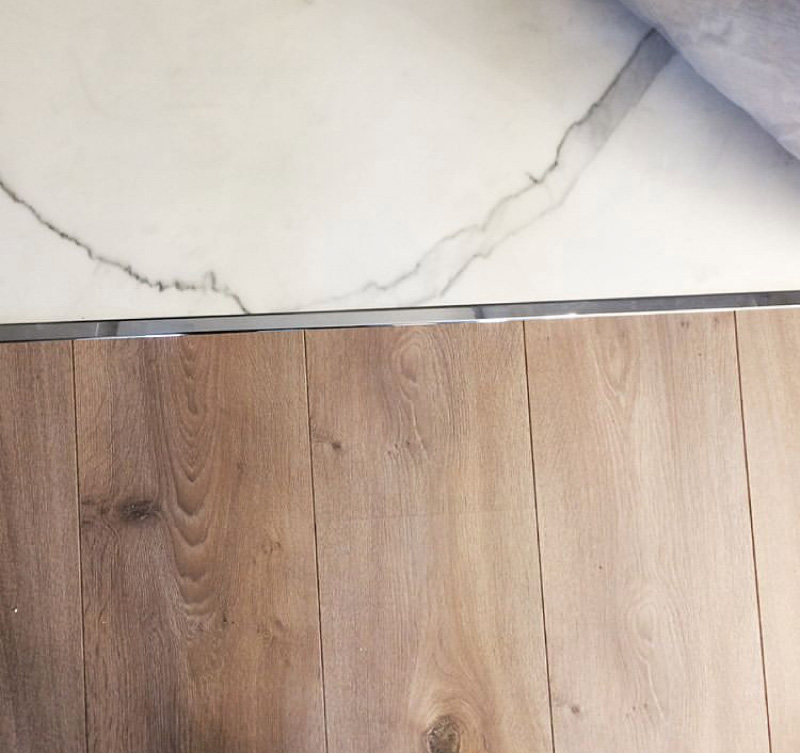
T-shaped metal profile at the junction of tiles and laminate 1.4 cm wide
But the profile diagram in the photo above.
- If the screed is already cast, the difference between the coatings is no more than 5 mm and the junction is straight, then a narrow aluminum T-shaped profile that is mounted on the sealant is optimal (in the photo below).
- If the joint has a difference in the height of the coatings from 5 to 12 mm, then a multi-level profile is needed (another name is transitional);
- For wavy and radius joints, a flexible threshold of PVC or metal is needed;
- We do not recommend to use: self-adhesive thresholds (unreliable), thresholds with visible holes for screws (look ugly), box thresholds (too high and interfere with walking);
- Preferred materials are aluminum or solid wood;
- The decorative part of the threshold should be flush with the floor as tightly as possible. Only in this case it will be practical and durable.
Installation of the T-shaped profile: The T-shaped profile has a mounting base, which is laid on one side under the tile in the process of laying. When the tile and the base are laid, on the other hand the laminate is laid with a gap of 5 mm. After laying the laminate in the base of the nut is laid rubber seal. Finally, a T-shaped decorative profile is put on the mounting base, which will block the edges of the tile and laminate.
Some more tips
- It is easiest to pick up the nut in the tone from the collection of the manufacturer of laminate.
- Sometimes, instead of puzzling over the creation of a joint without a nut, it is easier to completely abandon the idea of combining dissimilar coatings. For example, if you visually like wood, you can replace it with practical wood-like granite along with a floor heating system. But to dock the imitation of wood (the same stoneware) with natural wood or laminate is not worth it, since choosing the materials to match the tone and blending in texture is almost impossible.
- It is very important for the laying of the floor and the design of the junction between the tile and the laminate to find a qualified craftsman who has already performed similar work.
- Keep in mind that if the room is small (up to 8 sq. M.), Then the combined floors will not look very good, visually crush and reduce the space.
- If you want to combine tile and laminate in the kitchen, we advise you to make a tiled area at least 1 meter wide (from the pedestals with the stove and sink). The photo below shows an unfortunate example of combined floors - the strip of tile is too narrow.
- At first it is best to lay tile. Since under it is easier to adjust the level of the laminate. In addition, working with tiles is always wet, and this is harmful for the laminate.
Photo Gallery


 (Rate the material! Already voted:5 average rating: 5,00 from 5)
- How to lay a tile with your own hands
- Gender is relative: choose flooring for the kitchen
- How to choose baseboards for the floor - 50 photos and a guide to choose
- All about grouting for tiles - ranking the best manufacturers and a 4-step optional guide
- Cork flooring - 99% ideal floor covering for the kitchen
- Floorboard in the kitchen - all the pros and cons
- Everything about linoleum for the kitchen - compare, choose and lay your own hands
I had to close the junction of laminate-tile undulating form. Coverage has already been laid, so that the installation of a T-shaped profile was out of the question. Yes, and the price for 2m about $ 15 as I recall. Accidentally entered the shop of furniture fittings and saw a T-shaped edge for worktops. There are more than a dozen flowers and textures and the price is about $ 0.5 per meter. Pasted on the liquid nails, with bending slightly warmed by a hairdryer. On the day loaded with books. It was about 8 years ago. Recently I was on that apartment - a profile like new and never lagged behind.