
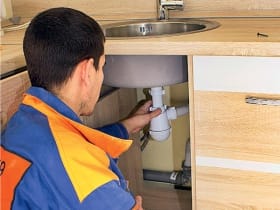
Installing a siphon in the kitchen is a very simple task that takes a maximum of 20 minutes and requires nothing but a screwdriver. Especially if you need to put a new siphon on a not yet installed sink. But if you need to replace the old device, the complexity will be mainly in the dismantling, and not in the installation. Therefore, calling a plumber and spending money on it does not make much sense.
Siphons for the kitchen are different - for ordinary and double sinks, with the ability to connect to a washing machine or dishwasher, with or without overflow, from metal or plastic, like a bottle or pipe. But all of them are installed on roughly the same principle, so we wrote one step-by-step instruction with the addition of installing a siphon with overflow and installing a double siphon for a two-bowl sink.
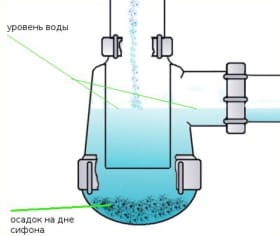
And, of course, all of the siphons have one reassignment - not to let in gases, that is, smells from the sewage system by means of a hydraulic trap formed in the sump, and also to keep food residues, garbage, small objects in it.
In this manual, we will look at how to install a regular plastic bottle (flask) type siphon, which most often complements the kitchen sink, because it is very easy to clean.
You will need
- Screwdriver - for dismantling you need a strong screwdriver of the right size, and when installing a new siphon, you can even get by with a coin, especially if you have purchased a modern siphon model;
- Hacksaw, tape measure, sandpaper - sometimes needed for cutting pipes or corrugations to the desired size and grinding their edges.
Step 1. Dismantling the old siphon

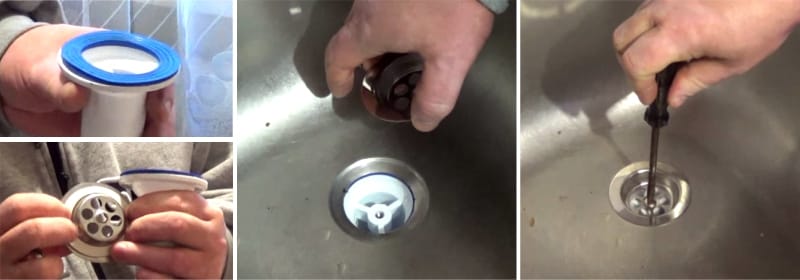
Before you install a new kitchen siphon, you need to remove the old one. To do this, take a strong screwdriver and unscrew the screw in the center of the grating in the drain hole as shown in the photo on the right. Be sure to put a basin under the siphon. When the siphon is removed, wipe the drain hole clean.
- The nut and the screw of the drain grille often become attached to each other over time, and therefore it is very difficult to unscrew. If you can not unscrew the screw, then you need to detach the lower part of the siphon, leaving one nipple, and then try to twist to help the nut and screw to break free. Most often, these manipulations are enough.
Step 2. Assembling the siphon
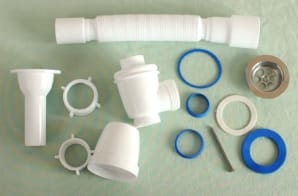
Lay out all the parts in front of you, ungrouping them by type, and then you will see that the details are many only at first glance, and in fact, you can assemble them intuitively, since all the gaskets fit the corresponding parts of the siphon.
- The device of the bottle siphon (without overflow): sealing gaskets, rings of different diameters, cap nuts, pipe, 2 parts of the siphon, corrugation, as well as the drain grate and screw;
- All elements must be tightened tightly, but not too tight, so as not to damage the fragile plastic threads and gaskets.
Here's how to properly collect the siphon for the kitchen:
- First we take the largest flat gasket and put it on the largest opening of the siphon, and then fasten the cap-cap to it. Now you will see that the siphon has 2 openings of different diameters - top and side.
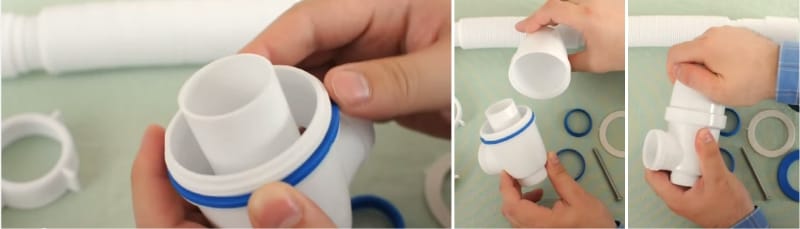
- Now we take the pipe (it will be attached to the sink) and select the conical gasket and the union nut that are suitable for the diameter. First, put the union nut on the nipple, then tighten the taper gasket with the blunt end up. We insert the nozzle into the upper opening of the siphon and tightly, but not too tightly, twist them.

- Sometimes the pipe with a funnel drain must also be pre-connected in a single unit;
- Be careful - there must be a nut in this drain funnel, do not lose it in the process.
- It remains to fasten the corrugated pipe in the same way: put the union nut on it, then tighten the conical gasket with the blunt end up, and then fasten the corrugation to the siphon. Well, that's all, the siphon is assembled. The rest of the details we need for the next step.

Step 3. Installing the siphon
It's time to install the assembled device:
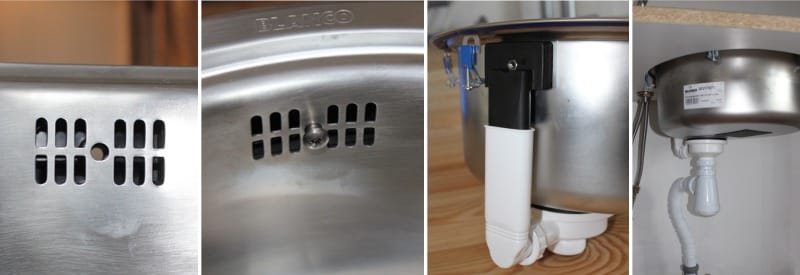
- we put a corrugated sealing ring on the siphon nozzle with strips up, and under the metal grille we stretch the remaining ring as shown in the photo below;
- now we substitute the siphon under the sink (under the drain hole), hold it and align it, and on top, i.e. already above the sink, put the metal grill;
- insert the screw into the lattice and twist it with a screwdriver or a coin.
Step 4. Connect the corrugation to the sewer riser
The last step - just connect the corrugation to the sewer, extending it to the desired length.
- Typically, the diameter of the corrugations for sewage is 50 or 40 mm, and the corrugations themselves are often produced in a diameter of 50 mm, which can be cut with a hacksaw to 40 mm if necessary;
- Instead of a corrugated pipe, it is even possible and desirable to use a rigid outlet.
Now we check the siphon for leaks, fill it with water to form a water trap. If it doesn't flow anywhere, then you did everything right.
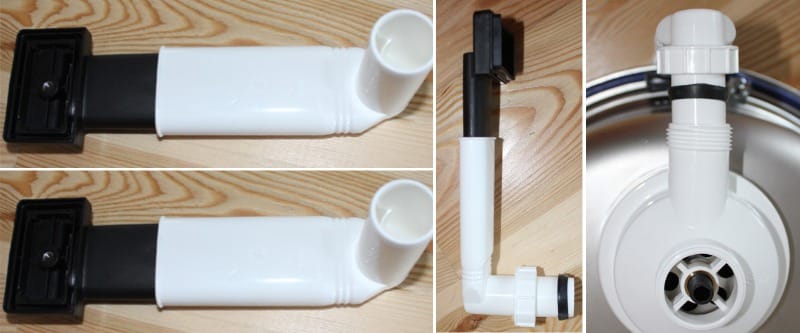
Addition - installation of a siphon with overflow
If your sink is overflowed, the siphon will be installed in approximately the same sequence as described above. Except that at the assembly stage of the device (see step # 2), it will be necessary to additionally collect the overflow itself, as shown in the photo below. The principle of connecting the overflow with the branch pipe branch is exactly the same as in the previous instruction - first we put the nut in, then the ring gasket with the blunt end to the overflow, then we insert the overflow into the branch and tighten the nut.
Now you need to connect the sink with overflow with a screw and screwdriver. Then we act according to the instructions in step 3 and 4.
How to install a double sink siphon?
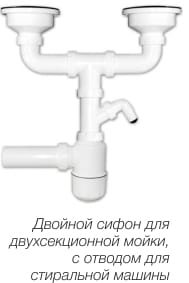
A two-piece sink should be equipped with a specially designed double siphon for them. Such siphons have two editions, which are united by one siphon, which can be either a bubble-like or a tubular one. They may also have taps for a washing machine or dishwasher as in the photo on the left.
Installation is carried out according to the principle described above with the only difference that you first need to fasten two branch pipes with a drain to two sinks, then under the sinks you need to connect two branch pipes with a conductor, and then fasten the rest of the device to the conductor. If necessary, pipes should be cut to the desired length with a hacksaw, sanding the edges with emery paper.

 (Rate the material! Already voted:20 average rating: 4,80 from 5)
- 5 steps of mounting the mixer in the kitchen do it yourself
- How to choose a kitchen faucet
- Do-it-yourself kitchen faucet repair
- Choosing a kitchen sink in 5 easy steps.
- Installing the kitchen sink - instructions, tips, video