
So, you bought a faucet to replace the old one or to equip a sink on a new headset and decided to start the installation yourself. On the one hand, it is very simple to connect and put the mixer on the sink with your own hands - anyone can handle it. On the other hand, even having some experience, but not knowing the elementary rules, you can do work poorly or completely spoil the product, for example, knocking the thread, bending the carts, etc. Another reason why you still have to contact a plumber - This is the lack of a set of sanitary tools. But this problem is completely solved, because you can always ask something from friends.
We tried to tell as clearly as possible how to install the mixer in the kitchen with our own hands safely and correctly.
List of required tools and parts
Before proceeding with the installation of kitchen plumbing with your own hands, you need to prepare and purchase everything you need. You will need:
- FUM sealing tape - it is better not to take linen tow, as it swells out of water, and even then it will be difficult to remove liners;
- Spanner 10 or 11;
- The tubular key is needed to tighten a hard-to-reach nut during installation of the mixer to the sink;

- Mounting kit - it must have rubber sealing rings, i.e. half washers (2 pcs.), One horseshoe metal half washer, a stud (1 or 2) and a nut. This kit is attached to the mixer, but if you wish, you can buy a sealing ring thicker and stronger, as manufacturers do not always include high-quality gaskets in the kit;

- Passatizhi, small key, screwdriver - sometimes they are also needed;
- Also useful rag, basin and flashlight, so that you can see everything;
- And finally, the main thing - 2 plumbing pipes - are attached to the kit, but it is better to buy others, as the factory ones are often short and made of silumin;
Perhaps, on eyeliners should focus. Keep in mind that:

- Liners are needed so long that they do not break, but bend in the form of a semicircle, that is, they should not be too long or, conversely, short in tension. The most common length is 86 cm;
- If the factory supply is too short, then it is better not to try to increase it, but to buy a new one;
- In addition, do not buy silumin hoses, especially if you bought a silumin mixer - at least the liner must be reliable;
- Installation of flexible connections is easier than connecting rigid ones, but they are considered less reliable, so it’s better to install them together with taps with a tap;
- In the set of liner must be pads;
- Replacing the old faucet in the kitchen often involves replacing old liners, because they also wear out.
Step 1. Dismantling the old mixer and preparing for installation
Before you install the faucet in the kitchen, you need to turn off the water (you don’t need to shut off the riser) and lay a rag on the bottom of the sink, just in case, so that small parts do not fall into it, and large parts do not damage it.
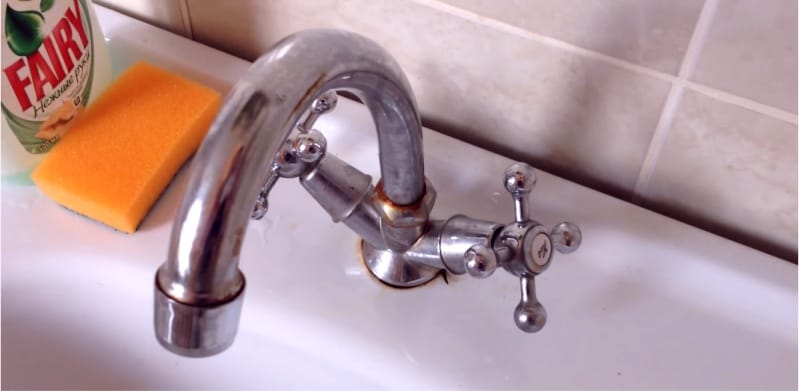
Of course, replacing the faucet in the kitchen requires dismantling the old faucet. For this you need:
- First, disconnect the old hoses from the pipes of cold and hot water with your hands or open-end wrench. Do not forget to put a basin under them and drain the rest of the water, after which the pipe threads must be wiped clean.
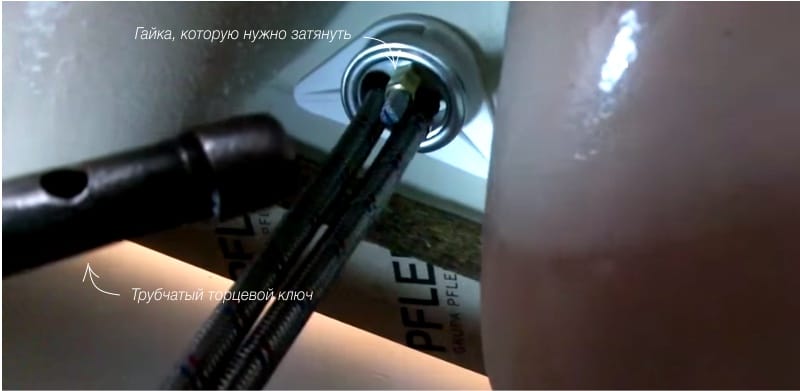
- Then, using a tubular wrench, unscrew the clamping nut on the stud (or two studs), which fastens the mixer to the sink (directly below it). When you unscrew this nut, the metal half-washer will come off.
- Now you need to pull the mixer along with the hoses from the hole of the sink. Well, that's all, you can proceed to the next step.
Step 2. Assembling the mixer and connections
Installing the mixer in the kitchen begins with its assembly, that is, with the connection to flexible hoses or rigid connections.

- If you have a dvuhventelny mixer as in the photo on the right, then, most likely, you first need to collect it. To do this, insert the spout (faucet) into the body to the restrictive ring and manually, without too much tightening, fasten them to each other.
Now take the FUM tape and slightly wrap it with the end of the liner.
- Wrapping the ribbon with the tip is not necessary, as the hose already has a gasket.
Then we insert the end of the first eyeliner into the corresponding hole in the mixer as in the photo below and fasten it first with our own hands, and then we tighten a little with an open-end wrench for 10. In the same way, fasten the second hose.
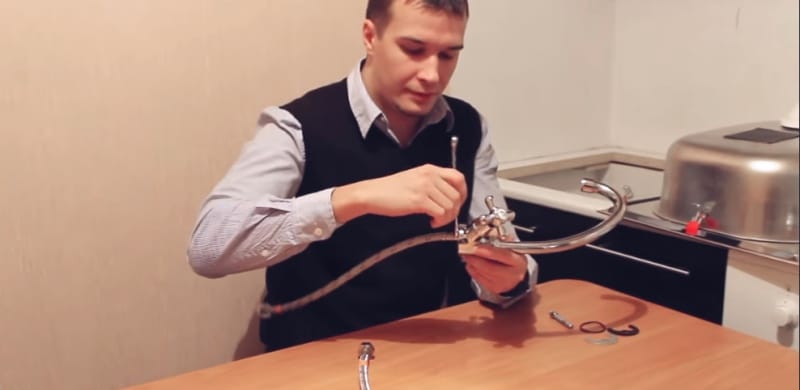
- It is very important not to tighten too much, otherwise the lining will be damaged! But not to endure too bad.
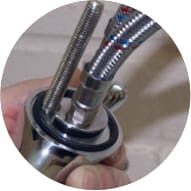
Finally, fasten the pin-pin (or 2 pins) with the thread up into the hole that is supposed to be for him. Our assembled mixer is almost ready to install. It remains to push both leads into the sealing ring, bring it to the base of the mixer body and fix it there as shown in the photo on the right.
Step 3. Install the mixer on the sink
And now it's time to put the mixer on the sink.
- By the way, it is more convenient to install the mixer on the still non-built-in sink, since it’s not very convenient to work climbing under the countertop (in this case, the installation is done this way).
We push the ends of the hoses into the sink bore, put the mixer in and ask someone to hold it so that you feel comfortable.
Then from the bottom under the table top or from the bottom of the removed car wash, we put on the second rubber presser washer on the liner. The result will be that the two rubber seals will protect the body and the top and bottom of the shell. Now we also attach the horseshoe-shaped metal washer (photo below).
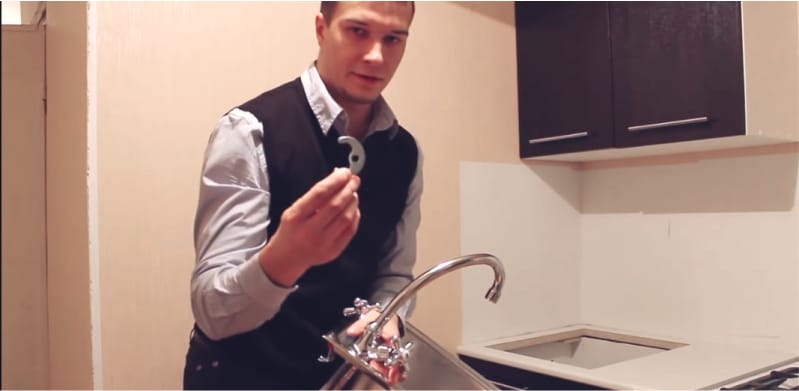
From below we put on the hairpin-nut and tighten it with the help of:
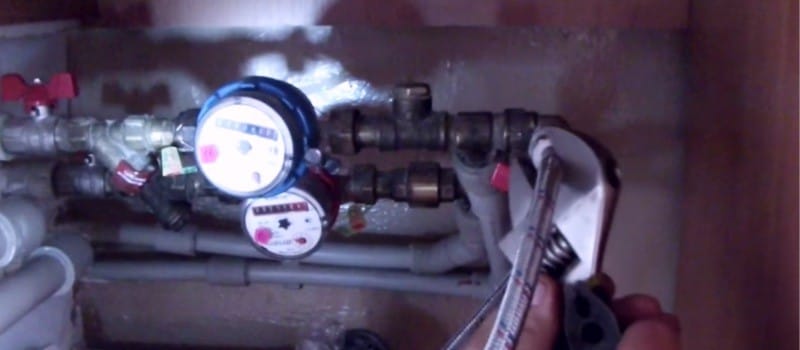
- Tubular key, in case you need to replace the mixer on an already installed sink. The photo below shows the mount below.
- With a wrench, in case you install the mixer on a new or removed sink. Of course, after this you need to install the sink itself on the countertop and only then proceed to connect the mixer to the pipes of hot and cold water.
- Tighten the nut firmly, but not too tight!
Step 4. Connecting to pipes
Finally, we connect the hoses to the water outlet pipes, considering that:
- Hot water outlet - from the right pipe;
- Conclusion cold - from the left pipe.
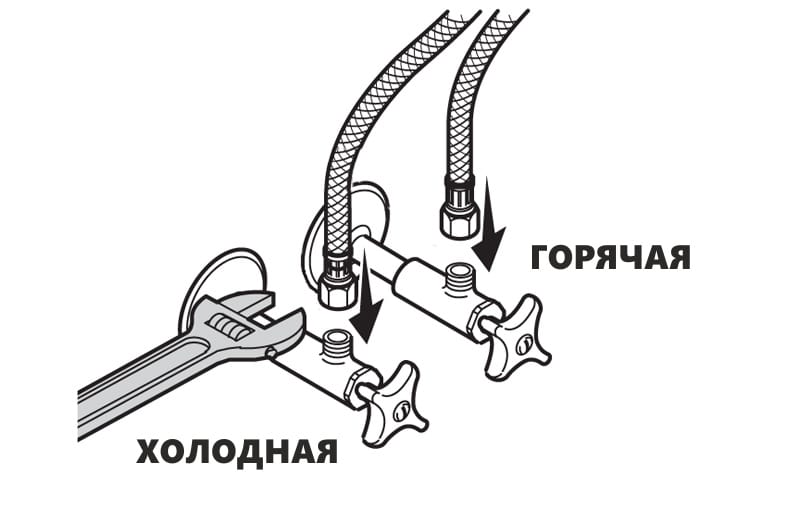
- Sometimes cold water is discharged through a pipe that is on top, and hot water through a pipe from below, as in the photo below.
- It is advisable to install pipes with taps on the pipes if you use flexible hoses.
Step 5. Check the work
Well, that's all, it remains to check the correctness of the connection, letting first hot and then cold water. If there are no leaks, and the wiring is curved smoothly in the shape of the letter U, then you have done it. If leaks have occurred, then, most likely, this means that the seal has been damaged somewhere - you have to remove and replace it.

 (Rate the material! Already voted:42 average rating: 4,33 from 5)
And how to change the mixer in the kitchen, if a stainless steel sink is thin or the landing hole is damaged? Then it is possible and necessary to make auxiliary details with our own hands, as the authors of the following videos did.
- Choosing a kitchen faucet
- Do-it-yourself kitchen faucet repair
- Installing a siphon in the kitchen in 4 steps
- Choosing a kitchen sink in 5 easy steps.
- Installing the kitchen sink - instructions, tips, video
- Corner kitchen sink - selection and installation
And you do not have the installation rules for faucets with one handle? If there is - I will be very grateful.
It is not clear what exactly is sealed with a fum-tape. Written eyeliner. If it meant flexible, it is not clear why, because there are rubber sealing rings. Please explain.