If you want to ensure the most clean air in the kitchen without vapors, grease and odors, then you will need a quality hood. This device should be chosen for design and performance, but the installation of a kitchen hood is no less important. By the way, do it yourself is not particularly difficult.
Features of the installation of kitchen hoods
Installation of the hood in the kitchen is made according to different principles depending on the type of construction:
- If the equipment can work in the modes of recirculation and removal, the installation implies the conclusion of the duct to the external ventilation system. Here you should correctly calculate the diameter of the duct (it should be in the range of 120-150 mm). The duct is not narrowed, if possible it does not bend or lengthen - this will help minimize power loss. A square or round duct is installed - but preferably smooth, rather than corrugated, otherwise the sound effect from the exhaust hood working in the kitchen will increase significantly.


- There are hoods that work only in recirculation mode. Their main element is a carbon filter. Such a device is not connected to the ventilation shaft. The air entering the structure, when passing through a carbon filter, is cleaned, after which it is again “ejected” into the room. The carbon filter is purchased separately. Connecting a device of this type correctly is easy, although its performance will be lower than that of a universal design.

Ways to correctly install the hood will vary, depending on whether built-in appliances or mounted.

Tools and materials needed for work
Installing a kitchen hood with your own hands will require special accessories and tools. Some of them will be bundled with the purchased equipment, and some (such as mounting or carbon filter) will have to be bought separately.
To install will require:
- Corrugation, which allows exhaust air with pollution directly into the ventilation channel;
- Grille for the ventilation shaft - so that the place where the installation of corrugations was made, looked aesthetically pleasing;
- Fastening (clamps) corrugations - 2 clamps.

Also installing the hood in the kitchen will require the following tools:
- Screwdriver or drill, hammer drill;
- Screwdriver;
- Knife;
- Roulette and pencil for marking;
- Level;
- Hacksaw for corrugations.
We carry out installation of an extract - stages of work
Before you begin installation, you need to calculate at what height to hang the hood. Actually the installation process with your own hands involves several steps:
- Fasten the hood to the wall.
- Connect the device to the duct system (or place a carbon filter inside).
- Make electrical connection.
The main nuances of mounting the hood to the wall are two:
- The device should be mounted with maximum reliability;
- Correctly determine the distance from the plate to the hood
What should be the installation height of the kitchen hood? It depends on its type, and the type of cooking surface:
- If the model is installed for an electric cooker, then the distance to hang the device is at least 70 cm;
- For kitchen hood with gas stove minimum height is 80 cm.
Some craftsmen, who prefer to do the installation by hand, say that the optimal distance for the gas and for the electric stove is exactly 700 mm. Indeed, such a height is considered sufficient for the exhaust hood in the kitchen (even the recirculation hood, which comes with a carbon filter), to effectively clean the air in the working area.
However, it should be understood that more heated air will rise from the gas stove - there may not be enough power of the product, damage to the filter or other structural elements. It turns out that by maintaining the minimum allowable distance, you risk the device's operability, and if you decide to mount the device at an increased height from the plate, you can significantly lose power.
Further work on installing the hood in the kitchen with your own hands is as follows:
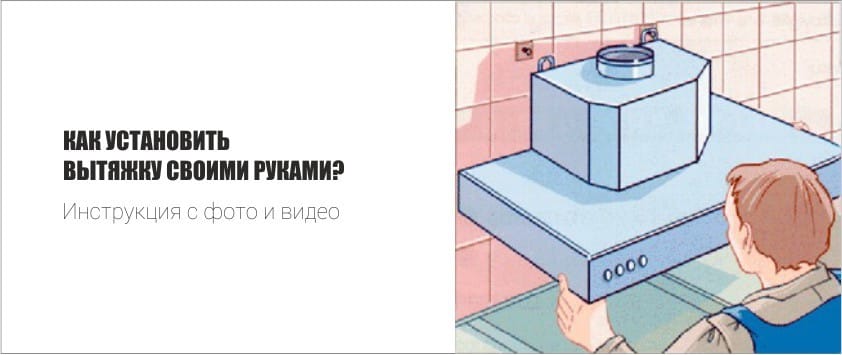
- Kitchen hood must be hung to the wall. It is very important to correctly calculate the height above the slab and perform the marking. The device must be mounted on a special axis corresponding to the center of the hob. It is better if the selected hood has eccentric fasteners - it allows you to adjust the nuances of the location of the equipment above the stove within 5 mm.
- You need to install the hood and connect it to the duct system. The position of the device should be calculated so that the length of the boxes was minimal. Installation of the duct is carried out to the ventilation duct, designed to remove air from the room. Install the air duct in the ventilation duct using a special sleeve. The resulting compound is compressed with clamps and lubricated with silicone for tightness.
- Solve the question of how to install the hood in the kitchen, it is impossible without electrical connections. The power of the device, as a rule, is small - this means that a special calculation of the wire cross section or the installation of a separate automatic circuit breaker is not needed. It is advisable to provide a wire in the kitchen immediately and hide it in the wall. If this was not done, then you will have to hang the socket outside and connect the wire, hiding it in the outer ventilation channel.
Features of the installation of built-in hood
Installing a built-in hood with your own hands is quite possible, although it has its own characteristics. Here you also need to correctly calculate the height above the slab, but the main nuance lies in how the device is mounted.
The built-in model in the kitchen does not need to be hung against the wall - it is fixed in the kitchen furniture, in the cabinet with a specially made hidden cavity. By the way, in the same way you can connect and recirculation hoods - their power will be quite enough for small kitchen facilities.
After the equipment is fully connected, its performance is checked. The final stage is the installation of a protective cover that hides the air ducts. After that, you can enjoy the fresh air.


 (Rate the material! Already voted:35 average rating: 3,77 from 5)
- Hood in the kitchen - what you need to pay attention to when buying
- What size should be the hood for the kitchen?
- We repair kitchen hood by yourself
- Himself a master - install the oven
- Built-in refrigerator - the nuances of selection and installation
- How to embed a regular refrigerator in the headset
The wife is a big fan of hotpoints, the hob and oven have already been installed, now our old hood has also been replaced with this one. Tolko nuance - did not know how to install. Thank you for the article, you have helped. Practical advice.
great article, thanks! now everything is simple and understandable, last week they took an inclined Indesit, and did not know which side to approach, how to install. These hoods praise very much, they say powerful and quiet! Here I install and check!