
This article is dedicated to all those who are interested in the question: can an ordinary refrigerator be built in? We answer immediately - you can, even if the door is convex, and you are not a professional furniture maker.
Should I embed a regular refrigerator in the headset?
There may be several reasons for refusing to buy embedded equipment in favor of self-embedding a conventional model:
- Embedded models are always more expensive;
- Other things being equal, the built-in device is inferior in volume and capacity;
- Just in the house already have a great old refrigerator.
On the other hand, it is much more reliable, simpler to build a built-in refrigerator from a technical point of view, and the appearance of the whole structure, starting from fittings and ending with facades, in this case turns out to be ideal. Built-in refrigerator does not overheat, less noise and vibrates.
But if you are still faithful to the idea of building a refrigerator in the kitchen, we suggest considering two ways how to do it:
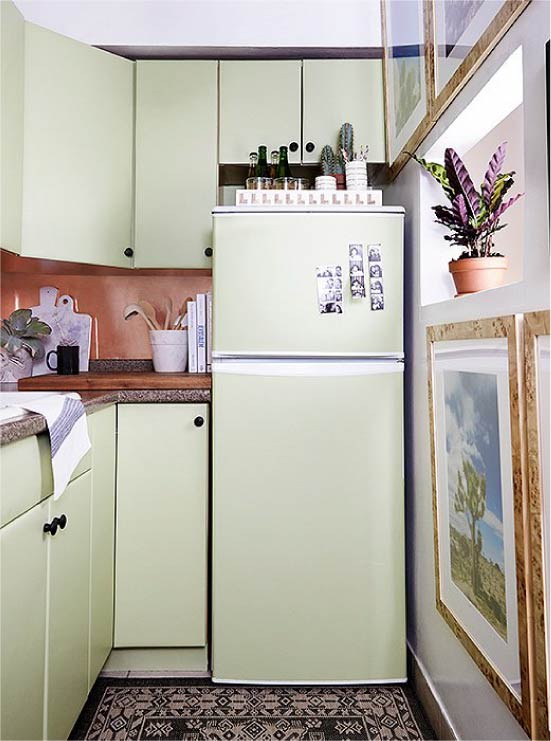
- Method 1. Install the refrigerator in the box (cabinet-case), designed by its size, and hang the doors on the front of the cabinet.
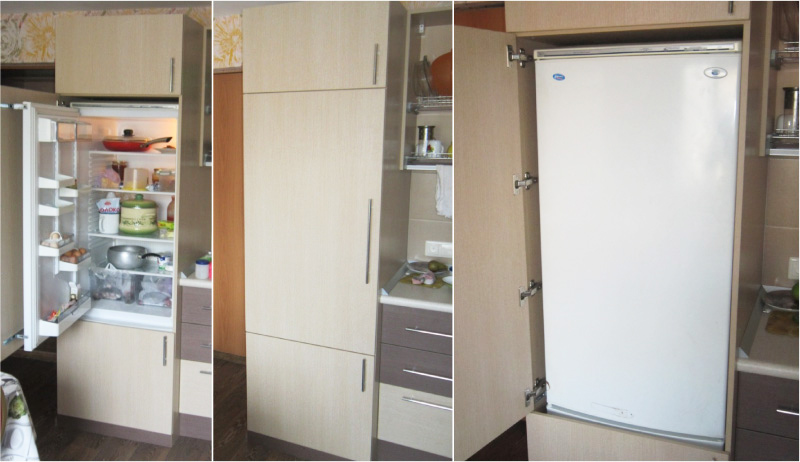
Regular refrigerator, built-in cabinet
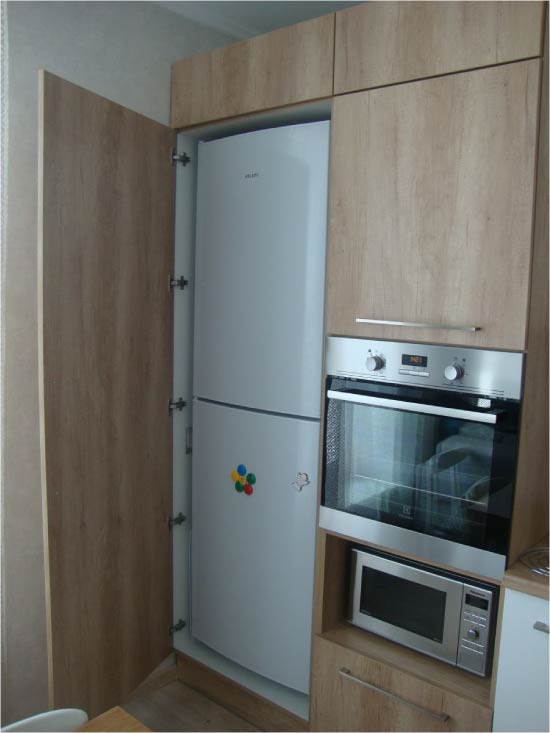
Option to install a conventional refrigerator without connecting facades with doors
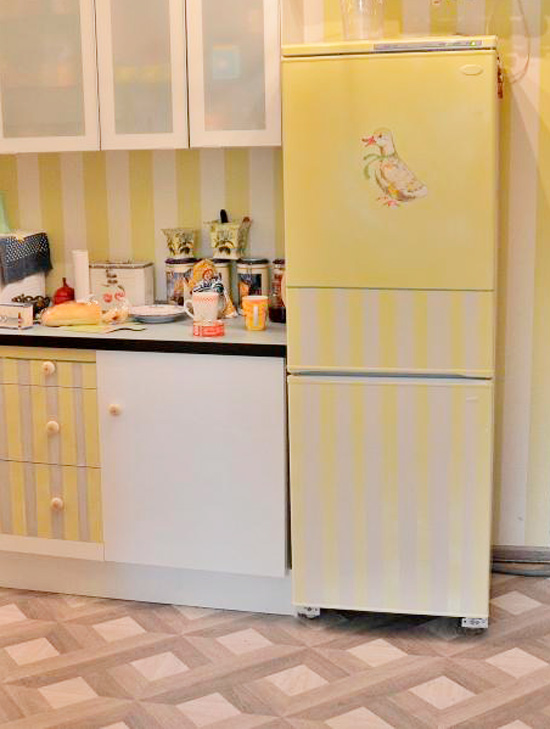
- Method 2 Disguise the refrigerator using staining or self-adhesive material (photo ideas are presented at the end of the article).
See also: 10 criteria for choosing a refrigerator that you need to know before you buy
Method 1. How to embed an ordinary refrigerator in the closet
To embed an inline cooler in a finished case, you will need:
- Ball guides of full extension, half the width of the cabinet's front (2 pcs.);
- Metal corners (4 pcs.);
- Fastening elements (screws, bolts with nuts, screws);
- Drill and high-quality metal drills of the desired diameter;
- Pencil;
- Ruler;
- Level.
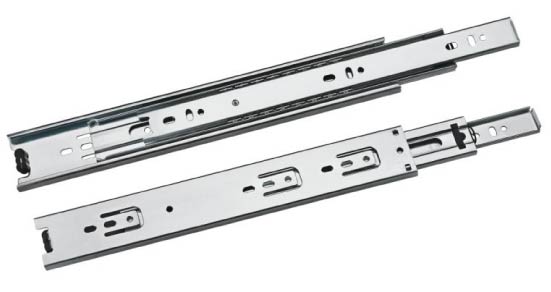
It looks like a ball guide full extension
For the manufacture of the frame and facades of the case with your own hands (or with the hands of a professional furniture maker) you will need:
- MDF or chipboard 16 mm thick (selected taking into account the design of the kitchen, ie, use the same facades);
- Melamine edge in MDF / chipboard color 2 mm thick;
- Furniture hinges are preferably with closers and an opening angle of at least 110 degrees so that you can easily reach the internal drawers and shelves of the refrigerator (3-4 hinges for the big door and 2-3 for the freezer door);
- Furniture handles (2 pcs.);
- Self-tapping screws;
- Confirmats for furniture;
- Minifixes;
- Corners.
Step 1. We make measurements and design a box for installation
To integrate an ordinary refrigerator into a kitchen set, you first need to create a cabinet for it. There are two options for the development of events: either you are an experienced craftsman and independently make a box, or you are an ordinary person and order the production of a pencil case to professionals in individual sizes.In the latter case, all you need to do is directly integrate the refrigerator into a niche - anyone can do it by following our instructions.
- Ideally, the box for the installation of the refrigerator should be envisaged at the design stage of the kitchen unit - so you will not have to bother with searching for materials suitable for the existing furniture.
Whatever path you choose, you first need to determine the place where the device will stand and make accurate measurements of the future cabinet-case.
- The main principle of determining the dimensions of the frame: around the refrigerator must constantly circulate air to cool its surface. This means that your closet will be somewhat larger than the refrigerator.
The action algorithm is as follows:
- We measure the width, height and depth of the refrigerator, as well as the distance from the floor to the middle of the gap between its upper and lower doors.
- Determine the size of the parts of the case, taking into account technological stocks:
- External cabinet width. In it you need to lay stock to install the loops of at least 28 mm. Thus, with a refrigerator width of 600 mm and a thickness of two sidewalls of the box of 16 mm, the outer width of the cabinet will be at least 660 mm.
- The height of the case. It is chosen at your discretion, but ideally the pencil case should be on the same level with the headset hinged cabinets. That is, if the kitchen has a height of 216 cm, then the case, and therefore the frame posts, must have a height of 216 cm. In such a high case, a shelf will fit over the refrigerator - it will be needed both for ventilation and for storage of things.
Important note: in the height of the refrigerator niche it is necessary to create a gap of at least 5 cm for ventilation.
- Racks. In the size of the side-racks we lay a supply of at least 50 mm, which means that if the depth of the refrigerator is 600 mm, then the legs of the box should have a width of 650 mm.
- The panel above the refrigerator (shelf). Its width is calculated by the formula: the external width of the canister minus the sum of the thicknesses of the two racks (for example, 660-16-16 = 628 mm). But the shelf length should be less than the width of the rack by about 100 mm - then the panel will not reach the wall and close the back of the refrigerator, which is necessary for ventilation. If this is not done, the device will simply overheat. Thus, we consider: 650-100 = 550 mm.
- Top panel box (cover). If you plan to make a niche for storage over the refrigerator, then you can make a deaf top cover (for example, 628 × 650 mm), but you will need to build a ventilation grid in its back. The second option: just make the top cover, not reaching the wall by 10 cm. Then we consider: 650-100 = 550 mm.
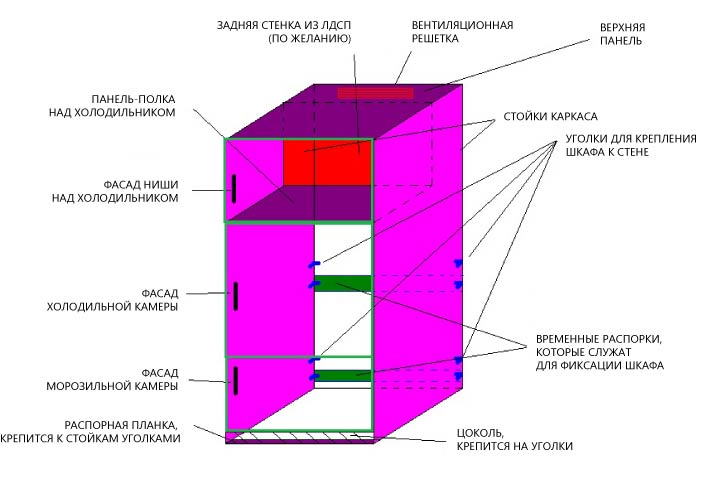
- Rear wall of the shelf. Its width = Internal width of the box (for example, 628 mm). The height of the wall is calculated at your discretion (depends on what height the niche itself will be), but taking into account the two thicknesses of the top cover and the panel above the refrigerator.
- Rear strut. It should be 150-160 mm wide and the length equal to the inner width of the frame.
- Lower strut (2 pcs.). Width - 50 mm and length corresponding to the internal width of the frame.
- The base. It should be slightly less than the distance from the floor to the edge of the lower door of the refrigerator so that the facade opens comfortably. For example, with a distance from the floor to the edge of the door of 80 mm, the height of the base may be about 68 mm. The length of the cap is equal to the width of the case.
- Facades (3 pieces (for the lower and upper doors of the refrigerator, as well as for the shelf above the x-com) or 2 pieces (if you build a case without a shelf)). The height and width of the facades should be calculated taking into account the thickness of the edges (2 mm on each side of the part) and gaps between the facades of 5 mm (they are needed in case of subsidence of the facades over time). So, for example, for a 60-centimeter refrigerator, 656 mm wide facades (without edges) will be required.
It is necessary to pay attention to three main points so that the future refrigerator will serve as long as possible:
- For complete cooling, the back of the cabinet should be absent; however, to fasten the structure, it is desirable to make several spacers (their dimensions, number and attachment point are indicated above).
- There should not be a hob or oven near the cabinet with a refrigerator.
Here is a drawing.
Step 2. We give the materials for cutting and chroming
Now that you know the necessary dimensions of the parts of the case, you can order its manufacture and assembly from a professional craftsman or, if possible, from the company that manufactured or will manufacture your kitchen.
- It is possible that finding a furniture maker who is ready to take on such an irregular task will not be possible the first time. Therefore, be prepared to acquaint the potential performer with your drawing of the pencil case, calculations and video.
If you make the box yourself, then your next step is to give your sawn timber to cutting and edge-cutting to a specialized company.
Step 3. Putting the frame
At this stage, the finished parts of the case must be assembled like a designer:
- The top panel and the panel above the fridge itself are connected to the stands with mini-fi xes.
- We fasten the shelf and back wall with the confirmatories (below). Also fasten the back wall to the racks with the help of the corners.
- On the back of the frame, approximately in the middle of the niche of the refrigerator, we also fasten a strut with a width of 10–15 cm and a length equal to the internal width of the cabinet with the help of corners. Then we raise the frame vertically.
- Fasten another smaller strut to the posts at the bottom of the frame (on the corners).
- We put the frame in the place where it should stand, then aligning it to the level of the adjacent hinged closets and pedestals. For reliability and rigidity of the structure, we additionally fasten the stands to the wall at the corners (approximately at the level of the middle of the canister, it is also possible at the bottom).
- We put another strut in the front bottom of the frame (behind the base) with the help of the corners: one side of the corner is attached to the rack, and the other to the floor.
- We install loops for facades on one of the racks. For the facade of the refrigerating chamber 4 loops can be installed, and for the facade of the freezer there will be enough a pair of loops.
- In one of the racks make a hole for the wire and connect the refrigerator to the outlet. Do not forget that the socket must be at least 30 cm from the floor and not less than 10 cm from the side of the refrigerator. This arrangement is considered safe (and the water will not reach, and the wire does not heat up).
Step 4: Embed the refrigerator in the box
Hooray, it is time to remove the temporary struts, unscrew the handles of the refrigerator and push it into the pencil case. Make sure that the closed facades do not run into the doors of the x-ka. Next, you need at the expense of the refrigerator itself to stiffen the racks, especially the one that does not support anything and holds the facades (this rack will bend inward, and the doors will be angled). For this we will use the corners.
- One side of the corner must be screwed to the rack, and the other in place of the “native” fastener of the refrigerator doors. To do this, unscrew one or two factory bolts, put a corner and re-tighten the bolts, shifting the corner so that the facades are leveled.
The corner can also be fixed above the factory mount as shown in the photo below.
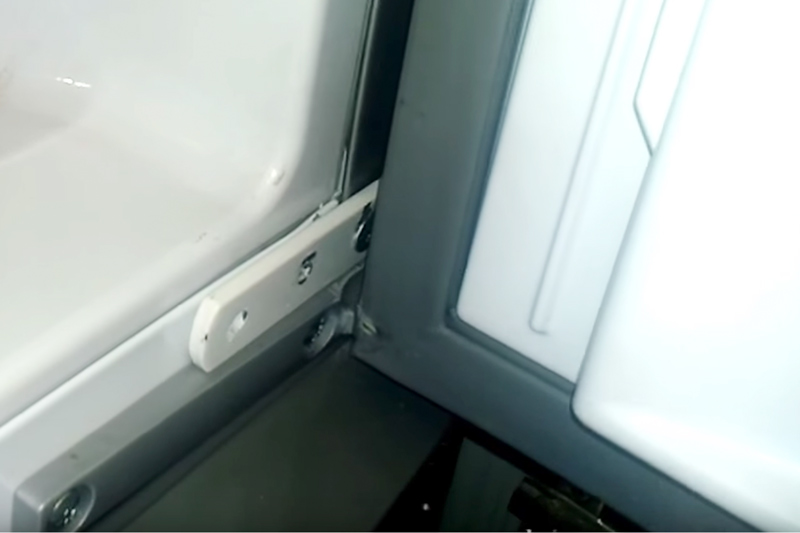
Alternative way to install the corner (above the "native" mount)
- Next, fasten the second corner to the other rack, after making the exact markup. Do not be afraid to drill the body of the refrigerator - it does not affect its work.
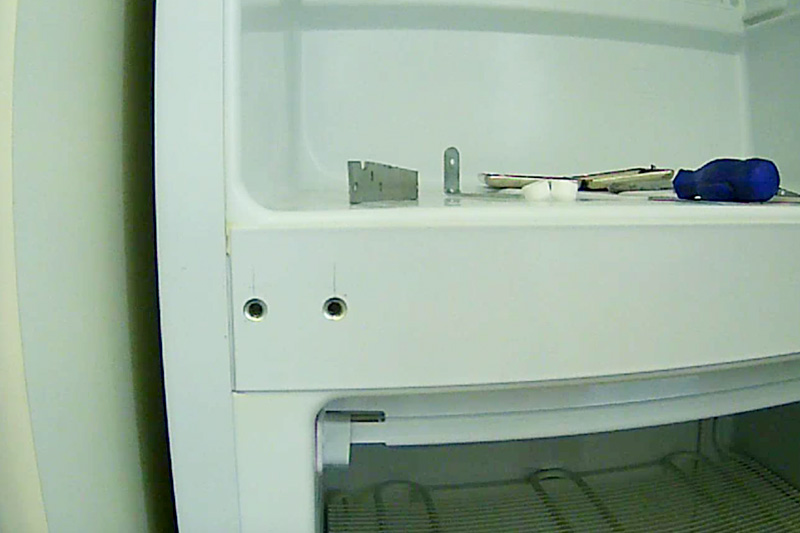
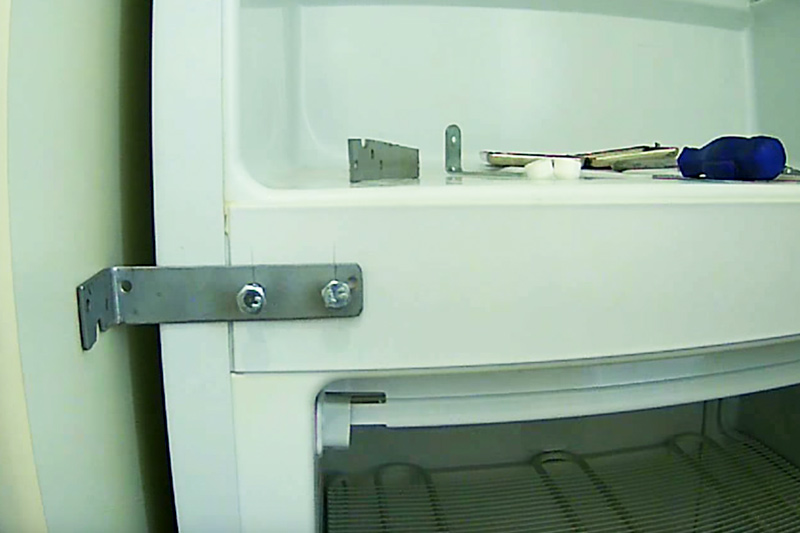
In these photos you can see how the corners are already set.
Step 5. Fasten the facades on the refrigerator door
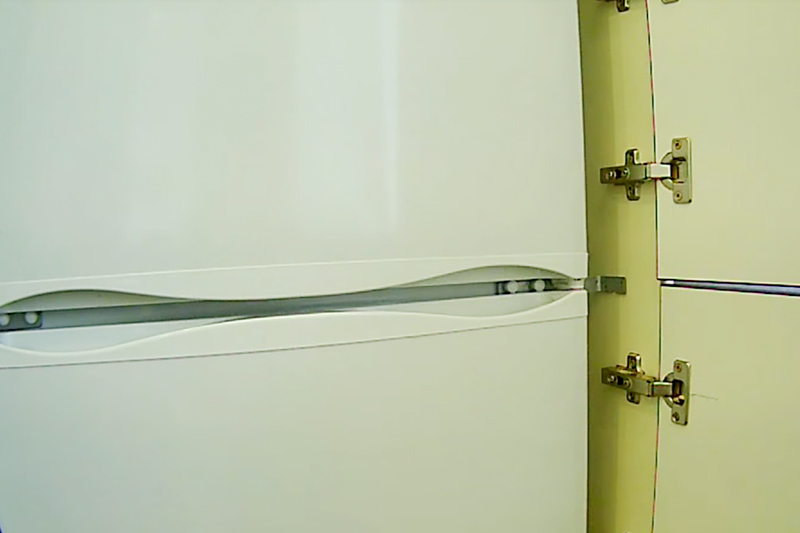
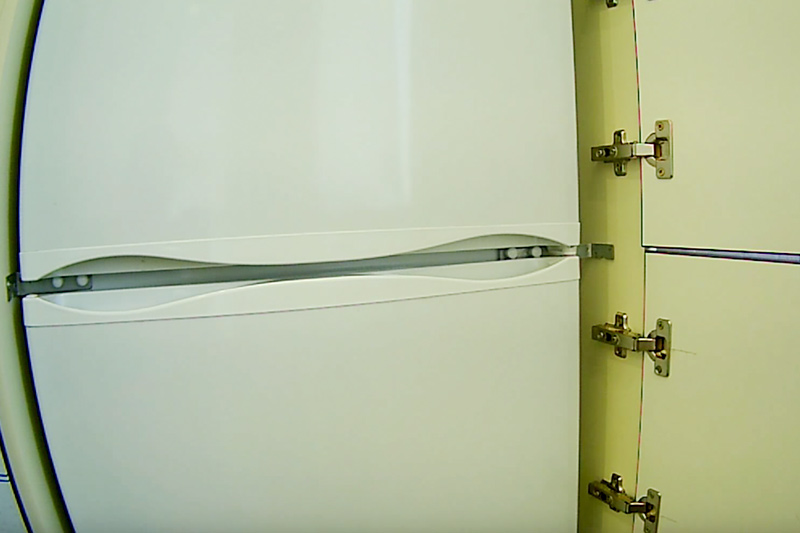
The time has come for the most interesting thing - fixing the facades on the doors of the refrigerator so that they open at the same time. A pair of ball guides will help us to achieve this (regardless of whether the door is bulging or not!).
- First, we determine the installation location of the guide - it should be installed at about the same level as the handle. It turns out that on the large facade the guide will be installed at the bottom, and on the small at the top.
- Stepping away from the edge of the facade about 3 cm, draw a straight line with a pencil (using a building level) with a length equal to the length of the guide.
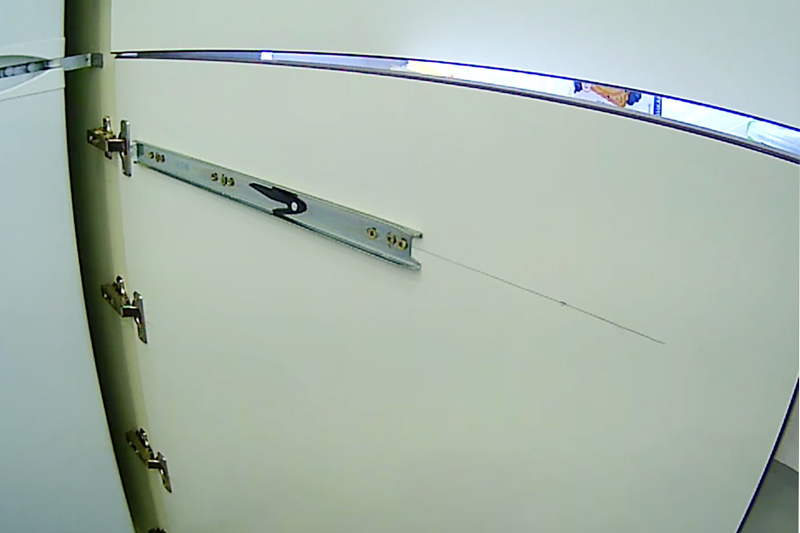
- Install the first part of the guide (see photo above) by screwing the screws into the mounting holes, then insert the second part of the guide into it.
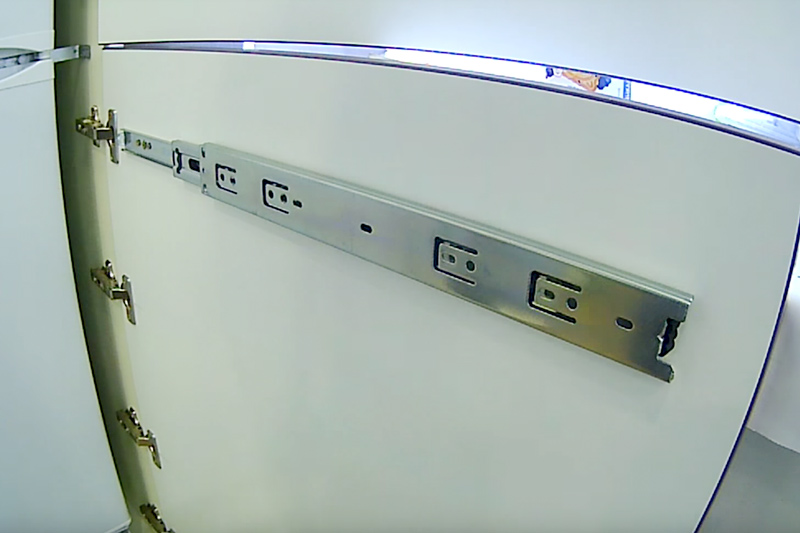
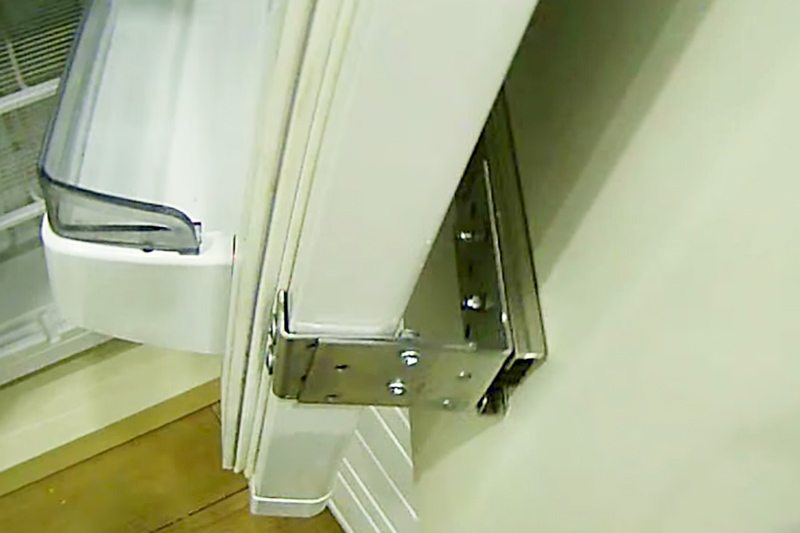
- Install one side of the bracket to the outer edge of the slide with bolts and nuts.
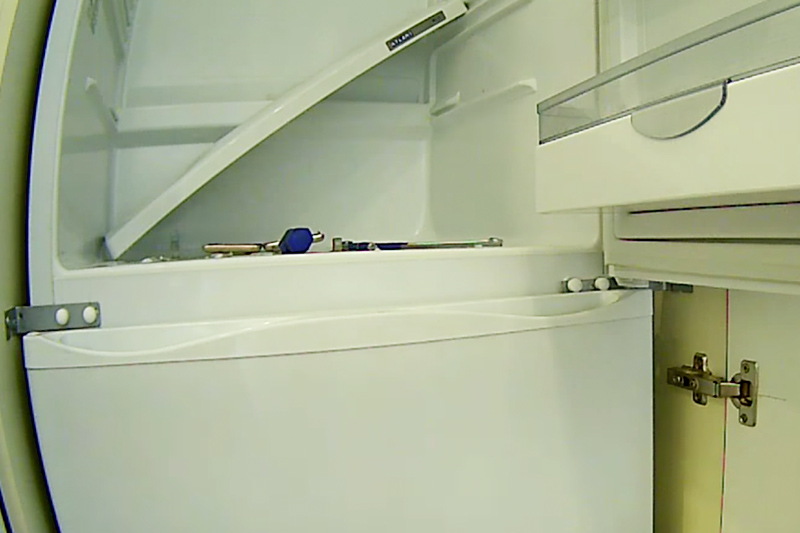
- Screw the second end of the corner on the end of the refrigerator door with a screw with a press washer, after making the marking.If necessary, you can use two corners (for the guide and the door x-ka), and then connect them with a screw as shown in the photo below. If the facade opens a little incorrectly, then its position needs to be adjusted by shifting the corner. That's all, it remains to repeat the same steps with the second door.
Method 2. Imitation of the built-in refrigerator using decor
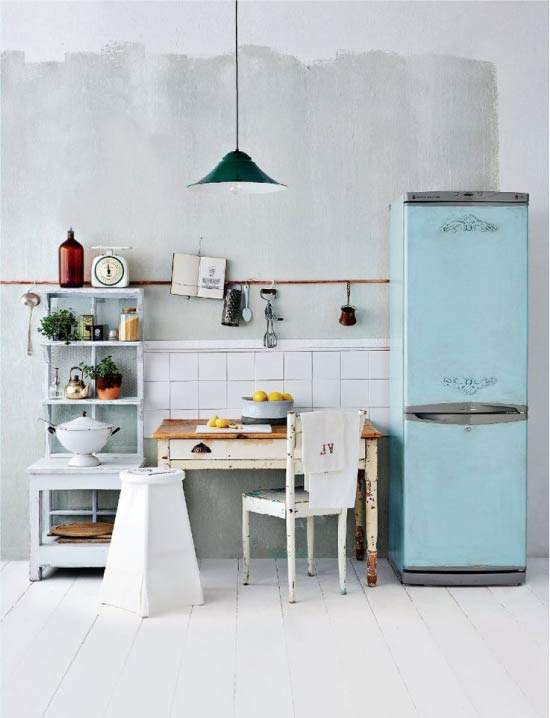
The first method was for those who are not afraid of manual labor and mathematical calculations. But harmoniously fit the fridge into the interior and create the illusion of a built-in fridge can also be decorating ways:
- Coloring enamel paint to match the headset or wall. Suitable car paint in cans or enamel in jars. Before painting the surface of the refrigerator must be wiped with white spirit and coated with a primer.
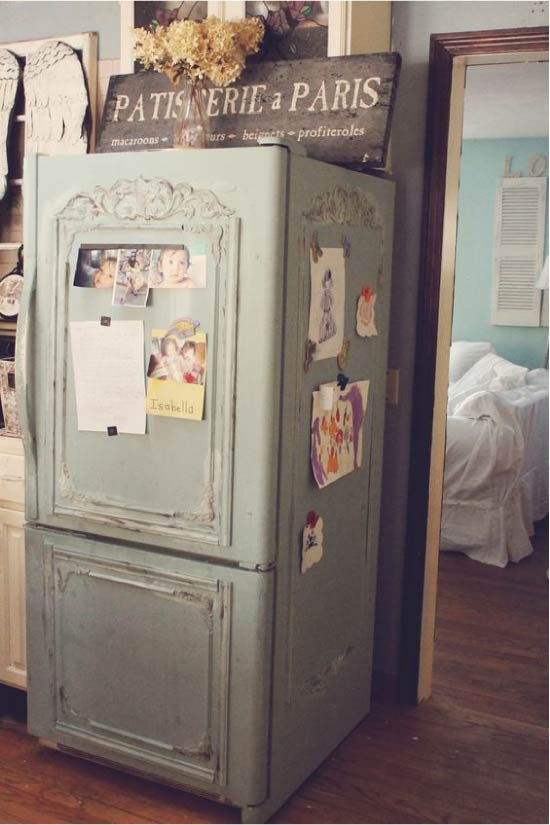
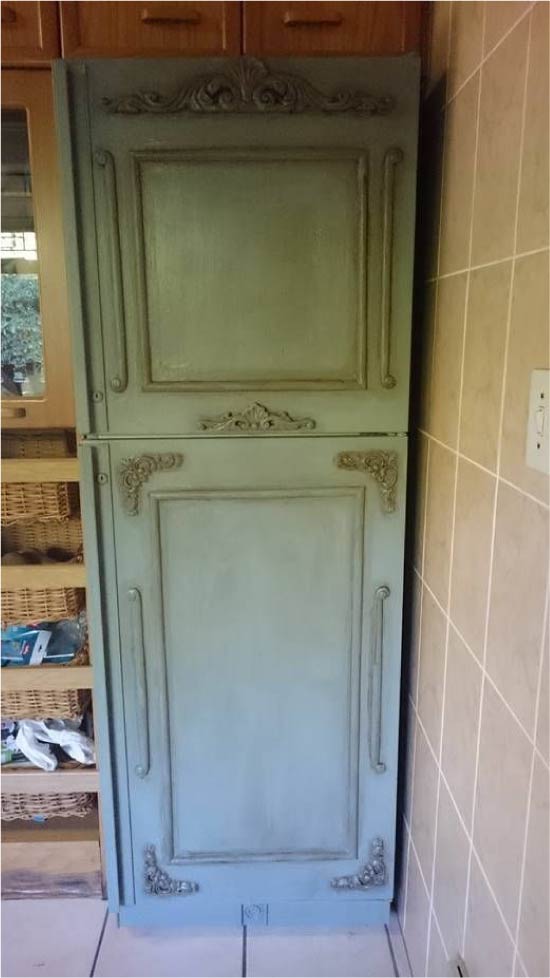
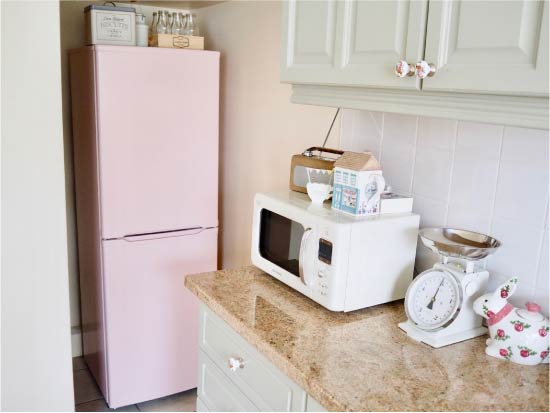
- Painted with acrylic paint using a stencil. Before painting, the surface of the x-ka must be wiped with white spirit and coated with a primer. After this, the ornament should be covered with a transparent varnish.
- Sticking vinyl PVC film.
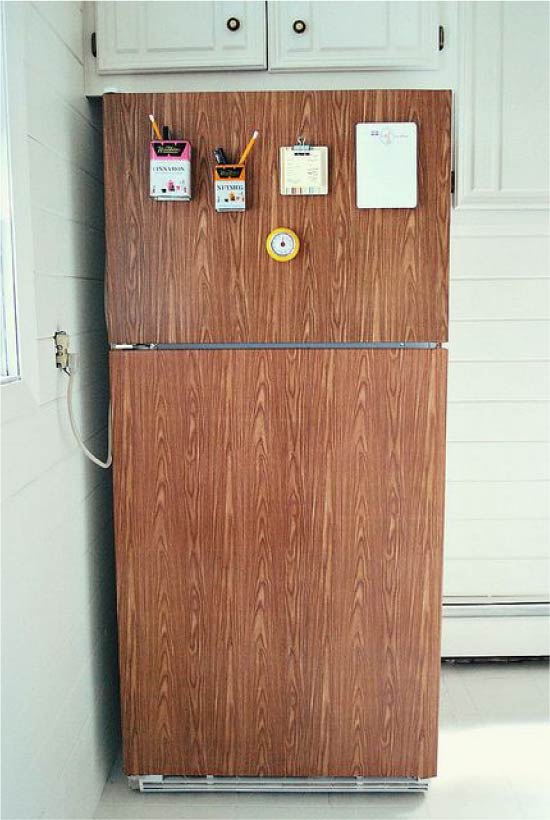
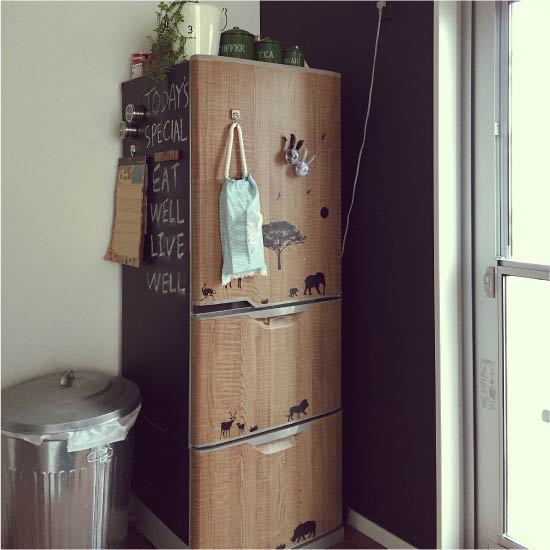
- Mounting magnetic magnetic boards. It is not suitable for every interior, but such a device décor will also bring practical benefits - you can leave notes and draw on it.

You can find more photo ideas for reworking refrigerators, as well as step-by-step master classes on their implementation in the article: 8 ways to decorate the refrigerator.
 (Rate the material! Already voted:8 average rating: 5,00 from 5)
- What should be the temperature in the refrigerator?
- 4 stages of choosing a built-in refrigerator and the nuances of its installation
- Making fridge magnets (and not only) from improvised, waste and natural materials
- How to properly and quickly defrost the refrigerator in 8 steps
- How to wash the refrigerator in 7 steps and eliminate odors with 8 home remedies
- How to get rid of mold in the refrigerator
- Juicer Step-by-Step Guide
- All the nuances of choosing a gas hob
And why build it ??? A refrigerator is just as normal in the kitchen as an oven, hob or hob. We do not hide the oven behind the facade? Why do these dances with tambourines, the invention of a bicycle with wings to ride backwards? Holes screws twist in the fridge? I, as a furniture designer, and kitchens in particular, am in a culture shock. Why overpay for the facade, for the case, if you can leave a normal, normal refrigerator?
And no one is embarrassed that the facade will be 650 mm, and this already violates the ergonomics of movement in the kitchen. And it doesn’t bother anyone that the depth on the worktop is 600, and such a fridge protrudes 90 mm from the façade, which violates the aesthetics of the kitchen .. I have one question, why ???